
Best Tools to Clean a Clogged Leaf Blower Carburetor to Buy in May 2026
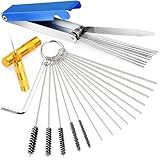
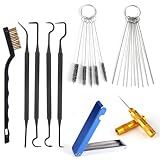
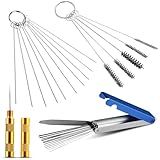
Valchoose Premium Torch Tip Cleaner, Stainless Steel Carburetor Cleaning Kit Heavy Duty, Density Nylon for Motorcycle Jet Lawnmower Small Engine Welding Stove Airbrush Spray Gun
-
EFFORTLESSLY CLEAN CARBURETORS WITH OUR HANDY, TIME-SAVING KIT!
-
COMPACT DESIGN FITS SMALL ENGINES; PERFECT FOR TIGHT SPACES.
-
VERSATILE TOOLS FOR VARIOUS APPLICATIONS; IDEAL FOR ANY MOTOR NEEDS.


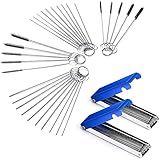
Motfittings Carburetor Cleaning Kit, 13 Wires + 10 Needles + 5 Brushes + 1 Pick, Premium Torch Tip Cleaner, Carbons Dirt Jet Remove, Suitable for Auto, Motorcycles, ATV, Welder, Lawn Equipment
-
TIME-SAVING SOLUTION: CLEAN SMALL SPACES EFFORTLESSLY WITH VERSATILE TOOLS.
-
DURABLE & RUST-PROOF: HIGH-QUALITY STAINLESS STEEL ENSURES LASTING PERFORMANCE.
-
PORTABLE & CONVENIENT: EASY STORAGE AND USE WITH A HANDY KEY RING CASE.
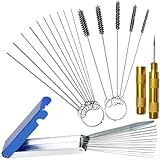
Tkiemoe Carburetor Cleaning Kit, 13 Stainless Steel Wires, 10 Needles, 5 Nylon Brushes, 1 Pick, Torch Tip Cleaner Tool For Motorcycle, Lawnmower, Atv, Chainsaw, Spray Gun, Small Engine
- ALL-IN-ONE KIT: 13 WIRES, 10 NEEDLES, 5 BRUSHES FOR THOROUGH CLEANING!
- PREMIUM RUST-PROOF MATERIALS ENSURE DURABILITY AND SAFE CLEANING.
- COMPACT CASE: ORGANIZED STORAGE FOR EASY TRANSPORT AND ON-THE-GO USE!
Set of 4 Carburetor Carbon Dirt Jet Remove Cleaner 26 Cleaning Wires Set + 20 Cleaning Needles + 10 Nylon Brushes Tool Kit for Motorcycle ATV Moped Welder Carb Chainsaw Spray Guns Torch Tips
-
13 DIAMETERS FOR PRECISION CLEANING: TACKLE ANY CARBURETOR BLOCKAGE!
-
DURABLE NYLON & STAINLESS STEEL: RUST-PROOF TOOLS FOR LONG-LASTING USE!
-
COMPACT CARRYING CASE: EASY STORAGE AND PORTABILITY FOR ON-THE-GO!
lasuroa Carburetor Cleaning Kit, Includes 1 Single Head Brush 23 Needles 5 Nylon Brushes 1 Scraper and 4 Cleaning Hooks for Motorcycle ATV Chainsaw & Welder
- COMPREHENSIVE KIT: INCLUDES 1 CARBURETOR CLEANER AND 19 ESSENTIAL TOOLS.
- DURABLE MATERIALS: MADE FROM STAINLESS STEEL AND NYLON FOR LASTING USE.
- EFFICIENT CLEANING: PRECISION TOOLS RESTORE ENGINE PERFORMANCE; SAVE FUEL!
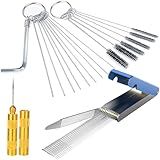
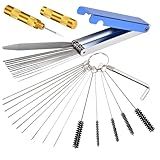
Wroskay Carburetor Cleaning Kit, Premium Gun Jet Cleaner, Stainless Steel 13 Clean Line Set, 9 Cleaning Needles, 6 Nylon Brushes, 1 Pointed Picks,1 Throttle Wrench
-
COMPREHENSIVE KIT FOR THOROUGH CLEANING IN ONE CONVENIENT PACKAGE.
-
DURABLE STAINLESS STEEL AND NYLON TOOLS ENSURE LASTING PERFORMANCE.
-
COMPACT DESIGN FOR EASY STORAGE AND ON-THE-GO CONVENIENCE.
desin Carburetor Carbon Dirt Jet Cleaner Repair Tools Kit Engine, Airbrush, Spray Gun Cleaning
- DURABLE STAINLESS STEEL & NYLON: FLEXIBLE, RUST-RESISTANT DESIGN.
- COMPACT CARRYING CASE: EASY TO STORE & TRANSPORT ALL ESSENTIAL TOOLS.
- VERSATILE SIZES: 13 VARYING DIAMETERS FOR ALL YOUR CLEANING NEEDS.
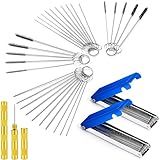
SOKOSEY Carburetor Cleaning Kit, Carbon Dirt Jet Remove Cleaner, 26 Cleaning Wires Set, 20 Cleaning Needles 10Nylon Brushes 2 Sharp Pick, For Motorcycle ATV Moped Welder Carb
-
COMPREHENSIVE KIT: 6-PIECE SET WITH 20 NEEDLES, 10 BRUSHES, AND 26 WIRES.
-
DURABLE MATERIALS: BRASS AND NYLON ENSURE RUST-PROOF, LONG-LASTING PERFORMANCE.
-
VERSATILE CLEANING: DESIGNED FOR PRECISE ACCESS TO CARBURETOR JETS AND PASSAGES.
Coeweule Carburetor Cleaning Kit, Premium Torch Tip Cleaner, Stainless Steel 13 Clean Line Set 10 Needles 5 Nylon Brushes 1 Pointed Picks for Small Engine Lawnmower Welding Stove Airbrush Spray Gun
-
CLEAN HARD-TO-REACH SPACES EFFORTLESSLY WITH 13 VERSATILE TOOLS.
-
PREMIUM STAINLESS STEEL & NYLON ENSURE DURABILITY AND RUST RESISTANCE.
-
SATISFACTION GUARANTEED WITH 24/7 SUPPORT FOR EVERY PURCHASE!
Cleaning a clogged leaf blower carburetor is important for maintaining the performance and efficiency of your equipment. Here's a step-by-step guide on how to clean a clogged leaf blower carburetor:
- Gather the necessary tools: Before starting, collect the tools needed for the job. This usually includes a screwdriver, carburetor cleaner, compressed air, a small brush or toothbrush, and a clean cloth.
- Safety precautions: Ensure that the leaf blower is turned off and the spark plug wire is disconnected to prevent accidental starts during the cleaning process.
- Access the carburetor: Locate the carburetor on your leaf blower. It is usually positioned near the air filter and involves removing its cover or housing to gain access. Use a screwdriver to remove any screws or bolts securing these parts.
- Remove and disassemble the carburetor: Once you have access to the carburetor, carefully remove it from the leaf blower. Disassemble the carburetor, taking note of the various components and their positions to aid in reassembly later.
- Clean the carburetor body: Spray carburetor cleaner generously on the outside and inside of the carburetor body. Use a small brush or toothbrush to remove any dirt, debris, or clogs that may have formed. Pay special attention to the small holes or jets within the carburetor body, ensuring they are clear of any obstruction.
- Clean the float bowl and components: Remove the float bowl, which is usually held in place by a screw or clip. Clean the bowl using carburetor cleaner and a brush to remove any residue or debris that may have accumulated.
- Clean jets and passages: Use compressed air to blow air through the jets and passages of the carburetor to dislodge any remaining debris. Be cautious while doing this, as excessive pressure may damage delicate parts.
- Reassemble the carburetor: Once all the components are cleaned, reassemble the carburetor by attaching the float bowl and other parts in their correct positions. Ensure that gaskets or O-rings are in good condition and properly seated.
- Reinstall the carburetor: Place the carburetor back into its original position within the leaf blower. Secure it by tightening the screws or bolts that were previously removed.
- Test and adjust: After cleaning, reconnect the spark plug wire, turn on the leaf blower, and test the performance. If needed, make adjustments to the carburetor settings, such as the idle speed or air-fuel mixture, to ensure optimal functioning.
Regularly cleaning your leaf blower carburetor will help to maintain its efficiency and extend its lifespan.
How to diagnose a carburetor problem in a leaf blower?
Diagnosing a carburetor problem in a leaf blower can be done by following these steps:
- Check for Fuel Flow: First, ensure that there is an adequate supply of fuel reaching the carburetor. Check the fuel tank for sufficient fuel level and inspect the fuel line for any clogs or leaks.
- Clean or Replace Air Filter: A dirty or clogged air filter can disrupt the airflow and cause carburetor issues. Remove the air filter and clean it thoroughly or replace it if necessary.
- Remove and Inspect Spark Plug: Take out the spark plug and inspect it for any signs of fouling or damage. Clean or replace it if needed.
- Check Choke Operation: Assess the choke by operating it and seeing if it is functioning properly. Make sure it is opening and closing smoothly, without any resistance or sticking.
- Adjust Carburetor Settings: If the previous steps did not address the problem, you may need to adjust the carburetor settings. Refer to the leaf blower's user manual or manufacturer's instructions for adjusting the carburetor idle speed and mixture screws. If you are not familiar with carburetor adjustments, it is advisable to seek professional assistance.
- Clean Carburetor: If none of the above steps resolved the issue, it could be due to a dirty or clogged carburetor. Remove the carburetor from the leaf blower and clean it thoroughly using carburetor cleaner. Pay attention to small passages and jets, ensuring they are clear of any debris or buildup.
- Reassemble and Test: Once the carburetor is cleaned or adjusted, reassemble all the components and reattach the carburetor to the leaf blower. Start the engine and observe if the problem persists. If the issue still remains, it is recommended to consult a qualified technician for further assistance.
What are the common mistakes to avoid while cleaning a leaf blower carburetor?
Here are some common mistakes to avoid while cleaning a leaf blower carburetor:
- Disassembling without proper knowledge: It is important to have a good understanding of carburetors before attempting to clean them. Take pictures or make notes during disassembly to ensure proper reassembly later on.
- Using the wrong cleaning agents: Certain cleaning agents, such as strong solvents or abrasive chemicals, can damage the delicate components of a carburetor. Always use recommended carburetor cleaners or gentle solvents specifically designed for carburetor cleaning.
- Not thoroughly cleaning all components: Carburetors have multiple small components, such as jets, diaphragms, screens, and gaskets. Avoid rushing through the cleaning process and make sure to clean every part thoroughly, removing any dirt, debris, or clogs.
- Improper reassembly: Take your time during reassembly and make sure all components are installed correctly, including properly tightened screws, seals, and gaskets. Incorrect reassembly can lead to air or fuel leaks, poor performance, or damage to the carburetor.
- Over-tightening screws: Over-tightening screws can strip threads or damage the carburetor housing. Be careful when tightening screws, and follow the manufacturer's recommendations for torque specifications.
- Neglecting periodic maintenance: Cleaning the carburetor is an important part of maintenance, but neglecting other maintenance tasks like air filter cleaning or fuel system cleaning can lead to carburetor clogs and inefficiencies. Regular maintenance can prevent carburetor issues in the first place.
- Not addressing the root cause: A dirty carburetor is often a symptom of a larger issue such as a clogged fuel line or filter, stale fuel, or improper fuel mixture. It's important to identify and address the root cause of carburetor issues to prevent recurrence.
Always refer to the manufacturer's instructions or seek professional help if unsure about any aspect of cleaning or maintaining a leaf blower carburetor.
What is the purpose of the throttle plate in a leaf blower carburetor?
The purpose of the throttle plate in a leaf blower carburetor is to regulate the amount of air that enters the engine, thus controlling the engine's speed and power output. By adjusting the position of the throttle plate, the operator can control the flow of air and fuel mixture going into the engine, ultimately dictating the engine's operating RPM and output.
What is the best method to clean a leaf blower carburetor?
Cleaning a leaf blower carburetor is an important maintenance task to ensure the proper functioning of the machine. Here are the steps for cleaning a leaf blower carburetor:
- Gather the necessary tools: You will need a screwdriver or Allen wrench (depending on the type of screws on your carburetor), a cleaning brush, carburetor cleaner spray, a small container or catch pan, and compressed air (optional).
- Safety precautions: Before starting any maintenance activity, ensure safety by wearing protective glasses and gloves. Also, work on a flat and well-ventilated surface.
- Locate the carburetor: Depending on the model, the carburetor may be located on the top or side of the engine. Consult your leaf blower's manual to find the exact location.
- Removing the carburetor: Carefully remove the air filter cover and air filter to access the carburetor. Then, disconnect the fuel line and any other connectors attached to the carburetor. Loosen the screws or bolts holding the carburetor in place, and gently pull it out.
- Disassembly: Once the carburetor is removed, carefully disassemble it by removing the screws or bolts holding the different components together. Make sure to keep track of the order and orientation of the parts.
- Cleaning: Using the carburetor cleaner spray, thoroughly clean all the parts of the carburetor, including the bowl, jets, needles, and other small passages. Use the cleaning brush to remove any stubborn debris or grime. Make sure to clean all the tiny holes and channels.
- Compressed air: If available, use compressed air to blow out any remaining debris from the carburetor components. This will help ensure a thorough and effective cleaning.
- Reassembly: Once the carburetor and all its components are clean and dry, carefully reassemble them in the reverse order of disassembly. Ensure all the screws or bolts are tightened to the recommended torque.
- Reinstallation: Place the carburetor back into its original position on the leaf blower and secure it with the screws or bolts. Reconnect the fuel line and other attachments.
- Final checks: Before using the leaf blower, it's recommended to test the carburetor's functionality. Start the engine and ensure smooth and consistent operation. Adjust the idle speed and air-fuel mixture if necessary for optimal performance.
By following these steps, you should be able to effectively clean your leaf blower carburetor and restore its proper functioning.
How to clean a clogged leaf blower carburetor without removing it?
Cleaning a clogged leaf blower carburetor without removing it can be challenging, as it requires working with limited access to the carburetor's internal components. However, you can try the following steps:
- Safety first: Before starting any maintenance task, ensure the leaf blower is turned off, the spark plug is disconnected, and any fuel lines are also disconnected.
- Remove the air filter cover and air filter. This step will primarily provide a better view and access to the carburetor.
- Inspect the carburetor: Look for any visible signs of blockages or debris that may be causing the clog. Use a flashlight if necessary to get a clear view.
- Spray carburetor cleaner: Use a carburetor cleaner spray, which can be found at most automotive stores, and carefully spray inside the carburetor. Be sure to follow the manufacturer's instructions when using the cleaner.
- Clear the clog: With the carburetor cleaner applied, try to dislodge or clear the clog using compressed air or a thin wire. Be gentle to avoid damaging any delicate parts. Use short bursts of air to prevent excessive pressure build-up.
- Repeat the process: If the clog persists, repeat the steps 4 and 5 until the blockage is cleared.
- Reassemble: Once the carburetor is clean, reassemble the air filter, air filter cover, and any other parts that were removed during the process.
- Test the leaf blower: Reconnect the spark plug and fuel lines if disconnected, then start the leaf blower to ensure it is running smoothly and the clog has been resolved.
While cleaning a clogged leaf blower carburetor without removing it is possible, it may not always result in a perfectly clean carburetor. If the issue persists or the carburetor continues to have difficulties, it may be necessary to remove it for a more thorough cleaning or take it to a professional for service.