
Best Digital Picture Frames Compatible with Instagram or Facebook to Buy in July 2026

32GB FRAMEO 10.1 Inch Smart WiFi Digital Photo Frame 1280x800 IPS LCD Touch Screen, Auto-Rotate Portrait and Landscape, Built in 32GB Memory, Share Moments Instantly via Frameo App from Anywhere
-
SHARE MOMENTS INSTANTLY: SEND PHOTOS/VIDEOS GLOBALLY VIA FRAMEO APP.
-
STUNNING VISUAL QUALITY: ENJOY VIBRANT IMAGES ON A 10.1” HD IPS SCREEN.
-
USER-FRIENDLY DESIGN: EFFORTLESS SETUP MAKES IT PERFECT FOR ALL AGES!


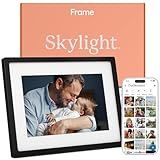
Skylight Frame – WiFi Digital Picture Frame Customer Support, Touch Screen Digital Photo Frame with Easy Setup, Photo Gifts for Parents and Grandparents - 10 Inch Black
-
QUICK, HASSLE-FREE SETUP: JUST PLUG IN, CONNECT TO WI-FI, AND ENJOY!
-
PERFECT PHOTO GIFTS: SHARE SMILES AND MEMORIES FOR ANY SPECIAL OCCASION!
-
CONNECT ALL GENERATIONS: A DIGITAL FRAME THAT DELIGHTS EVERYONE, TECH-SAVVY OR NOT!
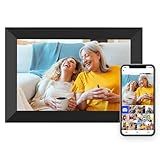
Digital Picture Frame WiFi 10.1 Inch Smart Digital Photo Frame with 1280x800 IPS HD Touch Screen, Auto-Rotate and Slideshow, Easy Setup to Share Photos or Videos Remotely via App from Anywhere
-
PRELOADED WITH PHOTOS FOR A HEARTFELT GIFT THAT SURPRISES LOVED ONES!
-
STUNNING 1280X800 RESOLUTION OFFERS VIBRANT VIEWS FROM ANY ANGLE.
-
EFFORTLESS WI-FI SHARING KEEPS FAMILY CONNECTED WITH CHERISHED MOMENTS.

Aura Digital Picture Frame - 10.1" HD Mat Display | Wirecutter's Best Digital Frame for Gifting - Send Photos Directly from Your Phone from Anywhere | Quick & Easy Setup Over WiFi - Free App | Black
-
TOP-RATED BY EXPERTS AND MILLIONS, PERFECT FOR DISPLAYING MEMORIES!
-
QUICK SETUP: CONNECT VIA WIFI AND SHARE PHOTOS EFFORTLESSLY!
-
GIFT-READY: PRE-LOAD MEMORIES FOR A PERSONAL TOUCH ON SPECIAL DAYS!
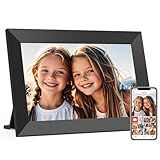
Euphro 10.1'' Digital Picture Frame with 32GB Storage, Digital Photo Frame with 1280x800 IPS Touch Screen, Share Photos/Videos and Send Best Wishes via Free App
-
INSTANTLY SHARE CHERISHED MOMENTS VIA THE UHALE APP ON ANY DEVICE.
-
VIVID 10.1 IPS TOUCHSCREEN DISPLAYS PHOTOS IN STUNNING DETAIL.
-
EXPAND STORAGE TO HOLD UP TO 60,000 TREASURED PHOTOS EFFORTLESSLY.

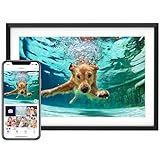
Digital Picture Frame, 15.6 Inch Large Frameo Digital Photo Frame WiFi, 32GB, 1920 * 1080 IPS HD Touch Screen, Tabletop&Wall-Mounted, Share Picture Video, Birthday, Wedding, for Mom
-
SHARE PHOTOS INSTANTLY VIA FRAMEO APP, NO LIMIT ON MEMBERS!
-
PERFECT HEARTFELT GIFT: IDEAL FOR BIRTHDAYS, WEDDINGS, AND ANNIVERSARIES!
-
STUNNING 15.6 HD TOUCH SCREEN DISPLAYS VIVID DETAILS OF YOUR MEMORIES!
Frameo 10.1 Inch WiFi Digital Picture Frame, Smart Cloud Electronic Photo Frame with HD IPS Touch Screen Slideshow 32GB Memory Auto-Rotate Wall Mount, Share Photos/Videos from Phone by Frameo App
-
INSTANT SHARING WITH PRIVACY: SEND PHOTOS SECURELY VIA THE FRAMEO APP.
-
STUNNING HD DISPLAY: ENJOY VIBRANT IMAGES ON A 10.1 INCH ANTI-GLARE SCREEN.
-
MASSIVE STORAGE CAPACITY: STORE 80,000+ PHOTOS FOR ENDLESS MEMORIES.

Apofial Digital Picture Frame 10.1 Inch WiFi Digital Photo Frame,1280 * 800 HD IPS Touch Screen Smart Cloud Photo Frame, to Share Photos Or Videos Remotely Via APP Email (Black)
- INSTANTLY SHARE PHOTOS VIA WIFI WITH FRIENDS AND FAMILY EASILY!
- IMPRESSIVE FEATURES: ADJUSTABLE SLIDESHOW, SLEEP MODE, AND ALARMS!
- STORE 50,000+ PHOTOS WITH 8GB MEMORY-PERFECT FOR ALL YOUR MEMORIES!
ApoloSign Digital Picture Frame 15.6 inch, WiFi Digital Photo Frame with 32GB Storage, 1920x1080 FHD IPS Touch Screen, Auto-Rotate, Easy Setup to Share Photos or Videos Instantly via Frameo App
-
SHARE MOMENTS INSTANTLY: CONNECT VIA WI-FI AND FRAMEO APP TO SHARE PHOTOS.
-
PERFECT GIFT FOR ALL OCCASIONS: BEAUTIFULLY PACKAGED, IDEAL FOR ANY EVENT.
-
STUNNING CLARITY & USER-FRIENDLY: 15.6 FHD SCREEN; EASY FOR EVERYONE TO USE.

Digital Picture Frame, 10.1'' Frameo Digital Frame Wifi, 32GB Memory, 1280*800 HD Touch Screen Digital Photo Frame, Wall Mountable, Auto-Rotate, Share Instantly, Wedding, Birthday Gifts for Women, Mom
- INSTANTLY SHARE PHOTOS VIA WIFI WITH FRAMEO APP, ANYTIME, ANYWHERE.
- PERFECT GIFT FOR ANY OCCASION, MAKING MEMORIES A THOUGHTFUL PRESENT.
- ELEGANT DESIGN FEATURES HD TOUCH SCREEN & EASY LANDSCAPE/PORTRAIT MODE.
Digital picture frames vary in their compatibility with social media platforms like Instagram or Facebook, depending on the brand and model. Some modern digital frames offer Wi-Fi connectivity, allowing them to sync directly with social media accounts. This lets users display their latest photos from these platforms directly onto the frame. These frames typically require the user to link their social media accounts via a companion app or web interface, providing a seamless way to update the frame's photo collection automatically or manually. However, not all digital frames have this capability. In cases where direct compatibility is absent, users might need to manually download photos from Instagram or Facebook and then upload them to the frame using a USB or memory card. As features and technology continue to evolve, more digital frames are likely to offer integration with popular social media networks, providing additional convenience and functionality.
How to personalize settings on a digital picture frame?
Personalizing settings on a digital picture frame can enhance your experience and ensure that it displays your photos exactly the way you want. The exact steps may vary depending on the brand and model of your frame, but here's a general guide to help you:
- Power On and Connect: Turn on the digital picture frame. Most frames come with a touch screen or remote control. Use either method to navigate through the options.
- Access the Settings Menu: Look for a "Settings" or "Menu" button either on the frame or within its interface. Use the navigation buttons or touchscreen to select and enter this menu.
- Customize Display Preferences: Slideshow Settings: Set the duration for each photo to display. Choose transition effects between photos. Decide whether to shuffle photos or display them in a specific order. Photo Format: Some frames allow zooming or cropping to fit the photo within the frame’s dimensions. Adjust these settings as needed.
- Adjust Screen Settings: Brightness and Contrast: Adjust these to fit the room's lighting conditions and your preference. Orientation: Set the frame to either landscape or portrait mode.
- Set Up Auto On/Off: Many frames come with a feature that automatically turns the device on or off at specific times. Set these times according to your daily routine or preferences.
- Connect to Wi-Fi and Social Media (if applicable): Some digital frames can connect to Wi-Fi to display photos from social media or cloud storage. Follow the onscreen instructions to set up these connections. Make sure to enter your credentials for Google Photos, Facebook, or other compatible services if the frame supports this feature.
- Upload and Organize Photos: Use a USB drive, SD card, or a dedicated app (if available) to upload new photos. Organize photos into albums or playlists, if the frame allows for such organization.
- Software Updates: Check if there are any firmware or software updates available for your frame, as these might include new features or improve performance.
- Volume Control (for frames with speakers): Adjust the volume for any audio components, if applicable.
- Reset to Default Settings (if needed): If you make a mistake or want to start fresh, look for an option to reset the frame to its factory settings.
Refer to the user manual specific to your digital picture frame for model-specific instructions, as features and options can vary widely.
What is the largest digital picture frame available?
As of the latest information available, one of the largest digital picture frames on the market is the Meural Canvas II by Netgear, which is available in sizes up to 27 inches. Larger options might also be available from various manufacturers, tailored for professional displays or digital art galleries, sometimes reaching sizes of 32 inches or more. When looking for the largest digital picture frame, it's important to consider factors like resolution, display technology, connectivity options, and frame design to ensure it meets your specific needs.
How to upload photos to a digital picture frame from Instagram?
Uploading photos from Instagram to a digital picture frame involves a couple of steps, as it usually requires downloading the photos from Instagram and then transferring them to the frame. Here's a general guide on how you can accomplish this:
Step 1: Download Photos from Instagram
- Using a Third-Party App or Website: There are various apps and websites that allow you to download photos from Instagram. Examples include InstaSave, DownloadGram, or 4K Stogram. Copy the URL of the Instagram photo you want to download. Paste the URL into the app or website, then download the photo to your device.
- Manually (for devices without apps): Take a screenshot of the Instagram photo. Crop the screenshot as needed to focus on the image.
- Check Instagram Settings: You can save original posts you share on Instagram directly to your phone, which makes accessing them easier if you're the one who posted them.
Step 2: Transfer Photos to Your Digital Picture Frame
- Using a USB Drive or Memory Card: Save the downloaded photos to a USB drive or memory card compatible with your digital frame. Insert the USB drive or memory card into the digital frame and follow the frame's instructions to display the photos.
- Over Wi-Fi (for Wi-Fi enabled frames): Some digital frames connect to Wi-Fi and have apps or email functionalities that allow you to send photos directly from your device. Follow the manufacturer's instructions to connect the frame to Wi-Fi. Use the associated app or email to send the downloaded Instagram photos to your frame.
- Cloud Synchronization: For frames that support cloud services like Google Photos, Dropbox, or iCloud, you can upload your Instagram photos to these services. Connect your frame to the corresponding cloud service and select the photos you wish to display.
Step 3: Display Photos on the Frame
- Once the photos are uploaded or inserted into your digital frame, use the frame's interface to create slideshows or set photo display preferences as desired.
Considerations:
- Privacy and Permissions: Ensure that you have the rights to download and display any photos that you're transferring from Instagram, especially if they contain images of other people.
- Compatibility: Check the compatibility of file formats. Most frames support JPEG, and some support PNG among others.
- Resolution: Ensure the photos have a suitable resolution for the digital frame to avoid poor display quality.
By following these steps, you should be able to transfer photos from Instagram onto your digital picture frame effectively.