Best Outdoor Storage Sheds With Floors to Buy in July 2026
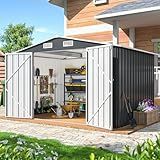
YADSUNY 10x8 FT Outdoor Storage Shed, Metal Garden Tool Shed with Updated Frame Structure and Lockable Doors, Ideal for Backyard Garden Patio Lawn, Grey
-
DURABLE ALL-WEATHER PROTECTION: STRONG GALVANIZED STEEL, RUST & UV-RESISTANT.
-
EASY ASSEMBLY: REINFORCED STRUCTURE FOR A 35% SMOOTHER SETUP EXPERIENCE.
-
ORGANIZED STORAGE SPACE: SPACIOUS DESIGN TO NEATLY HOLD ALL OUTDOOR ESSENTIALS.


Aoxun 6.2x4 FT Shed Outdoor Storage Shed with Lockable Doors & Slooping Roof Metal Garden Tool Shed for Backyard, Patio, Poolside (Brown)
- WEATHERPROOF BUILD: DURABLE STEEL FRAME ENSURES LONG-LASTING PERFORMANCE.
- VERSATILE DESIGN: IDEAL FOR GARDEN TOOLS, PET SHELTER, AND MORE!
- EASY ASSEMBLY: LABELED PARTS AND CLEAR MANUAL FOR QUICK SETUP.
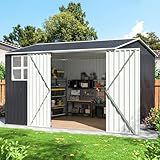
DAUSOLA 10x10 FT Outdoor Storage Shed, Metal Garden Tool Shed with Updated Frame Structure, Lockable Doors and Windows, Ideal for Backyard Garden Patio Lawn, Grey
- PREMIUM GALVANIZED STEEL: WATER, RUST, AND UV-RESISTANT FOR DURABILITY.
- EASY 35% ASSEMBLY IMPROVEMENT: ENJOY QUICKER SETUP AND STABILITY.
- SPACIOUS, ORGANIZED STORAGE: IDEAL DIMENSIONS FOR ALL YOUR OUTDOOR TOOLS.
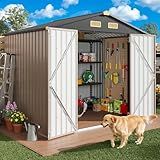
IRONCK 8x6FT Outdoor Storage Shed with Lockable Doors, 7.4x5.3FT Base Galvanized Steel Metal Garden Tool Shed with Breathable Vent for Yard Bins/Generator/Wheelbarrow Storage, Brown
- DURABLE CONSTRUCTION: MADE FROM THICK GALVANIZED STEEL FOR LONG-LASTING USE.
- EASY ASSEMBLY: PRE-DRILLED PARTS AND VISUAL GUIDES FOR QUICK SETUP.
- WEATHER RESISTANCE: PROTECTS BELONGINGS FROM RAIN, SNOW, AND FADING.
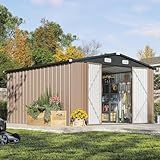
Aoxun 10 x 12FT Outdoor Storage Shed with Double Hinged Large Door Utility Garden Shed with Lockable Door & Sloped Roof Metal Sheds Outdoor Storage for Garden, Backyard, Patio and Backyard, Brown
-
MAXIMIZE STORAGE: GENEROUS SPACE AND OPTIONAL RACKS FOR ORGANIZED STORAGE.
-
SECURE & WEATHERPROOF: SLOPED ROOF AND LOCKABLE DOOR FOR PROTECTION.
-
VERSATILE USE: IDEAL FOR TOOLS, TOYS, AND MORE IN ANY OUTDOOR SETTING.

Vongrasig 5 x 3 x 6 FT Outdoor Storage Shed Clearance, Metal Garden Shed with Large Window and Lockable Door, Anti-Corrosion Waterproof Tool Shed for Backyard Patio, Lawn (Dark Gray)
- WEATHER-RESISTANT DESIGN: STEEL PLATES ENSURE DURABILITY, NO RUST OR ROT.
- BRIGHT & SPACIOUS: LARGE WINDOW AND VENTS CREATE A COMFORTABLE SPACE.
- VERSATILE USE: PERFECT FOR TOOLS, PETS, AND GARDEN GEAR STORAGE.
Outdoor storage sheds with floors can offer a certain degree of security, but their overall security depends on several factors. A solid floor can help protect the contents from ground moisture, pests, and some natural elements, potentially enhancing the longevity of stored items. However, their structural security largely depends on the materials used, the quality of construction, and additional security measures like locks or reinforced doors. Strong materials such as metal or high-quality wood can deter break-ins more effectively than cheaper, flimsy materials. Moreover, additional security features such as reinforced hinges, secure locking mechanisms, and the strategic placement of the shed in a less visible area of your yard can significantly enhance its security. Regular maintenance and inspections can also help identify and address potential vulnerabilities over time.
How to choose a shed floor material?
Choosing a shed floor material involves evaluating several factors to ensure durability, functionality, and cost-effectiveness. Here are some considerations and options to help you make an informed decision:
- Purpose and Use: Consider what you will be using the shed for. For light storage, a basic material may suffice. If you're setting up a workshop or storing heavy equipment, you'll need something more robust.
- Durability: Look for materials that can withstand the load you intend to place on them. Consider resistance to moisture, rot, pests, and damage.
- Location and Climate: In wet climates, select materials that won’t easily mildew or rot. In areas with extreme temperatures, choose materials that don’t warp or degrade quickly.
- Budget: Balance cost with quality; sometimes investing a bit more upfront can save money on repairs or replacements later.
- Installation: Consider how easy the material is to install. Some might require professional installation. Evaluate whether the material is suitable for DIY projects if you plan to do it yourself.
- Maintenance: Assess how much maintenance the floor will require over time.
Common Shed Floor Materials:
- Concrete: Pros: Highly durable, low maintenance, pest-proof, and provides a strong base. Cons: Requires professional installation, and is more expensive than other options. It’s also permanent, which may not be ideal for temporary setups.
- Pressure-Treated Wood: Pros: Resistant to rot and insects, relatively easy to install, and provides a traditional look. Cons: May require periodic treatment to maintain durability.
- Plywood: Pros: Cost-effective, easy to work with, suitable for light-to-moderate use. Cons: Needs to be protected from moisture to prevent warping and rot.
- Oriented Strand Board (OSB): Pros: Affordable, widely available, and suitable for indoor shed floors. Cons: Less moisture resistant than plywood, prone to swelling if wet.
- Plastic or Rubber Tiles: Pros: Resistant to moisture and chemicals, easy to clean, and can be laid on uneven surfaces. Cons: More expensive than wood or OSB, and may not support very heavy loads.
- Gravel: Pros: Provides drainage, inexpensive, and easy to install. Cons: Not suitable for heavy machinery, can shift, and requires a retainer to keep in place.
Make sure to evaluate the specific needs of your shed and prioritize which factors matter most for your particular situation.
What is a concrete slab for shed bases?
A concrete slab for shed bases is a flat, horizontal surface made of concrete that serves as a stable foundation for a shed. This type of foundation is popular for sheds because it provides a durable and level surface that can support the structure's weight and protect it from ground moisture and movement.
Key Features of a Concrete Slab for Shed Bases:
- Durability: Concrete is a strong material that can withstand heavy loads and harsh weather conditions, making it suitable for long-term use.
- Level Surface: A properly poured and finished slab offers a flat and even foundation, essential for structural stability and ease of construction.
- Load Distribution: It evenly distributes the shed’s weight across the ground, reducing the risk of settling or shifting.
- Moisture Barrier: A concrete slab helps keep moisture from the ground from seeping into the shed, thus protecting the structure and its contents.
- Longevity: Concrete slabs require minimal maintenance, are resistant to decay, and can last for many years.
Installation Considerations:
- Site Preparation: The ground must be cleared, leveled, and compacted to support the slab adequately.
- Formwork: Wooden forms are typically used to shape the edges of the slab and contain the concrete during pouring.
- Thickness: The slab’s thickness can vary depending on the size and intended use of the shed, but it's commonly at least 4 inches thick.
- Reinforcement: Steel rebar or mesh may be added to reinforce the concrete and improve its tensile strength.
- Curing: After pouring, the concrete must cure properly to achieve maximum strength, which involves keeping it moist for several days after setting.
Overall, a concrete slab is a reliable and practical option for shed bases, providing a sturdy and long-lasting foundation for various types of sheds.
What is a shed floor kit?
A shed floor kit is a pre-designed package that includes all the necessary materials and components needed to construct a floor for a storage shed. These kits are typically designed to make the installation process easier, especially for those who may not have advanced carpentry skills. The kit usually contains:
- Pressure-Treated Lumber: Often included to provide resistance against rot, decay, and insect damage, especially if the shed floor is in contact with the ground.
- Floor Joists: These are the horizontal structural elements that provide support for the floor. They are usually made from wood and spaced according to the shed's design and size.
- Plywood or OSB Panels: Sheets of plywood or oriented strand board (OSB) form the actual walking surface of the shed floor. They are typically designed to fit securely over the joists.
- Hardware: Nails, screws, metal connectors, or brackets necessary to assemble the floor structure.
- Instructions: A detailed guide or manual on how to assemble the floor properly.
A shed floor kit simplifies the construction process by ensuring that all of the components are compatible and designed to work together, thereby reducing errors and saving time. They are commonly used for DIY shed projects and can be found at most home improvement stores or through specialty suppliers.
What is a vapor barrier for shed floors?
A vapor barrier for shed floors is a material used to prevent moisture from passing through the floor and into the shed, protecting the interior from dampness, mold, and rot. Typically made from polyethylene plastic sheeting, vapor barriers are installed during construction or renovation to form an impermeable layer beneath the flooring. Here's a breakdown of its key aspects:
- Moisture Protection: The primary function of a vapor barrier is to stop moisture from the ground from seeping into the shed, which is crucial in areas with high humidity or poor drainage.
- Material: Vapor barriers are usually made from heavy-duty polyethylene plastic, often in sheets or rolls. The thickness can vary, but commonly used gauges are 6 mils or thicker.
- Installation: When installing a vapor barrier, it is generally placed directly on the ground before the flooring material (like plywood or concrete) is added. It can also be used beneath gravel or directly under the shed if it’s elevated.
- Overlap and Sealing: To ensure effectiveness, the sheets should overlap and be tightly sealed with tape designed for use with polyethylene. This prevents any gaps that moisture could penetrate.
- Ventilation Considerations: While vapor barriers are effective at controlling moisture, it’s also important to ensure that there’s proper ventilation in the shed to manage condensation and humidity.
By including a vapor barrier in your shed floor construction, you help ensure the longevity and durability of the shed, protecting stored items and maintaining structural integrity.