
Best Ultra-Wide Monitors to Buy in July 2026
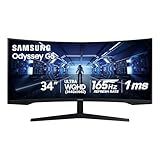
SAMSUNG 34' Odyssey G5 Ultra-Wide Gaming Monitor with 1000R Curved Screen, 165Hz, 1ms, FreeSync Premium, Large Display, Eye Comfort, Multiple Ports, WQHD, LC34G55TWWNXZA, Black
- IMMERSE IN 1000R CURVATURE FOR BREATHTAKING, LIFELIKE GAMING.
- ENJOY SEAMLESS VISUALS WITH 165HZ REFRESH RATE AND 1MS RESPONSE TIME.
- EXPERIENCE VIBRANT HDR10 COLORS FOR TRUE-TO-LIFE GAMING DETAILS.


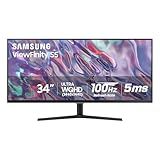
SAMSUNG 34" ViewFinity S50GC Series Ultra-WQHD Monitor, 100Hz, 5ms, HDR10, AMD FreeSync, Eye Care, Borderless Design, PIP, PBP, LS34C502GANXZA, 2023, Black
- MAXIMIZE MULTITASKING WITH ULTRA WQHD & 21:9 DISPLAY
- EXPERIENCE OVER 1 BILLION COLORS FOR STUNNING VISUALS
- REDUCE EYE STRAIN WITH SMART BRIGHTNESS & EYE SAVER MODE
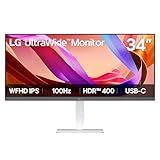
LG 34U530A-W 34-inch UltraWide WFHD (2560 x 1080) IPS Wide Computer Monitor, 100Hz, VESA DisplayHDR 400, HDMI, DisplayPort, USB Type-C, Tilt/Height/Swivel Stand, White
- BOOST PRODUCTIVITY: 34 21:9 ULTRAWIDE DISPLAY FOR SEAMLESS MULTITASKING.
- VIVID VISUALS: HDR COLOR AND 100HZ REFRESH FOR IMMERSIVE EXPERIENCES.
- SIMPLE CONNECTION: USB TYPE-C AND VERSATILE PORTS REDUCE CLUTTER.
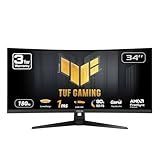
ASUS TUF Gaming 34” Ultra-Wide Curved Monitor (VG34VQ3B) – 21:9 QHD (3440x1440), 180Hz, 1ms, Extreme Low Motion Blur Sync, FreeSync Premium, Speaker, 90% DCI-P3, DisplayWidget Center, 3 yr Warranty
- EXPERIENCE IMMERSIVE GAMEPLAY WITH 34 QHD 1500R CURVED DESIGN.
- ENJOY ULTRA-FAST 180HZ REFRESH AND 1MS RESPONSE FOR SMOOTH ACTION.
- FREESYNC PREMIUM ENSURES TEAR-FREE GAMING; PLUS, 3-MONTH ADOBE ACCESS!
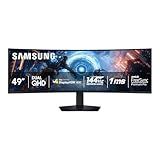
SAMSUNG 49-inch Odyssey G9 (G91F) DQHD, 144Hz, Curved Gaming Monitor, Ultra-Wide 32:9 Screen, DisplayHDR 600, AMD FreeSync™ Premium Pro, Ergonomic Stand, LS49FG910ENXZA, 2025
-
IMMERSIVE 1000R CURVED DISPLAY FOR ULTIMATE GAMING AWARENESS.
-
DISPLAYHDR 600 REVEALS HIDDEN DETAILS IN DARK SCENES.
-
144HZ REFRESH RATE AND 1MS RESPONSE TIME FOR LAG-FREE GAMEPLAY.
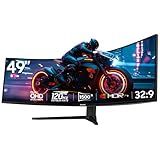
Gawfolk 49 Inch Curved Gaming Monitor, 5120x1440 Dual QHD, 120Hz, 1500R, AMD FreeSync, 32:9, Height Adjustable Ultra-Wide Computer Screen for Multitasking
-
ULTRA-WIDE 49 CURVED SCREEN: PERFECT FOR IMMERSIVE GAMING & MULTITASKING!
-
SMOOTH 120HZ REFRESH RATE: ENJOY FLUID GAMEPLAY AND REDUCED MOTION BLUR!
-
ERGONOMIC DESIGN: CUSTOMIZE YOUR VIEWING ANGLE FOR ALL-DAY COMFORT!
Ultra-wide monitors can be quite advantageous for video editing due to their expansive screen real estate, allowing editors to more easily manage timelines, view multiple windows, and work with large amounts of footage concurrently. The increased horizontal space provides more room for a fuller view of editing software interfaces, enabling editors to quickly access tools and assets without constant scrolling or switching between tabs. This can enhance workflow efficiency and improve the editing process. Despite these benefits, there are also considerations to keep in mind, such as the potential for color accuracy issues in some ultra-wide monitors. Ensuring the monitor has a high resolution and good color reproduction is essential for video professionals who require precise color grading. Additionally, the performance demands in terms of hardware compatibility should be evaluated to ensure a seamless experience, especially when dealing with high-resolution video files. Ultimately, ultra-wide monitors can be a solid investment for video editors, offering both productivity and an immersive editing environment, provided their specific requirements and specs align with the editor’s needs.
How to adjust aspect ratio settings on ultra-wide monitors?
Adjusting the aspect ratio on ultra-wide monitors can help in achieving the preferred display for different types of content. Here’s a general guide, but keep in mind that specific steps might vary depending on the brand and model of your monitor or your computer operating system:
On the Monitor's On-Screen Display (OSD) Menu:
- Access the Menu: Use the buttons on your monitor (usually located on the bottom edge or the back) to open the OSD menu.
- Navigate to Display Settings: Look for an option like "Display Settings," "Picture," or "Screen."
- Find Aspect Ratio: Locate a setting for "Aspect Ratio," "Screen Size," or similar.
- Select Desired Aspect Ratio: Options might include "16:9," "21:9" (native for ultra-wide), "Auto," or "Fullscreen." Choose the setting that fits your needs.
- Save Changes: Follow the prompts to apply and save the changes.
Via Windows Settings:
- Access Display Settings: Right-click on the desktop and select “Display settings.”
- Adjust Resolution: Scroll down to "Display resolution." Choose a resolution that corresponds with your desired aspect ratio. Note: Windows typically autodetects the best resolution for your monitor, ensuring the optimal aspect ratio.
- Scaling Settings: Adjust "Scale and layout" if necessary (usually set to 100% for native resolution).
On macOS:
- Open System Preferences: Click on the Apple menu and select "System Preferences."
- Select Displays: Click on “Displays” to view display options.
- Resolution Settings: In the Displays pane, hold the Option key and click “Scaled” for more resolution options. Choose a preferred resolution/aspect ratio that fits your monitor’s size.
For Specific Applications:
- Some applications and games allow you to adjust the aspect ratio or resolution within their settings. Look under options like “Video Settings” or “Graphics.”
Things to Keep in Mind:
- Native Resolution: Always try to use the native resolution of your ultra-wide monitor for the best picture quality.
- Distortion: Non-native aspect ratios can stretch or squish the image, altering its appearance.
- Driver Updates: Ensure your graphics drivers are up to date to support all available resolutions and aspect ratios.
In case you encounter any issues, refer to your monitor's manual for model-specific instructions or seek support from the manufacturer.
How to manage screen splitting on ultra-wide monitors?
Managing screen splitting on ultra-wide monitors can significantly enhance your productivity by allowing you to efficiently organize and access multiple applications simultaneously. Here are some tips and tools to help you manage screen splitting on ultra-wide monitors:
Built-in Operating System Tools
- Windows Snap (Windows 10/11): Drag a window to either edge or corner of your screen to snap it into place. Windows 11 supports snapping windows into quadrants for even more flexible arrangements. Use keyboard shortcuts like Windows Key + Left/Right Arrow to quickly snap windows to the sides of the screen, or Windows Key + Up/Down Arrow to snap them into quadrants (on Windows 11).
- Mission Control and Split View (macOS): Use Mission Control to find and arrange your open windows. Use Split View by clicking and holding the green full-screen button in the upper-left corner of a window, then selecting a second app to share the screen. Note that macOS doesn’t natively support more flexible layouts, but third-party apps can help with this.
Third-Party Applications
- Microsoft PowerToys (Windows): The FancyZones feature allows you to define custom window layouts, such as columns or grids, where you can drag and drop windows into predefined zones.
- DisplayFusion (Windows): Offers powerful windows management features, allowing you to set custom profiles, split screens into grids, and even control multi-monitor setups with ease.
- Magnet or Rectangle (macOS): Magnet lets you snap windows into various portions of your screen via drag-and-drop or keyboard shortcuts. Rectangle is a free, open-source alternative to Magnet with similar functionalities for window management on macOS.
- Divvy (Windows & macOS): Provides a grid-based approach to snapping windows, where you can quickly define custom sizes and positions for your applications.
Tips for Effective Screen Management
- Define Work Zones: Divide your screen into specific zones for particular tasks, such as one area for communication apps, another for coding or writing, and another for research or browser tabs.
- Use Virtual Desktops: These help you keep your workspace organized. Windows offers virtual desktops as a part of the Task View feature, and macOS has Mission Control for similar functionality.
- Invest in Software: If your workflow demands precise window management and your operating system doesn’t meet your needs, consider investing in third-party software for customizability and ease of use.
- Optimize for Comfort: Arrange your windows for ergonomic comfort to prevent strain, ensuring that critical applications are within your natural field of view.
- Regularly Review Your Setup: As your tasks and projects change, regularly review and adjust your window layouts to reflect your current needs and maximize efficiency.
Utilizing these tools and tips, you can effectively manage your ultra-wide monitor screen real estate, boosting both productivity and comfort.
How to use ultra-wide monitors with different editing software?
Using ultra-wide monitors with different editing software can significantly enhance your workflow by providing more screen real estate for timelines, tools, and multiple windows. Here's a general guide on how to optimize your ultra-wide monitor for various types of editing software:
General Setup for Ultra-wide Monitors:
- Resolution and Scaling: Ensure your computer's display settings are set to the maximum resolution supported by your ultra-wide monitor. Adjust scaling if necessary, especially if text and icons appear too small.
- Color Calibration: Use hardware calibration tools or software like SpyderX or X-Rite to ensure color accuracy, which is crucial for video and photo editing.
- Organize Workspace: Take advantage of the extra space by strategically placing windows and panels that you need quick access to. Most editing software allows you to customize workspace layouts.
Photo Editing Software (e.g., Adobe Photoshop, Lightroom):
- Photoshop: Use the extra space to open more tabs or images for comparison. Expand the Layers, History, and Brush panels for easier access. Use side-by-side before-and-after views for edits.
- Lightroom: Utilize Grid and Loupe views on a larger scale for organization. Use the filmstrip at the bottom of the screen without feeling constrained.
Video Editing Software (e.g., Adobe Premiere Pro, Final Cut Pro):
- Timeline Management: Expand the timeline view to see more clips at once and streamline your editing process. Use the space for multiple video layers or audio tracks.
- Preview and Effects Panels: Keep the Program Monitor large to avoid pixelation while previewing edits. Have the Effects Control and Lumetri Color panels open simultaneously without clutter.
Audio Editing Software (e.g., Audacity, Adobe Audition):
- Track Views: Maximize the view of multiple tracks, which can be particularly helpful for mixing.
- Tool Access: Keep editing tools and effects panels open for quick application of effects and adjustments.
Graphic Design Software (e.g., Adobe Illustrator, CorelDRAW):
- Workspace Utilization: Keep the design canvas large while still having full access to layers, swatches, and tools. Use multiple artboards efficiently without feeling cramped.
- Zoom and Detail: Take advantage of zooming capabilities while still seeing the bigger picture around your main focus.
Productivity Tips:
- Virtual Desktops: Use virtual desktops to manage different projects or tasks on the same monitor.
- Window Management Software: Consider window management tools like DisplayFusion or the built-in features in Windows and macOS for snapping, tiling, and managing open windows.
- Keyboard Shortcuts & Macros: Leverage keyboard shortcuts and macros for easier navigation and workflow management.
By customizing your setup for each specific software, you can significantly maximize the potential of your ultra-wide monitor, leading to more productive and comfortable editing sessions.