Best Action Cameras with Image Stabilization to Buy in July 2026
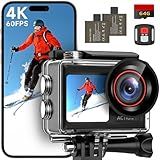
ODDV 4K60FPS 30MP Action Camera with Front LCD and Touch Rear Screens, Underwater Camera with 64GB Memory Card, 132FT Waterproof Camera, EIS, 5X Zoom, WiFi Remote Control(Black)
-
CAPTURE 4K60FPS VIDEO & 30MP PHOTOS FOR STUNNING CLARITY!
-
DUAL SCREENS FOR EASY SHOOTING & SELFIES ANYTIME, ANYWHERE!
-
EXCEPTIONAL EIS: SMOOTH VIDEOS EVEN IN HIGH-ACTION ENVIRONMENTS!


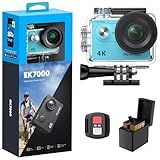
AKASO EK7000 4K30FPS 20MP WiFi Action Camera with EIS Ultra HD 131FT Waterproof Underwater Camera Remote Control 4X Zoom Support External Microphone
- CAPTURE STUNNING 4K VIDEO AND 20MP PHOTOS EFFORTLESSLY!
- ENJOY SMOOTH, STEADY FOOTAGE WITH ELECTRONIC IMAGE STABILIZATION.
- GO ANYWHERE WITH 131FT WATERPROOF DESIGN FOR EXTREME ADVENTURES!
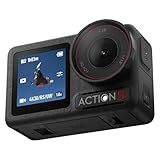
DJI Osmo Action 5 Pro Essential Combo, Waterproof Action Camera with 1/1.3" Sensor, 4K/120fps Video, Subject Tracking, Stabilization, Dual OLED Touchscreens, Action Camera 4K Ideal for Sports, Vlog
-
COST-EFFECTIVE MINIMALIST SETUP: PERFECT FOR QUICK TRIPS & DAILY USE.
-
PRO-GRADE NIGHT IMAGING: STUNNING 4K QUALITY WITH UNMATCHED LOW-LIGHT PERFORMANCE.
-
HANDS-FREE VOICE CONTROL: CAPTURE MOMENTS EFFORTLESSLY WITH VOICE COMMANDS.

AKASO EK7000 4K30FPS 20MP WiFi Action Camera with EIS Ultra HD 131FT Waterproof Underwater Camera Remote Control 4X Zoom Support External Microphone Black
- CAPTURE STUNNING 4K VIDEOS & 20MP PHOTOS WITH ULTRA HD CLARITY.
- ENJOY SMOOTH, SHAKE-FREE FOOTAGE WITH ADVANCED EIS TECHNOLOGY.
- DIVE DEEP: 131FT WATERPROOF DESIGN FOR ADVENTUROUS ACTIVITIES!

DJI Osmo Action 5 Pro Adventure Combo, Action Camera 4K with 1/1.3" Sensor, 12h Extended Battery Life with 3 Batteries, Stabilization, Dual OLED Touchscreens, Mini Action Camera for Travel, Vlog
-
CAPTURE STUNNING URBAN NIGHTSCAPES WITH ADVANCED LOW-LIGHT SENSOR.
-
ENJOY ULTRA-STABLE FOOTAGE AND SMOOTH SUBJECT TRACKING WITH 4NM CHIP.
-
GO HANDS-FREE WITH VOICE CONTROL FOR EFFORTLESS CAPTURING ON THE GO.
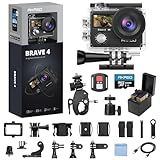
AKASO Brave 4 Action Camera 4K 30fps with 64GB MicroSD U3 Card Bicycle Helmet Accessories Kit Bundle, 20MP Ultra HD 131FT Waterproof Underwater Camera EIS WiFi Remote Control 5X Zoom Sport Cameras
-
STUNNING 4K VIDEO & 20MP PHOTOS: CAPTURE LIFE'S FINEST DETAILS!
-
ADJUSTABLE 170° VIEW & STABILIZATION: SMOOTH, PRO-QUALITY FOOTAGE!
-
WATERPROOF TO 131FT + DUAL SCREEN: PERFECT FOR ALL YOUR ADVENTURES!
Mini Body Camera 1080P, 512G Thumb Vlogging Cam Hands-Free Recording, Tiny Portable Action Camera with 360° Rotate Clip & Magnetic Clip, Wearable Video Recorder for Traveling, Motorcycle (No SD Card)
-
ULTRA-COMPACT DESIGN: LIGHTWEIGHT, THUMB-SIZED FOR EFFORTLESS PORTABILITY.
-
1080P HD QUALITY: CAPTURE STUNNING VIDEO, PERFECT FOR ALL ACTIVITIES.
-
VERSATILE MOUNTING: ATTACH ANYWHERE FOR DYNAMIC, HANDS-FREE RECORDING.
Cecosy Action Camera 4K 30FPS, Waterproof Camera 30M Underwater Ultra HD 131FT 170°Wide Angle Shooting, with 2 x 1050 mAh Batteries for Cycling, Ice Skating, Skiing, Fishing, Climbing
- CAPTURE STUNNING 4K VIDEOS AT 30FPS FOR EVERY ADVENTURE.
- DIVE DEEP: WATERPROOF UP TO 30M FOR THRILLING UNDERWATER MOMENTS.
- INCLUDES 2 BATTERIES FOR EXTENDED RECORDING-4-6 HOURS OF ACTION!
Yes, many modern action cameras come equipped with image stabilization technology. This feature is designed to reduce the effects of camera shake, resulting in smoother and clearer videos, especially during high-intensity activities or when the camera is mounted on moving objects. The stabilization can be digital, often referred to as electronic image stabilization (EIS), or optical, though EIS is more common in action cameras due to their compact size. This technology is particularly beneficial for capturing sports, adventures, and other dynamic activities where maintaining a steady shot can be challenging.
How to use a stabilizer with an action camera?
Using a stabilizer with an action camera can significantly enhance the quality of your footage by reducing shakiness and creating smooth, professional-looking shots. Here’s a general guide on how to use a stabilizer with an action camera:
- Choose the Right Stabilizer: There are various types of stabilizers available, such as handheld gimbals, chest mounts, and wearable stabilizers. Select one that suits your needs and is compatible with your action camera.
- Mount the Camera: Securely attach your action camera to the stabilizer. This often involves using a specialized mount or clamp. Ensure it is tightly fitted to prevent movement.
- Balance the Stabilizer: For handheld gimbals, it's crucial to balance the camera on the stabilizer to ensure smooth operation. This may involve adjusting knobs or sliding the camera mount until the camera can stay level without powered assistance.
- Power it Up: If you're using an electronic gimbal, turn it on and let it calibrate. Most gimbals will self-balance once powered up. Make sure your device's battery is fully charged for optimal performance.
- Configure Settings: Some stabilizers come with mobile apps or settings to adjust the stabilization modes (such as pan follow, lock mode, or full follow). Choose a mode based on your shooting needs.
- Practice Your Moves: Practice moving with the stabilizer to understand how your movements affect the footage. Walk gently, and try to keep your arms and body steady to minimize additional motion.
- Check the Grip and Posture: Hold the stabilizer firmly and adopt a posture that minimizes body movement. Consider using both hands for added stability.
- Plan Your Shots: Plan your movements and paths to avoid sudden jolts or quick changes in direction, which can disrupt stabilization.
- Adjust the Camera Angle: Depending on what you're filming, you may need to adjust the camera angle for better composition. Test different angles and movements to find what works best for your scene.
- Review the Footage: After capturing your content, review the footage to ensure the stabilization is adequate. This may help you make adjustments for future shoots.
- Post-Production Stabilization: If necessary, you can also use video editing software to further stabilize your footage.
By following these steps, you should be able to capture smooth and stable footage with your action camera and stabilizer. Always refer to the user manual for specifics related to your stabilizer model.
How to update firmware to improve image stabilization on an action camera?
Updating the firmware on an action camera can sometimes improve image stabilization and other performance aspects. Here's a general guide on how to update your action camera's firmware. Note that the exact steps may vary depending on the brand and model of your camera, so it's essential to refer to the manufacturer's instructions:
- Check for Firmware Updates: Visit the manufacturer's website and navigate to the support or downloads section. Look for any available firmware updates for your specific camera model.
- Download the Firmware Update: Download the firmware file. It will usually come in a compressed format like .zip. Make sure to download the correct version for your camera model.
- Prepare the Memory Card: Use a compatible memory card for your camera. It's often recommended to format the card in the camera before use to ensure it's clean. Ensure sufficient battery charge or have the camera connected to an external power source during the update process.
- Transfer the Firmware Update: Extract the contents of the downloaded file if necessary. Copy the firmware update file to the root directory of the memory card. Avoid placing it in any folders.
- Insert the Memory Card: Insert the memory card into the camera.
- Start the Firmware Update Process: Power on the camera. Depending on the model, the update might start automatically, or you may need to navigate to the settings menu and select a firmware update option. Follow any on-screen instructions carefully to proceed with the update.
- Wait for the Update to Complete: The camera may restart several times during the update process. Avoid turning off the camera or removing the memory card until the update is finished and the camera indicates it's safe to do so.
- Verify the Update: After the update, check the firmware version in the camera settings to ensure the update was successful. Test the camera’s image stabilization and other functions to verify improvements.
- Restore Settings (if necessary): Some updates may reset the camera's settings to defaults. Reconfigure your preferred settings if needed.
Always follow the specific instructions provided by your camera manufacturer to avoid potential issues during the update process. If you encounter any problems, contact the manufacturer's support for assistance.
How to enable image stabilization on an action camera?
Enabling image stabilization on an action camera typically depends on the brand and model you are using. However, there are some general steps you can follow to enable this feature:
- Consult the Manual: Before proceeding, check the user manual of your specific camera model for detailed instructions on enabling image stabilization. Different cameras have different settings and interfaces.
- Access Camera Settings: Turn on your action camera. Navigate to the settings menu. This can usually be accessed via the touchscreen, physical buttons, or a connected mobile app, depending on your camera model.
- Find Image Stabilization: Look for the image stabilization option within the settings menu. It may be labeled as "Stabilization," "EIS" (Electronic Image Stabilization), "HyperSmooth" (GoPro), "SteadyShot" (Sony), or something similar, depending on the brand.
- Enable Image Stabilization: Once you have located the image stabilization option, select it and choose "On" or "Enable." Some cameras may offer different levels of stabilization (e.g., Standard, Boost, HyperSmooth), so choose the level that fits your needs.
- Save Settings: After enabling the stabilization, make sure to save your settings if your camera requires manual saving.
- Test the Settings: Record a short video to ensure that the image stabilization is working as expected. Check the video playback for smoothness.
- Adjust if Necessary: If the stabilization doesn't seem adequate, you might need to adjust other settings such as the resolution or frame rate, as some options might work better with image stabilization features.
- Use a Mobile App: If your action camera can connect to a smartphone, you might be able to enable or adjust image stabilization through the associated mobile app. This can sometimes provide easier access to settings.
Remember, image stabilization may not be available in all modes or resolutions, so you might need to adjust your recording settings accordingly. If you encounter any issues, refer back to your camera's user manual or the manufacturer's support website for troubleshooting tips specific to your model.
What are the different types of image stabilization in action cameras?
Image stabilization in action cameras is crucial for producing smooth and clear videos, especially in dynamic and fast-paced environments. There are several types of image stabilization technologies commonly used in action cameras:
- Optical Image Stabilization (OIS): OIS uses physical hardware within the camera lens or sensor to compensate for small shakes and movements. It adjusts the path of the light entering the camera to stabilize the image. This is particularly effective for reducing blurriness in lower-light conditions and is typically found in more premium devices.
- Electronic Image Stabilization (EIS): EIS is a software-based solution that uses algorithms to adjust and stabilize the image captured by the camera. This involves cropping and shifting the image frame digitally to reduce the perception of motion, making it less effective in low-light conditions compared to OIS. EIS is widely used in action cameras due to its cost-effectiveness and lack of moving parts.
- Digital Image Stabilization: Similar to EIS, this method relies purely on software to stabilize images. It often includes image processing techniques like pixel interpolation to reduce blur and jitter. It is usually less effective than OIS and EIS but can be sufficient for small shakes or vibrations.
- Mechanical Stabilization: This involves using gimbals or other mechanical systems to physically stabilize the camera itself. While not inherently built into the camera, many action camera users employ external gimbals for enhanced stabilization. It's highly effective but adds bulk and weight to the setup.
- Hybrid Stabilization: Some cameras use a combination of OIS and EIS to take advantage of both hardware and software stabilization benefits. The combination helps to improve overall stability, especially in more challenging shooting conditions.
Each type of image stabilization has its strengths and weaknesses, and the best choice often depends on specific use-case scenarios and user preferences. High-end action cameras may incorporate multiple stabilization technologies to provide the best possible results across various filming conditions.
What sensors are used for image stabilization in action cameras?
Image stabilization in action cameras is achieved through various types of sensors and technologies that work together to minimize the effects of camera shake and produce smooth video footage. The primary sensors and technologies used include:
- Gyroscope: This sensor detects rotational movement of the camera. It provides real-time data about the camera's orientation and helps to stabilize the image by compensating for any unwanted movement.
- Accelerometer: This sensor measures linear acceleration, including vibrations and sudden movements. It complements the gyroscope by detecting changes in speed and direction, contributing to the stabilization process.
- Image Sensor (CMOS Sensor): While not a stabilization sensor per se, the image sensor captures visual data and works with electronic stabilization algorithms to adjust the image in response to motion data received from the gyroscope and accelerometer.
- Electronic Image Stabilization (EIS): This technology processes input from the gyroscope and accelerometer along with data from the image sensor to digitally adjust frames and reduce blur or jitters in the footage.
- Optical Image Stabilization (OIS): Some action cameras may use OIS, which involves physical movement of lens elements or the image sensor itself to counteract motion detected by gyroscopes and accelerometers. However, OIS is less common in action cameras due to size constraints.
- Inertial Measurement Unit (IMU): This combines the gyroscope and accelerometer in a single module, providing comprehensive motion data that can be used for stabilization.
By integrating these sensors and technologies, action cameras are able to provide smoother, more stable footage, even in dynamic and challenging environments.