Best Smart Leak Detectors for Home Security to Buy in July 2026
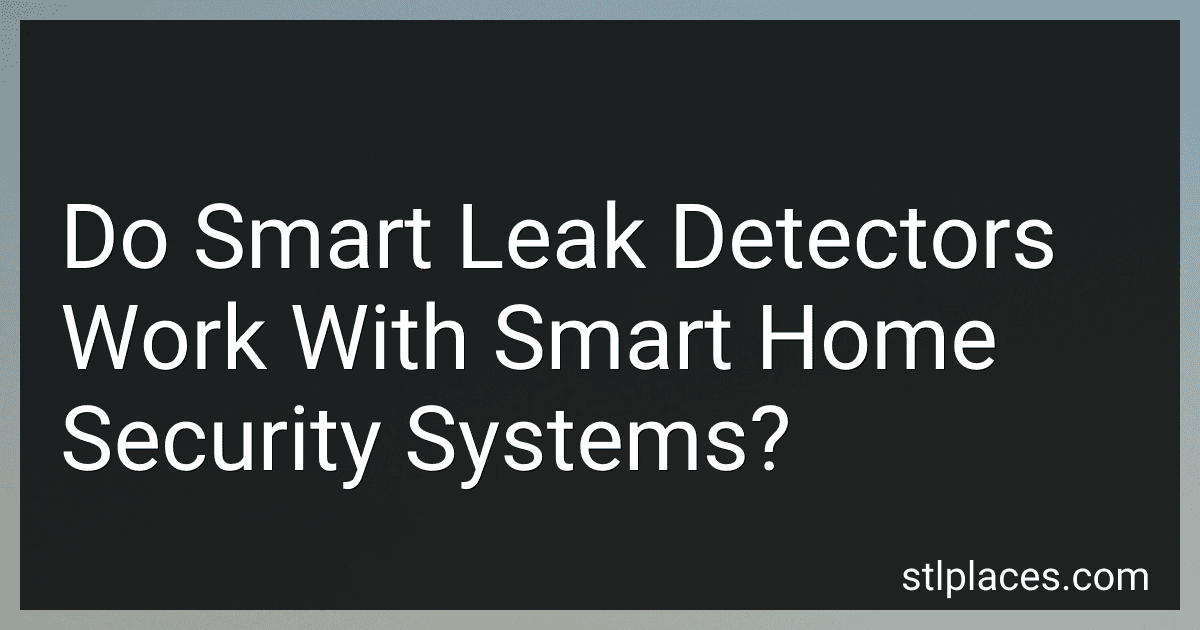
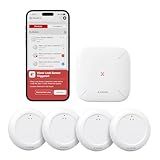
GoveeLife Upgraded Smart Water Leak Detector 1s with 1804ft Ultra-Long Range, WiFi Water Sensor with SMS/Email/APP Push and Sound Alarm, 5-Year Battery Life, Suit for Home, Basement, Kitchen, 3 Pack
-
UNMATCHED 550M RANGE: SECURE EXPANSIVE PROPERTIES FROM LEAKS SEAMLESSLY.
-
INSTANT ALERTS ANYWHERE: GET FREE SMS, APP, AND EMAIL NOTIFICATIONS FAST!
-
CUSTOMIZABLE ALERTS: ADJUST ALARM VOLUME AND SILENCE WITH ONE TAP.


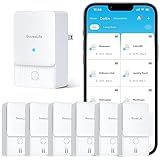
GoveeLife Upgraded Smart Water Leak Detector 1s with 1804ft Ultra-Long Range, WiFi Water Sensor with SMS/Email/APP Push and Sound Alarm,5-Year Battery Life, 5 Pack, Suit for Home, Basement, Kitchen
-
UNMATCHED 550M RANGE: SECURE EVERY CORNER OF YOUR PROPERTY WITH EASE.
-
INSTANT ALERTS: RECEIVE SMS, APP, AND EMAIL NOTIFICATIONS FOR LEAKS.
-
CUSTOMIZABLE ALERTS: ADJUST ALARM VOLUME AND SILENCE WITH A SIMPLE TAP.
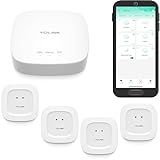
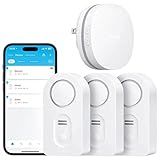
YoLink Water Leak Starter Kit: Hub + 4 Leak Sensor 1 (Silent), LoRa Long-Range, App/SMS/Email Alerts, D2D Offline Triggers, 2 AAA Up to 5-Year Battery, Compatible with Alexa/IFTTT/Home Assistant
-
COMPLETE COVERAGE: PLUG-AND-PLAY KIT SAFEGUARDS KEY AREAS IN YOUR HOME.
-
LONG-RANGE ALERTS: RELIABLE UP TO 1/4-MILE; GET INSTANT SMS/EMAIL NOTIFICATIONS.
-
OFFLINE PROTECTION: TRIGGERS ALARMS LOCALLY WITHOUT INTERNET FOR ADDED SECURITY.
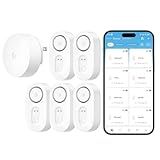
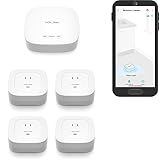
X-Sense Wi-Fi Water Leak Detector Kit, Smart Water Sensor Alarm with App Alerts and Ultra-Slim Design, Water Alarm Leak Detector for Basements, 4 Water Sensors and 1 Base Station, Model SWS0A41
- INSTANT ALERTS ANYWHERE: GET LEAKS DETECTED VIA APP ALERTS, EVEN AWAY.
- DUAL PROBES FOR EARLY DETECTION: SENSES WATER FROM ABOVE AND BELOW.
- COMPACT & WIRELESS: EASY TO PLACE ANYWHERE, 1,700 FT RANGE FOR ALERTS.
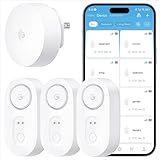
GoveeLife Premium Smart Water Leak Detector 2 with 1968ft Ultra-Long Range, WiFi Water Sensor with SMS/Email/APP Push and Sound Alarm, 5-Year Battery Life, Suitable for Home, Basement, Kitchen, 6 Pack
- INSTANT ALERTS VIA SMS, APP, & EMAIL FOR QUICK LEAK DETECTION!
- VOICE CONTROL WITH ALEXA FOR HANDS-FREE LEAK MANAGEMENT.
- LONG-RANGE CONNECTIVITY SUPPORTS UP TO 100 SENSORS FOR COVERAGE.
YoLink Water Leak Starter Kit: Hub + 4 Leak Sensor 4 (105 dB Siren), LoRa Long-Range, App/SMS/Email Alerts, D2D Offline, 2 AAA Up to 5-Year Battery, Compatible with Alexa/IFTTT/Home Assistant
-
INSTANT ALERTS: 105 DB ALARMS NOTIFY YOU ON-SITE FOR QUICK ACTION.
-
DEPENDABLE COVERAGE: LORA TECH SENDS ALERTS UP TO 1/4-MILE AWAY.
-
WORKS OFFLINE: LOCAL ALERTS EVEN WITHOUT INTERNET OUTAGES GUARANTEED.
Govee WiFi Water Leak Detector 3 Packs, Leak Alert with Remotely Email/APP Push and Sound Alarm, Smart Water Sensor with 100dB Adjustable Alarm, Suit for Home and Basement
- REAL-TIME ALERTS KEEP YOU INSTANTLY INFORMED OF WATER LEAKS.
- CONNECT UP TO 10 SENSORS FOR COMPREHENSIVE WATER PROTECTION.
- 100DB LOUD ALARM AND ADJUSTABLE VOLUME FOR ALL ENVIRONMENTS.
Smart leak detectors can indeed work with smart home security systems, providing an integrated solution for home monitoring and safety. These devices are designed to detect water leaks and alert homeowners to potential issues before they become major problems. When integrated with a smart home security system, leak detectors can send notifications to your smartphone or home automation hub, allowing you to quickly respond to leaks even when you're not at home. Many smart leak detectors are compatible with popular smart home systems and can be connected via Wi-Fi, Bluetooth, or proprietary protocols. This seamless integration allows for automated actions, such as turning off the water supply in the event of a leak, triggering alarms, or even notifying emergency contacts. Overall, incorporating smart leak detectors into a smart home security system can enhance home protection by providing comprehensive monitoring and reducing the risk of water damage.
What is the warranty period for smart leak detectors?
The warranty period for smart leak detectors can vary depending on the manufacturer and model. Generally, warranties can range from one to three years. It's crucial to check the specific product's warranty details either on the packaging, in the user manual, or on the manufacturer's website. Some brands might also offer extended warranty options or coverage for specific components.
How to integrate smart leak detectors with other IoT devices?
Integrating smart leak detectors with other IoT devices can enhance home automation and improve responses to potential water leaks. Here's a step-by-step guide to achieving this integration:
- Choose Compatible Devices: Ensure that the smart leak detectors are compatible with your existing IoT ecosystem or smart home hub, like SmartThings, HomeKit, or Google Nest.
- Use a Smart Home Hub: Use a central hub that can communicate with various IoT devices. This hub acts as a bridge between different protocols like Zigbee, Z-Wave, and Wi-Fi. Popular options include Samsung SmartThings, Amazon Echo Plus, or Apple HomeKit.
- Connect Devices to a Hub: Begin by connecting your smart leak detectors to the chosen hub. Follow manufacturer instructions for device pairing. Similarly, connect other IoT devices, such as smart lights, thermostats, or cameras, to the hub.
- Set Up Automation Routines: Use your smart home platform to create automation routines. For instance, when a leak detector senses water, it can trigger other IoT devices. Example actions: turn off a smart valve to stop water flow, alert you through smart speakers, or notify your smartphone.
- Utilize IFTTT: Use IFTTT (If This Then That) to link devices from different manufacturers if they do not support direct integration. Create applets that trigger actions based on the leak detector's status.
- Enable Notifications: Configure alerts and notifications on your smartphone via the app provided by the leak detector manufacturer or the smart home hub.
- Integrate with Voice Assistants: Link your setup with voice assistants like Amazon Alexa, Google Assistant, or Apple Siri. Use voice commands to query the status of the leak detectors or initiate routines.
- Regular Testing and Maintenance: Periodically test the setup to ensure that all devices communicate correctly and automations work as expected. Update firmware as required to maintain security and functionality.
- Advanced Integration: For advanced users, consider using platforms like Home Assistant or openHAB for more complex integrations and greater control over your IoT devices.
By correctly setting up your smart leak detectors and integrating them with other IoT devices, you can significantly enhance your home automation and quickly respond to any water leaks, protecting your home from potential water damage.
What is the benefit of a cloud-based smart leak detection system?
A cloud-based smart leak detection system offers several benefits, enhancing the efficiency and effectiveness of leak detection and management. Here are some of the key advantages:
- Real-Time Monitoring and Alerts: These systems provide continuous monitoring and can send immediate alerts when a leak is detected, allowing for quick response to prevent damage.
- Remote Access: Users can access data and control the system from anywhere with an internet connection, providing flexibility and convenience in monitoring and managing systems.
- Data Collection and Analysis: Cloud systems can store large amounts of data over time, enabling advanced analytics to identify patterns, trends, and potential system weaknesses, which can be used to improve prevention strategies.
- Scalability: Being cloud-based, these systems can easily scale up or down to meet the needs of different sizes of operations or changes in demand without significant infrastructure investment.
- Cost-Effectiveness: Reducing the need for on-premises infrastructure and maintenance, cloud-based systems can lower the overall cost of ownership. Additionally, preventing leaks early can save costs related to extensive damage repairs.
- Integration with Other Systems: Many cloud-based solutions can integrate with other building management or IoT systems, enhancing the overall smart capabilities of the infrastructure.
- Enhanced Security: Cloud providers often offer robust security measures to protect sensitive data, ensuring that leak detection systems also benefit from these protections.
- Automatic Updates and Maintenance: Software updates and maintenance can be managed centrally and automatically, reducing downtime and ensuring that the system uses the latest technologies and features.
- Environmental Benefits: By detecting leaks early and accurately, these systems help minimize water waste, contributing to more sustainable water management practices.
- Regulatory Compliance: Leveraging accurate and reliable data collection, these systems can help organizations comply with regulatory requirements regarding leak detection and environmental protection.
Overall, cloud-based smart leak detection systems offer a more efficient, comprehensive, and user-friendly approach to managing leaks, helping prevent damage, save costs, and contribute to sustainable practices.
How to set up alerts for a smart leak detector in a security system app?
Setting up alerts for a smart leak detector within a security system app typically involves a few steps. While the exact process can vary slightly depending on the brand and model of your leak detector and security system app, the general workflow is usually quite similar. Below are detailed steps to help guide you through the process:
- Install the Leak Detector: Begin by installing the leak detector according to the manufacturer’s instructions. Place it in areas where water leaks are likely, such as near sinks, water heaters, or washing machines.
- Connect the Device: Ensure the leak detector is connected to your home Wi-Fi network. This often requires a smart home hub if your system uses one, or direct connection via a proprietary protocol.
- Download the App: Download and install the security system app on your smartphone or tablet. Ensure it's the official app for your security system to prevent compatibility issues.
- Create an Account/Login: Open the app, and either log in to your existing account or create a new one if you don’t have one already.
- Add the Leak Detector to the System: Navigate to the section of the app where you can add new devices. This might be labeled as "Devices", "Settings", or similar. Follow the app’s instructions to add the leak detector, ensuring your phone or tablet is connected to the same Wi-Fi network as the leak detector if required.
- Configure Alerts: Once the leak detector is successfully added, navigate to the alerts or notifications settings within the app. Enable notifications or alerts specifically for the leak detector. You may be given options for how you’d like to receive alerts (e.g., push notifications, email, SMS). Some systems allow you to customize the conditions for alerts, such as alert sensitivity or frequency.
- Test the System: Perform a test to ensure the alerts are working properly. You can simulate a leak if the device instructions allow for it or manually trigger the detector according to the user manual.
- Additional Settings (Optional): Some advanced systems offer additional settings like integration with other smart home devices (e.g., automatically shutting off water supply in conjunction with a smart valve). Check if there are any app-specific features such as alert scheduling, volume adjustment, or integration with other home automation systems.
- Review and Save Configurations: Review all settings to ensure they align with your preferences and save any changes made.
- Monitor and Maintain: Regularly check the app to monitor the status of the leak detector and update software or firmware as needed to ensure optimal performance.
Remember to consult the user manual of your specific device and app for the most accurate instructions, as user interfaces and functionalities can differ significantly across various brands and models.
How to integrate a smart leak detector with a smart home security system?
Integrating a smart leak detector with a smart home security system can enhance your home's protection and offer greater peace of mind. Here's a general guide to help you through the integration process:
- Choose Compatible Devices: Ensure that the smart leak detector is compatible with your existing home security system or ecosystem. Check whether both devices support the same smart home platform such as Apple HomeKit, Google Home, Alexa, Zigbee, or Z-Wave.
- Set Up Each Device Individually: Follow the manufacturer's instructions to set up the smart leak detector and ensure that it is connected to your Wi-Fi network or smart hub. Similarly, make sure your smart home security system is fully operational and connected.
- Use a Smart Home Hub or Platform: If both devices are compatible with a smart home hub (like SmartThings or Hubitat) or a platform (like Apple HomeKit, Google Home, or Amazon Alexa), add both the leak detector and the security system to this hub or platform. Using the hub's app, you'll often be able to connect and control these devices from a single interface.
- Configure Automations/Scenes: Use the smart home app associated with your hub or platform to create automations or scenes. For instance, you can set up an automation that turns on the security system sirens or sends a smartphone alert if a water leak is detected. Some hubs allow you to program more complex routines, such as shutting off the main water supply if a leak is detected.
- Test the System: After setting up the integration and automation, test the system to ensure it operates as expected. Simulate a leak (without causing actual water damage) to see if the security system responds appropriately.
- Explore IFTTT or Zapier: If direct integration isn't available, you might use a service like IFTTT (If This Then That) or Zapier to create an indirect connection between the two devices. These platforms allow you to set up triggers that can initiate actions across different devices and services.
- Stay Updated: Keep both the smart leak detector and the smart home security system updated with the latest firmware. This ensures they are functioning optimally and can take advantage of any new integration features.
- Consult Manufacturer Support: If you're having difficulty with integration, consult the user manuals or contact customer support for both the leak detector and security system. They can provide device-specific guidance or potential solutions.
By following these steps, you can integrate a smart leak detector with your home security system for enhanced protection against water damage.
What is the process to connect a leak detector to a smart home hub?
Connecting a leak detector to a smart home hub typically involves several steps to ensure compatibility and seamless integration. Here’s a general process you can follow, though specifics may vary depending on the brands and models of your devices:
- Check Compatibility: Ensure that the leak detector is compatible with your smart home hub. Check the manufacturer’s specifications for both devices.
- Installation: Physically install the leak detector according to the manufacturer's instructions. This often involves placing it in a location where water leaks are likely, such as under sinks or near appliances.
- Power On: Make sure the leak detector is powered on. This might involve inserting batteries or connecting it to a power source depending on the model.
- Configure the Hub: Access the smart home hub’s control app. Ensure your hub is set up and operational, connected to your network.
- Pairing Mode: Put the leak detector and the smart home hub into pairing mode. Often, this involves pressing a button on the device or using the hub’s app. Follow specific instructions provided by manufacturers.
- Add Device: Use the smart home hub's app to add new devices. Navigate to the section for adding devices, and select the appropriate type or brand of your leak detector.
- Follow Instructions: The app will typically guide you through the process of connecting the leak detector. You may need to press buttons on the detector or the hub, or input codes provided by the app.
- Testing: Once connected, test the setup by triggering the leak detector. Ensure that notifications or alerts are sent to your smartphone or other connected devices.
- Configure Alerts: Set up notifications within the hub’s app. Decide how you want to be alerted in case of a leak, whether it’s through push notifications, emails, or text messages.
- Integration with Other Devices: If your smart home system allows, integrate the leak detector with other devices or routines (e.g., turning off water supply smart valves if a leak is detected).
Refer to the manuals or support resources for your specific devices for detailed steps, as the processes can vary between different ecosystems like Apple HomeKit, Google Home, or Amazon Alexa.