Best Electric Scooter Accessories to Buy in July 2026
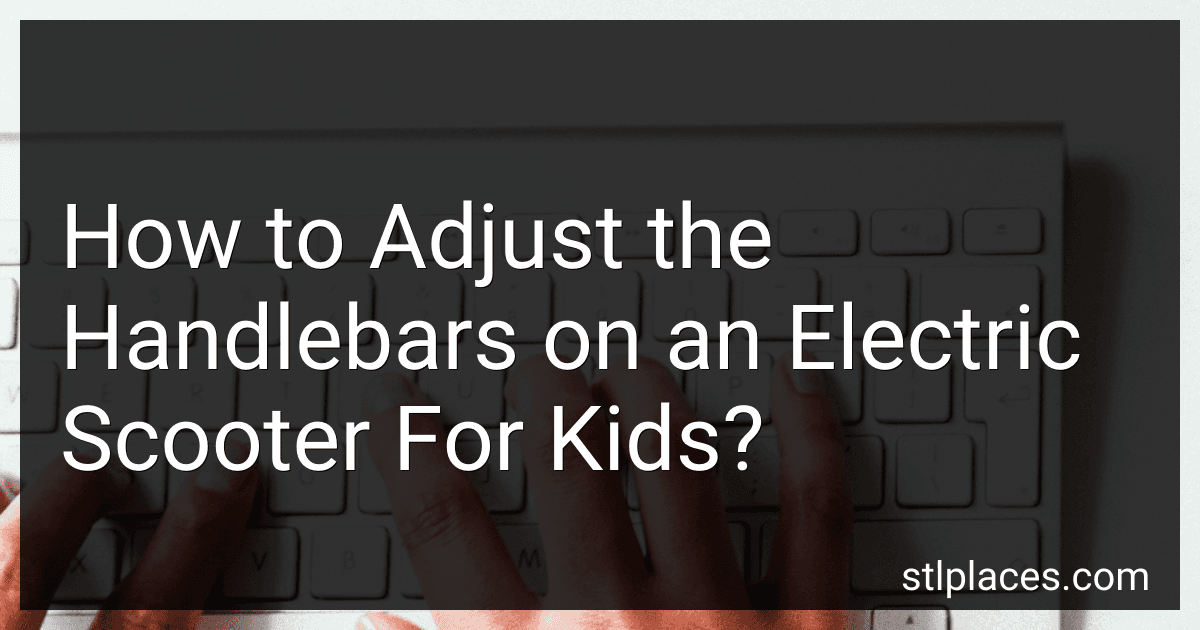
Ainiv Electric Scooter Handlebar for Kids, Child Safe Handrail, Adjustable Children's Handle Grip, Aluminum Alloy Armrest Handle Bar for Xiaomi Mijia M365 Electric Scooter Skateboard Accessory Parts
- HEIGHT-ADJUSTABLE GRIP FOR TAILORED SAFETY AS YOUR CHILD GROWS!
- DURABLE, RUST-PROOF ALUMINUM WITH NON-SLIP GRIP FOR SECURE RIDES.
- EASY TO INSTALL WITH NO DAMAGE; VERSATILE FOR BAGS AND OTHER ITEMS!


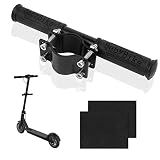
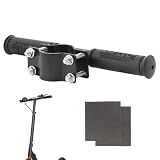
Yungeln Scooter Kids Handle Grip Bar Non-Slip Adjustable Child Safe Holder Kids Handrail Compatible for Xiaomi M365 / Pro 1S Scooter
- DURABLE ALLOY BUILD: CRAFTED FROM HIGH-QUALITY ALUMINUM, RUST-RESISTANT.
- ADJUSTABLE FOR SAFETY: HEIGHT ADAPTABLE FOR KIDS TO RIDE SAFELY WITH PARENTS.
- COMFORTABLE GRIP: SILICONE NON-SLIP HANDLE ENSURES SECURE CONTROL WHILE RIDING.
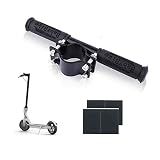
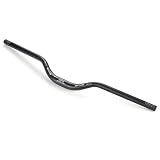
Electric Scooter Folding Handlebar, Universal Steering Handlebar 25.4/31.8mm, Aluminum Alloy 90° Adjustable Crossbar, Length 600mm Light Weight 533g, For Electric Bicycles, Cycles
-
LIGHTWEIGHT & DURABLE: 40% STRONGER, 30% LIGHTER FOR EFFORTLESS RIDING.
-
QUICK-RELEASE DESIGN: FOLD & FIX IN 3 SECONDS-PERFECT FOR URBAN COMMUTERS.
-
SPACE-SAVING: FOLDS TO 20% OF ITS SIZE-FITS EASILY IN CAR TRUNKS OR TRANSIT!
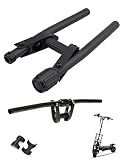
BUCKLOS Mountain Bike MTB Handlebars 25.4/31.8mm - 20/30/50/90/100/120/160mm Rise Aluminum Alloy Handlebar - 720/780mm Extra Long Bicycle Riser HandleBars for EBike Folding Bike Downhill Racing
- LIGHTWEIGHT 6061 ALUMINUM ALLOY FOR ENHANCED DURABILITY AND FEEL.
- OPTIMAL WIDTHS (580/620/720/780MM) FOR SUPERIOR MOUNTAIN BIKE CONTROL.
- ERGONOMIC DESIGN ENSURES COMFORT AND STABILITY DURING EVERY RIDE.
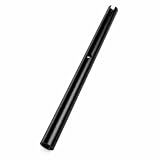
SPYMINNPOO Electric Scooter Handle Bar Stainless Steel Handlebar for Mijia M365 Electric Scooter Accessories, SPYMINNPOOgn0odcga3e
- SUPERIOR CRAFTSMANSHIP ENSURES A SEAMLESS AND RELIABLE RIDING EXPERIENCE.
- DURABLE STAINLESS STEEL DESIGN GUARANTEES LONG-LASTING PERFORMANCE.
- EASY INSTALLATION ENHANCES FUNCTIONALITY FOR MAJOR SCOOTER MODELS.

Tbest Electric Scooters Handlebar, Electric Scooters Handle Bar Handle for Mijia Replacement Repair Accessories
- UPGRADE YOUR RIDE: NEW HANDLEBAR FOR OPTIMAL PERFORMANCE!
- BUILT TO LAST: PREMIUM ALUMINUM ALLOY OFFERS UNMATCHED DURABILITY.
- PERFECT FIT: DESIGNED SPECIFICALLY FOR MIJIA ELECTRIC SCOOTERS.
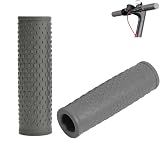
YehVeh 2 Pack Electric Scooter Handle Grips E-Scooter Handlebar Grips Non-Slip-Rubber Hand Grips for VOLPAM Hiboy S2 Xiaomi M365 Pro Segway Ninebot E2 Folding Commuter Electric Scooter Handle Bar
- PERFECT FIT FOR M365'S SLOTTED HANDLEBAR DESIGN.
- SOFT, COMFORTABLE RUBBER ENHANCES YOUR RIDING EXPERIENCE.
- QUICK INSTALL/REMOVAL FOR EFFORTLESS SCOOTER UPGRADES.
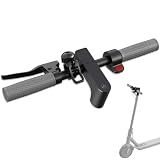
Felixstory Scooter Handlebar Set Fit for Xiaomi M365/ 1S/ Pro/Pro 2, Scooter Handle bar with Dashboard, Bell, Handbrake, Accelerator, Folding Clip
-
ORIGINAL REPLACEMENT FOR XIAOMI SCOOTERS: COMFORT & SPEED UP TO 27KM/H
-
CLEAR DASHBOARD DISPLAY: SAME FUNCTIONS AS ORIGINAL UNIT
-
EASY INSTALL: ALL ACCESSORIES INCLUDED, NO EXTRA TOOLS NEEDED
9 Inch Bike Backseat Handlebar, Electric Scooter Handle Grips, Bicycle Back Seat Safety Armrest, Bike Training Handle for Pipe 34.9mm-60mm Bicycles and Electric Scooters Diameter, Black
To adjust the handlebars on an electric scooter for kids, start by locating the screw or bolt that holds the handlebars in place. Use a screwdriver or Allen wrench to loosen the screw or bolt, allowing you to adjust the height of the handlebars to a comfortable position for the child. Once you have adjusted the handlebars to the desired height, tighten the screw or bolt back in place securely to ensure the handlebars stay in position while riding. Make sure the handlebars are straight and aligned with the front wheel before tightening the screw or bolt completely. Finally, test the scooter to ensure that the handlebars are adjusted correctly and that the child can safely and comfortably operate the scooter.
How to test the handlebar adjustment on an electric scooter for kids?
- Start by making sure the scooter is turned off and in a stable position.
- Loosen the bolts that secure the handlebar to the scooter frame. This will allow you to adjust the height and position of the handlebar.
- Adjust the handlebar to a height that is comfortable for the child using the scooter. The handlebar should be at a level where the child can comfortably reach and grip it while standing on the scooter.
- Tighten the bolts securely to keep the handlebar in place. Make sure the handlebar is straight and aligned with the scooter frame.
- Once the handlebar is adjusted, have the child stand on the scooter and hold onto the handlebar. Have them practice steering and maneuvering to ensure that the handlebar is at the correct height and position for their comfort and control.
- Test the scooter by having the child ride it around in a safe and controlled area. Pay attention to how the child feels while using the scooter and whether they have any difficulty controlling it with the adjusted handlebar.
- Make any necessary adjustments and retest the scooter until the handlebar is at a comfortable and safe position for the child.
What is the recommended maintenance schedule for handlebars on an electric scooter for kids?
The recommended maintenance schedule for handlebars on an electric scooter for kids may vary depending on the brand and model of the scooter. However, a general maintenance schedule for handlebars on an electric scooter for kids may include the following:
- Check the handlebars for any signs of damage or wear on a regular basis, at least once a month.
- Tighten any loose screws or bolts on the handlebars as needed to prevent accidents.
- Wipe down the handlebars with a damp cloth to remove any dirt or debris that may have accumulated.
- Lubricate the moving parts of the handlebars, such as the folding mechanism or the grips, with a non-corrosive lubricant to ensure smooth operation.
- Inspect the brake levers and cables to make sure they are in good working condition and adjust or replace them if necessary.
- Replace the handlebar grips if they are worn out or damaged to ensure a comfortable and secure grip while riding.
It is important to follow the manufacturer's recommendations for maintenance and care of the electric scooter, as neglecting regular maintenance could lead to safety hazards and decrease the lifespan of the scooter.
What is the difference between adjusting handlebars for kids and adults on an electric scooter?
The primary difference between adjusting handlebars for kids and adults on an electric scooter is the height and reach of the handlebars.
For kids, the handlebars need to be lower and closer to the scooter deck to accommodate their smaller size and shorter arms. This ensures that they can comfortably reach and control the handlebars while riding.
For adults, the handlebars need to be higher and further from the scooter deck to accommodate their larger size and longer arms. This allows for a more comfortable and ergonomic riding position for adults.
In addition to the height and reach of the handlebars, the grips may also be different for kids and adults, with kids’ grips being smaller and designed for smaller hands.
Overall, adjusting handlebars for kids and adults on an electric scooter is essential for safety, comfort, and proper control while riding.
How to avoid common mistakes when adjusting handlebars on an electric scooter for kids?
- Read the manufacturer's instructions: Before adjusting the handlebars on an electric scooter, always refer to the manufacturer's instructions or user manual. This will ensure that you are following the correct steps and not making any mistakes.
- Use the right tools: Make sure you have the appropriate tools for adjusting the handlebars, such as an Allen key or screwdriver. Using the wrong tools can damage the scooter and cause more problems.
- Check the handlebar height: Adjust the handlebars to a height that is comfortable for your child to hold onto while riding the scooter. Make sure the handlebars are not too high or too low, as this can affect control and stability.
- Tighten the bolts securely: After adjusting the handlebars, make sure to tighten the bolts securely to prevent them from loosening while riding. Loose bolts can cause the handlebars to wobble or detach, leading to accidents.
- Test the scooter: Before letting your child ride the scooter, test the handlebar adjustment by moving it from side to side and ensuring that it is stable and secure. Make any necessary adjustments before allowing them to ride.
- Regularly check and maintain the handlebars: To prevent any issues with the handlebars, make sure to regularly check and maintain them. Inspect for any signs of wear or damage, and adjust or replace as needed.