Best Headlamp Accessories to Buy in July 2026
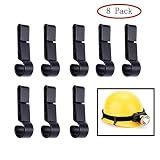
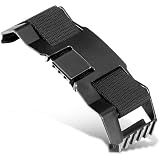
Headlamp Clips Hook Hard Hat Light Clips,Hardhat Headlamp Accessory
- SECURELY MOUNT HEADLAMPS ON HARD HATS TO PREVENT FALLS.
- SIMPLE ATTACHMENT FOR ANY HEADLAMP; EASY TO USE AND ADJUST.
- LIGHTWEIGHT, DURABLE CLIPS ENSURE COMFORT WITHOUT ADDED PRESSURE.


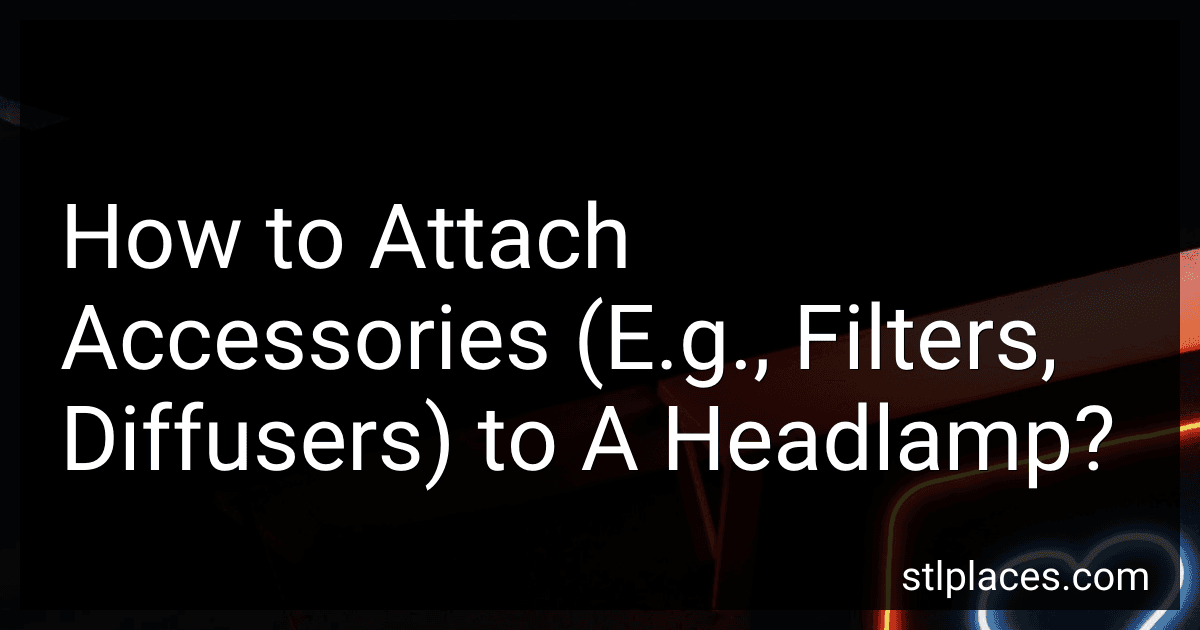
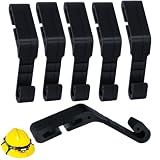
Lenporl 12 Pcs Hard Hat Light Clips,Helmet Light Holder Hook for Headlamp,Anti-Slip Stable Full Brim Hardhat Headlamp Accessory for Worker(6Longer for Back+6 Shtort for Front)
-
SECURE FIT: LIGHTWEIGHT CLIPS ENSURE HEADLAMPS STAY IN PLACE SAFELY.
-
QUICK INSTALLATION: EASY-TO-USE CLIPS FOR HASSLE-FREE HEADLAMP SETUP.
-
DURABLE QUALITY: HEAT-RESISTANT CLIPS MADE TO WITHSTAND TOUGH CONDITIONS.
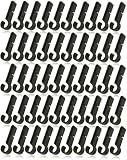
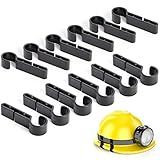
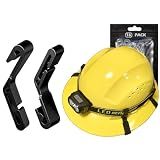
Hyamass 50Pc Helmet Clips for Headlamp,Narrow-Edged Hardhat and Safety Cap
- RUGGED COMFORT: LIGHTWEIGHT POLYMER CLIPS WITHSTAND TOUGH JOB CONDITIONS.
- QUICK INSTALLATION: TOOL-FREE SETUP IN JUST 10 SECONDS - EASY AND EFFICIENT!
- UNIVERSAL FIT: COMPATIBLE WITH MOST HELMETS FOR VERSATILE WORKSITE USE.
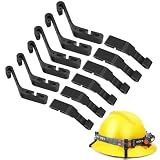
Helmet Clips for Headlamp,Headlight Hook on Narrow-Edged Hardhat Safety Cap(8pack)
- SECURELY ATTACH HEADLAMPS TO HARD HATS WITH EASY-TO-USE CLIPS.
- LIGHTWEIGHT (0.1OZ) DESIGN ENSURES COMFORT DURING LONG USE.
- 8 CLIPS INCLUDED FOR VERSATILE USE AND SHARING WITH FRIENDS!
Dekeliy 6 Pcs Hard Hat Light Clips, Anti-Slip Stable Hardhat Headlamp Light Holders,Hard Hat Hook Accessories for Headlamp
-
SECURE AND STABLE: SPECIAL BUCKLE DESIGN PREVENTS SLIPPING AND LOSS.
-
DURABLE AND LIGHTWEIGHT: HIGH-QUALITY POLYMER FITS ALL FULL BRIM HARD HATS.
-
EASY INSTALL/REUSE: QUICK CLIP-ON DESIGN FOR HASSLE-FREE USE AND REMOVAL.
Hard Hat Light Clips 8 Pack,Hardhat Headlamp Clips for Full Brim Helmets, Tool-Free Hardhat Accessories Hard Hat Headlamp Clips for Construction, Mining, Firefighting, Cycling
- TOOL-FREE CLIPS INSTALL IN SECONDS FOR HASSLE-FREE CONVENIENCE.
- BUILT TO WITHSTAND HEAT AND RAIN FOR TOUGH WORKSITE DURABILITY.
- SECURE LOCKING DESIGN KEEPS GEAR IN PLACE FOR MAXIMUM SAFETY.

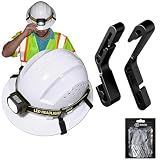
Taaib™ 10-Pack Multipurpose Full Brim Hard Hat Clips Hooks for Headlamp Light and Safety Goggle Strap Holder, Light Mount, 2-in-1 Safety Helmet Accessories, Compatible with MSA V-Gard
- VERSATILE CLIPS: SECURE HEADLAMPS & GOGGLES FOR ULTIMATE CONVENIENCE.
- FEATHER-LIGHT COMFORT: ENJOY ALL-DAY WEAR WITHOUT ADDED BULK.
- QUICK INSTALL: TOOL-FREE SETUP IN SECONDS, NO DOWNTIME NEEDED.
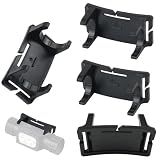
Lenporl 5 PCS Headlamp Holder Mounting Clip Buckle Headlight Flashlight Mount Stand for Slonik and Most Other 22mm -26mm LED Headlamps Flashlight Rechargeable (Not Include Head Lamp)
- SECURE ANTI-SLIP DESIGN: LOCK YOUR HEADLAMP FIRMLY FOR ANY ADVENTURE!
- UNIVERSAL FIT: COMPATIBLE WITH MOST 22-26 MM LED HEADLAMPS!
- LIGHTWEIGHT & PORTABLE: IDEAL FOR CAMPING, HIKING, AND NIGHT WORK!
48-73-1090 Hard Hat Headlamp Mount Compatible with B-OLT Hard Hats, Fits for Most Headlamps, Includ Webbing (1)
- SEAMLESS FIT FOR BOLT HARD HATS & MOST HEADLAMPS FOR CONVENIENCE.
- SECURE ATTACHMENT BOOSTS SAFETY AND OPERATIONAL EFFICIENCY ON SITE.
- DURABLE MATERIALS ENSURE LONG-LASTING PERFORMANCE AND RELIABILITY.
Hard Hat Light Clips 16 Pack,Hardhat Headlamp Clips for Full Brim Helmets, Tool-Free Hardhat Accessories Hard Hat Headlamp Clips for Construction, Mining, Firefighting, Cycling
- TOOL-FREE SETUP: CLIP ON IN SECONDS, NO TOOLS REQUIRED!
- DURABLE DESIGN: HIGH-TEMP & WEATHER RESISTANT FOR TOUGH CONDITIONS.
- LIGHTWEIGHT & COMFY: MINIMAL WEIGHT ENSURES ALL-DAY WEARABILITY.
To attach accessories such as filters or diffusers to a headlamp, follow these general steps:
- First, ensure that your headlamp is turned off or disconnected from any power source to prevent accidental injury.
- Identify the specific attachment mechanism for your headlamp. Most headlamps have a bezel or lens housing that can be unscrewed or popped off to access the lamp or bulb.
- Once you have located the bezel or lens housing, carefully remove it according to the manufacturer's instructions. This may involve unscrewing the bezel or pressing on specific tabs to release it.
- Once the bezel or lens housing is removed, you may find additional components such as a reflector, lens, or bulb. Be cautious and avoid touching the bulb directly, as it can get hot and cause burns.
- Attach the desired accessory, such as a filter or diffuser, to the headlamp. Filters are often mounted on a frame or holder that corresponds to the headlamp's size, while diffusers may slide or clip onto the lens.
- Ensure that the accessory is securely attached to the headlamp, avoiding any loose or unstable connections that could potentially fall off during use.
- Once the accessory is attached, carefully reassemble the headlamp by placing the reflector, lens, or bulb back into their original positions. Ensure that all elements fit snugly.
- Finally, secure the bezel or lens housing back onto the headlamp by screwing it on or pressing it firmly until it clicks into place, depending on the specific design.
- Once you have successfully attached the accessory and reassembled the headlamp, you can now safely use your headlamp with the selected accessory, allowing for custom lighting effects or filtering.
Note: It is crucial to consult your headlamp's specific instructions and guidelines provided by the manufacturer for accurate attachment instructions, as different headlamp models may have varying mechanisms and procedures.
How to clip a filter holder onto a headlamp?
To clip a filter holder onto a headlamp, follow these steps:
- Identify the filter holder: The filter holder is a small plastic or metal frame with a clip mechanism.
- Locate the front of the headlamp: Look for the front-facing section of the headlamp where the light beam emerges.
- Align the filter holder: Position the filter holder so that it aligns with the front of the headlamp. The clip mechanism should be facing towards the headlamp's front.
- Insert the filter holder: Insert the bottom section of the filter holder into the top section of the headlamp, ensuring a snug fit.
- Secure the clip: Once the filter holder is inserted, push down on the clip mechanism until it clicks or snaps into place. This will secure the filter holder onto the headlamp.
- Test the stability: Gently shake the headlamp to make sure the filter holder is securely attached and won't fall off during use.
Note: It is important to check the user manual or specific instructions provided with your headlamp and filter holder. Different models may have slightly different attachment mechanisms, so it's essential to follow the manufacturer's guidelines for a proper fit.
How to fasten a gel onto a headlamp?
To fasten a gel onto a headlamp, you can follow the steps below:
- Choose a gel: The first step is selecting a gel that fits your requirements. Gels come in various colors and provide different effects, such as diffusing or correcting the light's color temperature.
- Cut the gel: Once you have chosen the gel, cut it to match the size of your headlamp's lens. Lay the gel flat and trace the outline of the lens onto the gel using a marker. Ensure the gel is slightly larger than the lens to allow for attachment.
- Clean the lens: Before attaching the gel, clean the headlamp's lens with a microfiber cloth to ensure there is no dust or debris.
- Apply adhesive: Apply a thin, even layer of adhesive or heat-resistant tape to the backside of the gel. Make sure not to cover the entire surface, as the adhesive might show through the gel and affect the light output.
- Attach the gel: Gently press the adhesive side of the gel onto the lens of the headlamp. Start from one edge and slowly work your way across, applying even pressure to ensure it sticks properly. Smooth out any air bubbles or wrinkles as you go.
- Trim the excess: If there is any excess gel extending beyond the edge of the lens, carefully trim it off using scissors or a utility knife. Be cautious while cutting to avoid damaging the lens.
- Test the headlamp: Once the gel is securely attached, turn on the headlamp and check if the light passes through the gel as desired. Inspect for any uneven lighting or color distortion.
By following these steps, you should be able to successfully fasten a gel onto your headlamp and achieve the desired lighting effect.
How to mount a diffuser holder onto a headlamp?
Mounting a diffuser holder onto a headlamp can vary depending on the specific model and design of the headlamp. However, here are some general steps to mount a diffuser holder onto a headlamp:
- Determine the compatibility: Ensure that the diffuser holder you have is compatible with your specific headlamp model. Check the size, shape, and connections to confirm compatibility.
- Gather the necessary tools: Prepare the tools required for mounting the diffuser holder, such as a screwdriver or Allen wrench if needed.
- Remove the headlamp bezel: Some headlamps have a removable bezel that covers the front of the light. Use a screwdriver or rotating mechanism (if present) to remove the bezel carefully.
- Attach the diffuser holder: Align the diffuser holder with the headlamp's mounting points or brackets. In some cases, the holder may come with specific screws or clips that need to be inserted through corresponding holes or slots. Use the provided hardware or follow the manufacturer's instructions for proper attachment.
- Secure the holder: Tighten the screws or fasteners securely to ensure that the diffuser holder is firmly attached to the headlamp. Be careful not to overtighten and risk damaging the holder or headlamp.
- Test and fine-tune: After mounting the diffuser holder, reassemble the headlamp bezel if it was removed. Test the headlamp to ensure that the diffuser holder is fitted correctly and that the light distribution meets your requirements. Make any necessary adjustments or repositioning if needed.
Remember to always consult the user manual or specific instructions provided by the manufacturer for your particular headlamp model, as the mounting process may vary.