
Best Mouse Pads Cleaners to Buy in July 2026
Vayzer Gaming Labs Gaming Peripheral Wipes, Keyboard Cleaner & Electronic Wipes, Safe for Controllers, Keyboards, Laptops, PCs & Mice – Alcohol-Free, Unscented, Paraben-Free, Cleaning Wipes - 50 Pack
- ALCOHOL-FREE WIPES PROTECT YOUR GEAR AND ENSURE SAFE USE DAILY.
- UNSCENTED FORMULA KEEPS YOUR FOCUS ON THE GAME, NOT DISTRACTIONS.
- CONVENIENT TRAVEL PACK WITH 50 WIPES FOR QUICK CLEANUPS ANYWHERE.


Glorious Keyboard, Mouse & Mousepad Cleaning Kit - Included Brush, Blower & Microfiber Cloth (GLO-Acc-CK)
- COMPACT BRUSH: PERFECT SIZE FOR QUICK CLEANUPS OF ELECTRONICS.
- POWER DUSTER: STRONG AIRFLOW TARGETS DUST IN HARD-TO-REACH AREAS.
- MICROFIBER CLOTH: SAFELY CLEANS WITHOUT SCRATCHING DELICATE SURFACES.
![Fintie Screen Cleaning Pad, [4 Pack] Soft Cloth Wipes Screen Cleaner with Elastic Strap for iPad, iPhone, MacBook, Tablets, Laptop (Blossom)](https://cdn.blogweb.me/1/51nkg_Hsb_3_L_SL_160_02f6efeab3.jpg)
Fintie Screen Cleaning Pad, [4 Pack] Soft Cloth Wipes Screen Cleaner with Elastic Strap for iPad, iPhone, MacBook, Tablets, Laptop (Blossom)
- UNIVERSAL COMPATIBILITY FOR ALL TOUCH SCREEN DEVICES AND SIZES.
- VEGAN LEATHER & MICROFIBER FOR EFFECTIVE CLEANING WITHOUT SCRATCHES.
- DURABLE, REUSABLE, AND COMES IN VIBRANT COLORS-PERFECT FOR ALL!
Hystar Aero Spray for Glass Mousepads | Instantly Increase Glide Speed | Compatible with Popular Brands | Non‑Streak Formula | Safe for Optical/Laser Mice
-
SIX-MONTH DURABILITY: REAPPLY QUICKLY WITH NO BUILDUP OR WEAR.
-
SAFE FOR ALL GLASS TYPES: ETCHED, FROSTED, OR POLISHED FINISHES.
-
LEAVES NO RESIDUE: QUICK APPLICATION WITH NO STREAKS OR GREASINESS.
ProCase 4 Pack Screen Cleaning Pad, Elastic Strap Soft Cloth Wipes Screen Cleaner for iPad, iPhone, MacBook, Tablets, Laptop, Cellphone, Computer, Camera, TV Screen -Color Mixed
- COMPATIBLE WITH ALL TOUCH DEVICES: IPADS, IPHONES, SAMSUNG, AND MORE.
- REUSABLE PAD REMOVES DUST AND SMUDGES EFFORTLESSLY WITHOUT CHEMICALS.
- COMPACT 3X3 INCHES DESIGN WITH HANDY PU LEATHER HANDLE FOR EASY USE.

Bonnie K. Hunter's Quilter's Tech Set: Microfiber Mouse Mat, Cleaning Cloth, Mini Cleaner & Pouch
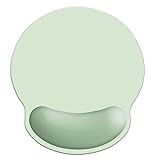
LONNAONE Wrist Rest Support Mouse Pad,Ergonomic Memory Foam Mouse Mat 9x10in Non-Slip Rubber Base Pain Relief Mousepad for Computer, Laptop(Light Green Foam)
- ERGONOMIC SUPPORT REDUCES WRIST PAIN FOR LONG WORKING HOURS.
- NON-SLIP BASE ENSURES STABILITY ON ANY SURFACE FOR BETTER CONTROL.
- VIBRANT DESIGN AND PORTABILITY MAKE IT A PERFECT GIFT OPTION!
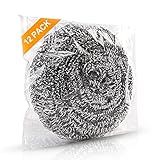
ovwo 12Pack Upgraded Steel Wool Scrubbers - Premium Stainless Steel Scrubber, Metal Scouring Pads, Steel Wool Pads, Kitchen Cleaner, Heavy Duty Cleaning Supplies - Especially for Tough Cleaning
-
DURABLE 410 STAINLESS STEEL: RESISTS RUST AND STAYS TIGHTLY WOUND.
-
HEAVY-DUTY CLEANING: TACKLES GREASE AND STUBBORN STAINS EFFORTLESSLY!
-
12-PACK VALUE: INDIVIDUALLY WRAPPED FOR CLEANLINESS AND EASY STORAGE.
Keeping your mouse pad clean is crucial for optimal gaming performance. Here's how you can ensure your mouse pad remains in top condition:
- Dust Removal: Use a soft-bristled brush or can of compressed air to remove any loose dust or debris from the surface of the mouse pad. Brush gently in one direction to prevent the debris from embedding further into the pad.
- Stain Spotting and Pre-Treating: Inspect the mouse pad for any visible stains or marks. If you notice any, pre-treat them with a mild stain remover or a mixture of equal parts water and vinegar. Allow the pre-treatment to sit for a few minutes to break down the stain.
- Hand-Washing: Fill a basin or sink with lukewarm water and add a small amount of mild detergent. Submerge the mouse pad in the soapy water and gently agitate it using your hands. Pay close attention to any stained areas, and continue to work the detergent into the pad's surface.
- Rinse: Thoroughly rinse the mouse pad under cool running water to remove all traces of detergent. Continue rinsing until the water runs clear without any suds.
- Drying: Squeeze out excess water from the mouse pad, being careful not to wring or twist it too forcefully. Lay the pad flat on a clean and absorbent towel. Roll the towel with the mouse pad inside to gently squeeze out remaining moisture. Repeat this step with a dry towel if necessary.
- Air-Drying: Finally, leave the mouse pad to air dry completely. Avoid using a hairdryer or placing it in direct sunlight, as excessive heat can damage the pad's surface.
Remember that the frequency of cleaning depends on how frequently you use the mouse pad and your environment. Regular cleaning can enhance accuracy, responsiveness, and longevity, ensuring you get optimal gaming performance.
What is the ideal way to store a mouse pad when not in use?
The ideal way to store a mouse pad when not in use is to lay it flat on a clean and dust-free surface. This helps to maintain its shape and prevents it from curling or warping. Avoid storing it in a folded or rolled-up position, as this can cause permanent creases or damage. Additionally, it is recommended to keep the mouse pad away from excessive heat or moisture to ensure its longevity.
How to clean a mouse pad with RGB lighting?
Cleaning a mouse pad with RGB lighting requires some extra care to avoid damaging the lighting components. Here's a step-by-step guide on how to clean your RGB mouse pad effectively and safely:
- Turn off and unplug the mouse pad: Before starting the cleaning process, make sure to turn off and unplug the mouse pad from the power source. This will help protect the lighting components during the cleaning process.
- Remove any loose debris: Gently shake your mouse pad upside down over a trash bin or use a soft brush to remove any loose debris, crumbs, or dirt. This will help prevent scratching the surface during the cleaning.
- Prepare a mild cleaning solution: Mix a small amount of mild detergent or liquid soap with warm water in a bowl or sink. Make sure to use a gentle, non-abrasive cleaning solution that won't harm the RGB lighting or the pad's surface.
- Dampen a soft cloth or sponge: Take a soft cloth or sponge and dip it into the cleaning solution. Squeeze out any excess liquid to ensure the cloth is damp but not dripping.
- Gently wipe the mouse pad: Wipe the surface of the mouse pad with the damp cloth or sponge in a gentle, circular motion. Avoid applying excessive pressure as it can damage the RGB lighting or the surface.
- Clean difficult spots: For stubborn stains or dirt, you can lightly scrub the affected areas with a soft-bristled toothbrush dipped in the cleaning solution. Be gentle and ensure not to scratch the surface or damage the lighting.
- Rinse and remove soap residue: After cleaning, rinse the mouse pad thoroughly with clean, warm water. Make sure to remove any soap residue to avoid sticky or slippery surfaces.
- Air dry or pat dry: Gently pat the mouse pad with a clean, absorbent towel to remove excess moisture. Then, set it aside to air dry completely. Avoid using a hairdryer or any additional heat source, as it may damage the lighting components.
- Reconnect and test: Once the mouse pad is completely dry, reconnect it to the power source and test the RGB lighting to ensure it is functioning properly.
- Regular maintenance: To keep your RGB mouse pad clean, it is recommended to perform regular maintenance. Avoid eating or drinking near the mouse pad, and periodically remove loose debris to prevent buildup.
Remember to refer to the manufacturer's instructions for specific cleaning recommendations, as different RGB mouse pads may have unique care requirements.
How to avoid shrinking a mouse pad while washing it?
To avoid shrinking a mouse pad while washing it, follow these steps:
- Check the care instructions: Read the manufacturer's care instructions for the mouse pad. This will indicate whether it can be machine washed or if it requires specific care.
- Hand wash: If the mouse pad is not machine washable, avoid the risk of shrinking by hand washing it. Fill a sink or basin with warm water and lightly scrub the surface using a mild detergent or soap. Make sure to gently work the soap into the mouse pad without excessively rubbing or stretching it. Rinse it thoroughly with clean water.
- Machine wash (if instructed): If the mouse pad is machine washable, place it in a laundry bag or pillowcase to protect it from excessive agitation. Use a delicate or gentle cycle with cold water and a mild detergent. Avoid using bleach or fabric softeners, as these can damage the mouse pad. Once the wash cycle is complete, remove it from the bag or pillowcase.
- Air dry: Allow the mouse pad to air dry completely to ensure there is no moisture left. Hang it up, lay it flat, or place it on a drying rack. Avoid using high heat or direct sunlight, as this can cause shrinkage. Patience is crucial during this step, as air drying may take a day or two depending on the thickness of the mouse pad.
- Spot clean: If you have smaller stains or dirt marks on the mouse pad, use a damp cloth and a mild soap solution to spot clean it. This avoids the need for a full wash and reduces the risk of shrinking.
Remember, prevention is key. Protect your mouse pad from spills and excessive dirt by regularly cleaning and maintaining it. This can help prolong its lifespan and reduce the need for frequent washing.
How to clean a mouse pad with a foam base?
Cleaning a foam-based mouse pad is a fairly simple process. Here's a step-by-step guide:
- Prepare the cleaning solution: Mix a mild detergent or liquid soap, such as dish soap, with warm water in a bowl or sink. Avoid using harsh chemicals or bleach, as they may damage the foam or the surface of the mouse pad.
- Remove any loose debris: Shake or gently tap the mouse pad to remove any loose dust or dirt particles. You can also use a soft brush or vacuum cleaner with a brush attachment to clean the surface.
- Spot test: Before starting the cleaning process, perform a spot test on a small inconspicuous area of the mouse pad to ensure that the cleaning solution does not cause any discoloration or damage.
- Scrub gently: Wet a soft cloth or sponge with the cleaning solution and gently scrub the surface of the mouse pad in a circular motion. Pay extra attention to areas with visible stains or dirt buildup. Avoid applying excessive pressure to prevent damaging the foam.
- Rinse: Once you've cleaned the entire surface, rinse the mouse pad under cool running water to remove any remaining soap residue. Make sure to rinse thoroughly to avoid leaving behind any soapy film.
- Squeeze out excess water: Gently squeeze the mouse pad to remove excess water. Avoid wringing or twisting it, as this might warp or damage the foam.
- Air dry: Lay the mouse pad flat on a clean and dry towel or hang it up to air dry. Avoid exposing it to direct sunlight or using a hairdryer, as excessive heat may cause the foam to deform.
- Optional: Disinfect the mouse pad: If desired, you can disinfect the mouse pad by creating a solution of equal parts water and white vinegar. Lightly dampen a cloth with this mixture and wipe the surface of the mouse pad. Then rinse and air dry as mentioned in the previous steps.
Remember, foam-based mouse pads are generally not machine washable, so it's important to follow these manual cleaning instructions.
How to remove stains from a mouse pad?
To remove stains from a mouse pad, you can follow these steps:
- Start by checking the manufacturer's instructions, if available. Some mouse pads may have specific cleaning requirements, so it's best to be aware of them.
- Begin by wiping the surface of the mouse pad with a damp cloth. Use distilled or filtered water instead of tap water to avoid any mineral deposits on the pad.
- If the stain persists, try using a mild dish soap. Mix a small amount of dish soap with warm water to create a soapy solution. Dip a sponge or cloth in the solution and gently scrub the stained area of the mouse pad.
- Rinse the mouse pad thoroughly with clean water to remove any soapy residue.
- For tougher stains, you can try using isopropyl alcohol, also known as rubbing alcohol. Dampen a cloth or cotton ball with alcohol and gently rub the stained area. Ensure that you are not saturating the mouse pad with alcohol as excessive moisture can damage the pad.
- Once the stain is removed, rinse the mouse pad again with clean water to remove any alcohol residue.
- To dry the mouse pad, either let it air dry or pat it gently with a clean towel. Avoid using a hairdryer or any heat source as it may damage the pad.
- If there are any remaining stains that are difficult to remove, you can try using a mild stain remover or diluted vinegar solution. However, always test these solutions on a small, inconspicuous area first to ensure they do not cause any discoloration or damage to the mouse pad.
Remember to regularly clean your mouse pad to prevent the accumulation of dirt, oils, and stains.
What is the recommended cleaning solution for mouse pads?
The recommended cleaning solution for mouse pads is a mixture of warm water and mild soap or dishwashing liquid. You can create a solution by mixing a small amount of soap or dishwashing liquid in a bowl of warm water. Dip a soft cloth or sponge in the solution and gently scrub the surface of the mouse pad. Rinse the mouse pad with clean water and pat dry with a towel.