
Best Xbox Controllers for Gaming Laptops to Buy in July 2026
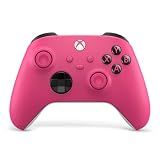
Xbox Wireless Gaming Controller | Deep Pink | Console, PC, & Cloud Devices | Textured Grip | Wireless, Bluetooth, USB-C Connectivity
- ENHANCED COMFORT: MODERNIZED DESIGN BOOSTS COMFORT FOR MARATHON GAMING.
- PRECISION CONTROL: HYBRID D-PAD AND TEXTURED GRIPS FOR SUPERIOR ACCURACY.
- CUSTOM SETTINGS: REMAP BUTTONS FOR A TAILORED GAMING EXPERIENCE.


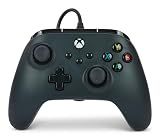
PowerA Wired Controller for Xbox Series X|S - Black, gamepad, wired video game controller, gaming controller, works with Xbox One and Windows 10/11
- FEEL THE ACTION WITH DUAL RUMBLE MOTORS AND IMPULSE TRIGGERS!
- PLAY COMFORTABLY FOR HOURS WITH AN ERGONOMIC DESIGN AND LONG CABLE.
- ENJOY SEAMLESS COMPATIBILITY WITH XBOX AND WINDOWS 10/11 DEVICES.
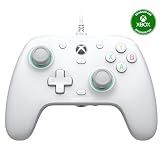
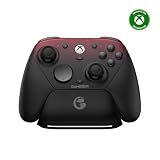
GameSir G7 SE Wired Controller for Xbox Series X|S, Xbox One & Windows 10/11, Plug and Play Gaming Gamepad with Hall Effect Joysticks/Hall Trigger, 3.5mm Audio Jack (White)
-
VERSATILE COMPATIBILITY WITH XBOX AND PC FOR ALL GAMERS.
-
PRECISE CONTROL WITH HALL JOYSTICKS FOR IMPROVED ACCURACY.
-
PLUG-AND-PLAY SETUP FOR INSTANT GAMING WITHOUT EXTRA DRIVERS.
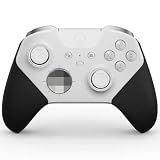
Xbox Wireless Gaming Controller | Elite Series 2 Core | Robot White | Console, PC, and Cloud Devices | Adjustable Thumbsticks | Trigger Locks
- PRO-LEVEL CONTROL WITH ADJUSTABLE THUMBSTICKS FOR ULTIMATE PRECISION.
- CUSTOMIZABLE DESIGN THROUGH XBOX DESIGN LAB FOR A UNIQUE LOOK.
- ENJOY 40 HOURS OF BATTERY LIFE FOR UNINTERRUPTED GAMING SESSIONS.
GameSir G7 Pro Wired Controller for Xbox Series X|S, Xbox One, Wireless Gamepad for PC&Android with TMR Sticks, Hall Effect Analog Triggers, 1000Hz Polling Rate, 3.5mm Audio Jack - Black
-
SEAMLESS TRI-MODE CONNECTIVITY: SWITCH BETWEEN XBOX, PC, AND ANDROID EASILY.
-
DRIFT-FREE GAMING: TMR STICKS ENSURE STABILITY AND LOW POWER CONSUMPTION.
-
ULTIMATE CONTROL: HALL EFFECT TRIGGERS OFFER SMOOTH PRECISION FOR GAMERS.
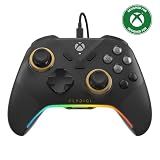
FLYDIGI VADER 5S Wired Controller for XBOX Series X|S, XBOX One, Windows
-
ULTRA-PRECISE CONTROL WITH ZERO STICK DRIFT FOR ACCURATE GAMEPLAY.
-
ADJUST JOYSTICK TENSION INSTANTLY FOR ANY GAME STYLE.
-
QUICK IN-GAME ADJUSTMENTS WITHOUT PAUSING FOR MAXIMUM FOCUS.
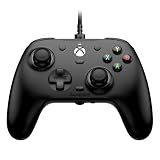
GameSir G7 HE Wired XBOX Controller, Officially licensed Controller for XBOX Series X|S, XBOX One, Windows 10|11, PC, Video Game Controller with Hall Effect Sticks (Black)
- DURABLE DESIGN: MICROSWITCH BUTTONS LAST 3 MILLION CLICKS FOR LONGEVITY.
- ENHANCED COMFORT: NON-SLIP SILICONE GRIP ENSURES STABILITY AND COMFORT.
- CUSTOMIZABLE PLAY: MAGNETIC FACEPLATE LETS YOU PERSONALIZE YOUR CONTROLLER.
To connect an Xbox controller to a gaming laptop, follow these steps:
- Turn on your Xbox controller by pressing and holding the Xbox button on the controller until it powers up.
- On your gaming laptop, locate the USB port where you want to connect the controller.
- Connect the USB connector on the controller's charging cable into the USB port on your laptop.
- Wait for the laptop to recognize the connected controller. It may take a few seconds for the driver installation process to complete.
- Once the controller is recognized, you can start using it to play games on your laptop.
- If the controller doesn't work immediately, you may need to configure it in the game settings. Most modern games have built-in support for Xbox controllers, but you might need to map the buttons or adjust sensitivity in the game's settings menu.
- To disconnect the controller, simply unplug the USB cable from your laptop.
Remember, some laptops may require an adapter if they don't have traditional USB ports. Additionally, the Xbox controller must be compatible with your laptop's operating system, so ensure that you have the necessary drivers installed.
What is the lifespan of an Xbox controller when used with a gaming laptop?
The lifespan of an Xbox controller when used with a gaming laptop can vary depending on several factors, including usage patterns, care, and quality of the controller. On average, with regular usage and proper maintenance, an Xbox controller can last several years before experiencing any significant issues. However, it's important to note that wear and tear, accidental drops, intense gaming sessions, and other factors can potentially shorten the lifespan.
How to connect an Xbox controller to a gaming laptop?
To connect an Xbox controller to a gaming laptop, you can follow these steps:
- First, make sure your laptop has built-in Bluetooth capability. If it does not, you will need to purchase a wireless adapter that supports Xbox controllers.
- Turn on your Xbox controller by holding the Xbox button located at the center of the controller until it lights up.
- On your laptop, go to the Start menu and open the Settings app.
- In the Settings menu, click on "Devices".
- In the Devices menu, click on "Bluetooth & other devices" tab located on the left side.
- Turn on Bluetooth by toggling the slider to the "On" position.
- Click on the "Add Bluetooth or other device" button.
- A new window will appear, select "Bluetooth" from the available options.
- Your laptop will start searching for Bluetooth devices, and it should detect your Xbox controller in a few seconds.
- Once your Xbox controller appears in the list of available devices, click on it to connect.
- Your laptop will then install the necessary drivers automatically.
- Once the controller is successfully connected, the Xbox button on the controller will light up and remain lit.
Now, your Xbox controller is connected to your gaming laptop, and you can use it to play games and navigate through your laptop's interface.
How to optimize the performance of an Xbox controller on a gaming laptop?
To optimize the performance of an Xbox controller on a gaming laptop, you can follow these steps:
- Update drivers: Ensure that your Xbox controller drivers are up to date. You can do this by connecting the controller to your laptop via a USB cable, visiting the Xbox website, and downloading the latest drivers.
- Connect via USB: For the best performance, connect your Xbox controller directly to your laptop using a USB cable. This ensures a stable and low-latency connection.
- Disable unnecessary applications: Close any unnecessary background applications and processes that may be consuming system resources. This will free up system memory and CPU usage, helping to improve performance.
- Adjust power settings: Optimize your power settings to ensure maximum performance. Set your laptop to high-performance mode and adjust the settings to prevent the laptop from reducing performance when running on battery power.
- Configure controller settings: Open the "Xbox Accessories" app on your laptop and customize the controller settings according to your preferences. You can adjust the sensitivity, button mapping, and even create custom profiles for different games.
- Install game-specific controller software: Some games have their own controller software or profiles. Check if the games you play have specific controller settings or software that you can install to enhance your gaming experience.
- Disable Bluetooth: If you are using a wireless Xbox controller via Bluetooth, consider connecting it via USB for a more reliable and lag-free experience. Bluetooth can introduce latency, which may affect your gameplay.
- Keep your laptop updated: Regularly update your gaming laptop with the latest system updates, graphics drivers, and firmware updates to ensure optimal performance and compatibility with the Xbox controller.
- Optimize in-game settings: In each game, make sure to optimize the controller settings accordingly. Adjust the sensitivity, dead zones, and any other settings that can enhance your control inputs.
- Monitor system temperature: Overheating can negatively impact gaming performance. Keep an eye on the laptop's temperature and, if needed, clean the vents, use a cooling pad, or adjust the fan settings to prevent throttling.
By following these steps, you should be able to optimize the performance of your Xbox controller on a gaming laptop and enjoy smooth and responsive gameplay.