
Best Guitar Customization Kits to Buy in July 2026
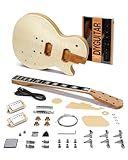
Fesley DIY LP Style Electric Guitar Kits with Mahogany Wood Body/Neck, 6 Strings Electric Guitar Kits, Purpleheart Fretboard, H-H Pickups, Flamed Maple Veneer Top, Build Your Own Guitar Kit, Natural
- HASSLE-FREE SETUP WITH PRE-ASSEMBLED, TESTED GUITAR KITS.
- PREMIUM LP-STYLE BODY ENSURES RICH TONES AND STUNNING VISUALS.
- FULL ACCESSORY SET INCLUDED FOR AN ENJOYABLE DIY GUITAR EXPERIENCE.


AKLOT DIY Electric Guitar Kit: Flame Maple Top, Roasted Maple Neck, Pre-Soldered Wiring, HH Pickups, Coil-Split, Luminous Position Markers, Build Your Own Lorien Style Beginner Guitar with Accessories
- PERFECTLY PRE-DRILLED & TREATED FOR EASY ASSEMBLY
- PRE-SOLDERED WIRING HASSLE-FREE FOR STRESS-FREE BUILDING
- LUMINOUS MARKERS ENSURE VISIBILITY ANYWHERE YOU PLAY
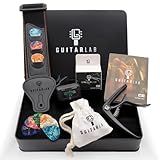
Guitar Accessories Kit by Guitar Lab – Premium Metal Tin with Guitar Strap, Capo, Tuner, Picks for Acoustic, Bass, Electric & Ukulele Guitars – Ideal Guitar Gifts for Men, Beginners, and Pros
-
SLEEK GIFT SET IN BRANDED TIN: PERFECT FOR ANY GUITAR ENTHUSIAST.
-
COMPREHENSIVE ACCESSORIES KIT: EVERYTHING A GUITARIST NEEDS IN ONE!
-
DURABLE & QUALITY CRAFTSMANSHIP: BUILT TO LAST FOR ALL SKILL LEVELS.
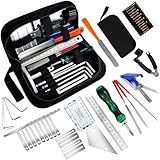
28Pcs Guitar Tool Kit, Guitar Accessories Gifts for Men, Guitar Maintenance Kit with Carry Bag, Guitar Repair Kit for Acoustic Electric Guitar Ukulele Bass Banjo, TIMDAM Guitar Setup Kit Guitar Gifts
- COMPLETE TOOLKIT FOR ALL GUITAR REPAIRS AND MAINTENANCE NEEDS.
- PORTABLE CASE ENSURES TOOLS STAY ORGANIZED AND EASY TO TRANSPORT.
- IDEAL GIFT FOR MUSICIANS AND BEGINNERS TO ENHANCE THEIR SKILLS.
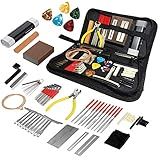
72PCS Guitar Tool Kit,Professional Guitar Repairing Maintenance Tool Kit with Guitar Strings Picks Bridge Pins Gauge Guitar Accessories Gift for Acoustic Guitar Electric Guitar Ukulele Bass Banjo
-
COMPLETE 72PCS KIT: ALL TOOLS YOU NEED FOR GUITAR MAINTENANCE IN ONE SET!
-
VERSATILE FUNCTIONALITY: PERFECT FOR INTONATION, STRING CHANGES, AND REPAIRS.
-
IDEAL GIFT FOR MUSICIANS: GREAT FOR BEGINNERS AND GUITAR LOVERS ALIKE!
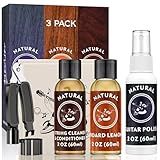
Deviser Guitar Cleaning,All IN ONE Kit,fretboard Lemon oil,Polish,Guitar String-cleaner,Guitar string winder,Cleaning cloth for guitar cleaning and maintenance
- ALL-IN-ONE SOLUTION: EVERYTHING YOU NEED FOR GUITAR CARE INCLUDED!
- SUPERIOR PERFORMANCE: RESTORES TONE AND EXTENDS STRING LIFESPAN EFFORTLESSLY.
- EASY TO USE: PERFECT FOR BEGINNERS AND PROS, WITH CLEAR STEP-BY-STEP GUIDES.
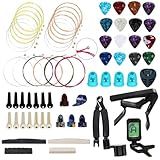
NERECNDENS 66PCS Guitar Accessories Kit, Acoustic Changing Tool, Including Guitar Acoustic Strings, Picks, Capo, String Winder&Cutter, Tuner, Bones, for Players and Beginners
- DURABLE, RUSTPROOF STRINGS: ENJOY SMOOTH PLAY WITH ENHANCED LONGEVITY!
- PRECISION TUNER: ACHIEVE PERFECT PITCH EFFORTLESSLY, IDEAL FOR ALL SKILL LEVELS.
- ALL-IN-ONE TOOLS: VERSATILE GADGETS ENSURE EASY STRING CHANGES AND MAINTENANCE.
Customizing your acoustic guitar is a great way to make it feel more personalized and unique to you. There are several ways you can customize your acoustic guitar to fit your preferences and style. One popular method is to change the pickguard or add decals to the body of the guitar. This can give your guitar a more distinctive look and make it stand out.
Another way to customize your acoustic guitar is to replace the tuning keys with ones that are more comfortable or aesthetically pleasing. You can also change the bridge pins or saddle to improve the tone or playability of the guitar. Additionally, you can install a new nut or saddle to improve the guitar's intonation and overall sound quality.
If you're feeling more adventurous, you can even repaint or refinish the body of your acoustic guitar to give it a completely new look. Just be sure to use high-quality materials and follow proper techniques to ensure the finish lasts and looks professional.
Overall, customizing your acoustic guitar can be a fun and rewarding way to make it feel like your own. Whether you choose to make small changes or completely transform the guitar, the possibilities are endless. Just be sure to take your time and do your research to ensure that any modifications you make are done safely and effectively.
How to customize my acoustic guitar with a new endpin jack?
To customize your acoustic guitar with a new endpin jack, you will need to follow these steps:
- Choose a high-quality endpin jack that is compatible with your guitar and pickup system. Make sure to select one that fits securely in the existing endpin hole.
- Remove the existing endpin jack by gently pulling it out of the endpin hole. Be careful not to damage the guitar or the surrounding wood.
- If the new endpin jack requires a larger hole, carefully enlarge the endpin hole using a drill and the appropriate size drill bit. Be sure to go slowly and check the fit frequently to avoid making the hole too large.
- Install the new endpin jack by carefully inserting it into the endpin hole. Make sure it fits securely and is aligned properly with the guitar body.
- Connect the pickup system wiring to the new endpin jack according to the manufacturer's instructions. Make sure all connections are secure and properly insulated.
- Test the new endpin jack and pickup system by plugging in your guitar and playing a few notes. Adjust the volume and tone controls as needed to achieve the desired sound.
- Secure any excess wiring inside the guitar body to prevent it from rattling or interfering with the sound quality.
- Enjoy your customized acoustic guitar with the new endpin jack and pickup system!
What tools are essential for changing the pickguard on my acoustic guitar?
The tools that are essential for changing the pickguard on an acoustic guitar include:
- Guitar pick or putty knife: to carefully remove the old pickguard from the guitar's body
- New pickguard: to replace the old pickguard with a new one that matches the design and size of your guitar
- Double-sided adhesive tape or adhesive: to securely attach the new pickguard to the guitar's body
- Towel or cloth: to protect the guitar's body from scratches or damage during the pickguard replacement process
- Screwdriver or Allen wrench: to remove any screws or bolts that may be holding the old pickguard in place, depending on your guitar model
- Soft brush or cleaning cloth: to clean the area around the pickguard before attaching the new one for a clean and polished finish.
What is the best method for adding inlay to my acoustic guitar?
The best method for adding inlay to an acoustic guitar is usually done by a professional luthier or guitar builder. However, if you want to attempt it yourself, the process typically involves the following steps:
- Choose the design and material for the inlay. Common materials used for inlay include mother-of-pearl, abalone, and various colored woods.
- Carefully plan out the placement of the inlay on your guitar. Use tracing paper or transfer paper to transfer the design onto the guitar's surface.
- Using a small router or chisel, carefully cut out the cavity for the inlay pieces. Be sure to take your time and work slowly to avoid damaging the guitar.
- Fit the inlay pieces into the cavities and glue them in place using a strong adhesive. Make sure the inlay pieces are flush with the guitar's surface.
- Once the glue is dry, carefully sand down any excess material to ensure a smooth and even finish.
- Finally, finish the inlay design by polishing and buffing the surface to a high shine.
Overall, adding inlay to an acoustic guitar requires a steady hand, attention to detail, and some experience working with woodworking tools. If you are unsure about your skills, it is always best to consult a professional to ensure the quality and integrity of your instrument.
How to refinish the body of my acoustic guitar?
Refinishing the body of your acoustic guitar can be a time-consuming process, but with patience and the right materials, you can achieve a professional-looking result. Here is a general guide on how to refinish the body of your acoustic guitar:
- Remove the strings and hardware: Start by removing the strings and any hardware attached to the body of the guitar, such as the bridge, pickguard, and tuning pegs. This will make it easier to work on the body of the guitar.
- Sand the body: Use sandpaper to remove the existing finish on the body of the guitar. Start with a coarse grit sandpaper (around 80-120 grit) to remove the majority of the finish, and then switch to a finer grit sandpaper (around 220-400 grit) to smooth out the surface. Be sure to sand in the direction of the wood grain for a clean finish.
- Clean the body: After sanding, use a damp cloth to wipe down the body of the guitar and remove any dust or debris. Make sure the body is completely clean before moving on to the next step.
- Apply a sealant or primer: Depending on the type of finish you want to achieve, you can apply a sealant or primer to the body of the guitar. This will help the new finish adhere to the wood and provide a smooth surface for painting or staining.
- Paint or stain the body: Once the sealant or primer has dried, you can apply your desired paint or stain to the body of the guitar. Use a brush or spray gun to evenly coat the body, and allow the finish to dry completely between coats. You may need to apply multiple coats for a vibrant color or a deep stain.
- Apply a clear coat: To protect the new finish and give it a glossy shine, apply a clear coat to the body of the guitar. This will help seal in the paint or stain and prevent it from scratching or chipping.
- Reattach hardware and strings: Once the clear coat has dried completely, reattach the hardware and strings to the body of the guitar. Make sure everything is securely in place before tuning up and playing your newly refinished acoustic guitar.
Remember to take your time and follow the proper steps for refinishing the body of your acoustic guitar. If you're unsure about any part of the process, don't hesitate to seek help from a professional guitar technician or luthier.