Best Video Editing Tools to Buy in July 2026
CyberLink PowerDirector and PhotoDirector 2026 | AI Video Editing & Generative AI Photo Editing for Windows | Easily Create Stunning Videos, Photos, Slideshows & Effects | Box with Download Code
-
PERSONALIZED PHOTO EDITS IN SECONDS WITH AI-DRIVEN QUICK ACTIONS!
-
STREAMLINE WORKFLOW: EDIT ENTIRE PHOTO SETS WITH ONE-CLICK BATCH TOOLS!
-
ELEVATE VISUALS WITH AI IMAGE ENHANCEMENT AND SEAMLESS FRAME INTERPOLATION!


CyberLink PowerDirector 2026 | Easily Create Videos Like a Pro | Intuitive AI Video Editing for Windows | Visual Effects, Slideshow Maker & Screen Recorder | Box with Download Code
-
CAPTURE SCREEN & WEBCAM, EXPORT CLIPS, CUSTOMIZE FINAL VIDEOS EASILY.
-
ENHANCE VIDEO QUALITY WITH AUTOMATIC COLOR AND CONTRAST ADJUSTMENTS.
-
SEAMLESSLY ADD AI-GENERATED FRAMES FOR SMOOTHER, DETAILED FOOTAGE.

CyberLink PhotoDirector 2026 | Generative AI Photo Editor for Windows | AI Tools, Layer Editing, Photo Retouching, Creative Effects & Design | Box with Download Code
- EFFORTLESSLY REMOVE DISTRACTIONS WITH AI OBJECT DETECTION.
- ENHANCE YOUR PHOTOS AND RETOUCH FACES IN SECONDS WITH AI.
- STREAMLINE EDITING WITH ONE-CLICK BATCH PROCESSING FOR PHOTOS.
![Adobe Premiere Elements 2026 | Software Download | Video Editing | 3-year term license | Activation Required [PC/Mac Online Code]](https://cdn.blogweb.me/1/51q_VIY_2_Zcy_L_SL_160_0d7cb9cb00.jpg)
Adobe Premiere Elements 2026 | Software Download | Video Editing | 3-year term license | Activation Required [PC/Mac Online Code]
-
EFFORTLESS AI-DRIVEN EDITING FOR QUICK, STUNNING VIDEO CREATION.
-
MASTER SKILLS WITH EASY MODES: QUICK, GUIDED, AND ADVANCED!
-
SEAMLESS CLOUD INTEGRATION FOR FAST ACCESS AND ORGANIZED FOOTAGE.
VEGAS Pro Suite 23 — All-in-one Suite for video, audio and post-production | Video editing software | Video editing program | Windows 11 PC | 1 license
- FULLY CUSTOMIZABLE INTERFACE FOR TAILORED VIDEO EDITING EFFICIENCY.
- INCLUDES PROFESSIONAL AUDIO TOOLS AND EXTENSIVE PLUG-IN SUPPORT.
- SEAMLESS WORKFLOW FOR HIGH-QUALITY VIDEO AND AUDIO PRODUCTION.
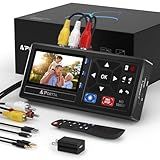
Portta VHS to Digital Converter, Video to Digital Recorder with Remote, Compatible with VHS, VCR, DVR, DVD, Hi8, Mini DV Players, Camcorder, Gaming Consoles (Tapes/DVD Player Not Included)
- EFFORTLESS VIDEO CONVERSION TO DIGITAL WITH NO PC NEEDED.
- SUPPORTS MULTIPLE FORMATS; CAPTURES AUDIO/VIDEO UP TO 1080P.
- DIRECTLY PLAYBACK STORED FILES VIA USB/SD; EASY AND CONVENIENT!
MAGIX Video Pro X16 - Creative video editing I Video editing program I Video editing program I Video editing software | Windows 10 / 11 I 1 full license for 2 devices in a practical shipping box
- AUTOMATE WORKFLOW: AI TOOLS STREAMLINE VIDEO EDITING FOR PROS.
- PRO-LEVEL CUTTING: FAST, VERSATILE TOOLS FOR CREATIVE VIDEO CUTS.
- ULTIMATE POST-PROCESSING: ACHIEVE STUNNING VISUALS AND AUDIO EASILY.
Adobe Premiere Pro | Video Editing and Production Software | 12-Month Subscription with Auto-Renewal, PC/Mac
- COMPLETE CURRENT TERM BEFORE STARTING A NEW SUBSCRIPTION.
- EDIT AND ENHANCE FOOTAGE FOR FILM, TV, AND WEB SEAMLESSLY.
- TRUSTED BY HOLLYWOOD PROS AND CONTENT CREATORS ALIKE.
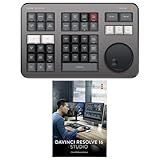
Blackmagic Design Davinci Resolve Speed Editor Bundle with Davinci Resolve 18 Studio (Activation Card)
- LIGHTWEIGHT DESIGN FOR ON-THE-GO CONVENIENCE AND FLEXIBILITY.
- QUICK ACCESS WITH BUILT-IN SEARCH DIAL FOR EFFICIENT EDITING.
- COMES WITH DAVINCI RESOLVE 17 STUDIO FOR PROFESSIONAL EDITING POWER.
![Corel Photo Video Ultimate Bundle 2023 | PaintShop Pro 2023 Ultimate and VideoStudio Ultimate 2023 | Powerful Photo and Video Editing Software [PC Download]](https://cdn.blogweb.me/1/51lv_SJ_7f_Mn_L_SL_160_88366c87e2.jpg)
Corel Photo Video Ultimate Bundle 2023 | PaintShop Pro 2023 Ultimate and VideoStudio Ultimate 2023 | Powerful Photo and Video Editing Software [PC Download]
-
ALL-IN-ONE EDITING: PHOTO AND VIDEO TOOLS FOR EVERY CREATIVE PROJECT.
-
EXCLUSIVE BONUSES: UNLOCK ANIMATIONS, DIGITAL PAINTING, AND PREMIUM EFFECTS.
-
EASY TO USE: NO SUBSCRIPTION, TUTORIALS FOR ALL SKILL LEVELS INCLUDED.
Editing videos from an action camera involves several steps to enhance and refine your footage. First, transfer the footage from the action camera to your computer using a USB cable or a memory card reader. Organize your clips by reviewing and selecting the best parts, often using a video editing software such as Adobe Premiere Pro, Final Cut Pro, iMovie, or a free option like DaVinci Resolve. Import your selected clips into the software and place them on the timeline. Begin editing by trimming and cutting the footage to remove unwanted sections, ensuring a smooth flow of content. Enhance the video quality by adjusting the brightness, contrast, and color balance to improve visibility and vibrancy. Implement stabilization features if available to reduce shakiness from handheld shots. Incorporating transitions between clips can help create a seamless viewing experience. Add music or sound effects to complement the visuals and enhance the mood. Consider integrating text or graphics to provide context or highlight important information. Finalize by reviewing the entire edited video, making adjustments where necessary. Export the finished product in the desired format and resolution suitable for your target platform, ensuring the video maintains high quality.
What is video compression, and why is it important?
Video compression is the process of reducing the file size of digital video files without significantly degrading visual quality. This involves using algorithms and techniques to remove redundant or non-essential data, making the file more manageable for storage and transmission. There are two main types of video compression: lossless, which reduces file size without losing any quality, and lossy, which actually removes some data to achieve even higher compression rates.
Video compression is important for several reasons:
- Storage Efficiency: Compressed video files take up less space, allowing more videos to be stored on physical or cloud-based storage systems.
- Transmission and Streaming: Smaller file sizes make it easier to stream videos over the internet, reducing buffering and improving the viewing experience, especially for users with limited bandwidth.
- Cost Reduction: By reducing the amount of data needed to store and transmit video, compression lowers costs associated with both storage and data transfer.
- Compatibility: Many devices and platforms have limitations on file size for playback; compressed videos are more universally playable across various devices and networks.
- Environmental Impact: Reducing the amount of data processed and stored can lead to lower energy consumption, contributing to a smaller carbon footprint for digital operations.
Overall, video compression is crucial for making video technology sustainable, efficient, and accessible, especially as the demand for high-quality video content continues to grow globally.
What is the difference between video trimming and cropping?
Video trimming and video cropping are two distinct editing techniques used for different purposes in video production:
- Video Trimming: Purpose: Trimming is used to shorten a video by removing parts from its beginning, middle, or end. Impact on Content: It reduces the duration of the video without altering the dimensions of the video frame. This is often done to eliminate unwanted sections, focus on key moments, or fit the video to a specific time requirement. Example: Cutting out commercials or unnecessary footage before starting the main action or cutting dialogue to the essential pieces.
- Video Cropping: Purpose: Cropping changes the dimensions of the video frame by removing sections from the edges. Impact on Content: It modifies the frame by focusing on a specific area of the video, effectively changing the aspect ratio or reducing distracting elements from the outer sections of the frame. Example: Removing a company logo or black bars from the sides of a video, or focusing on a specific part of the scene by removing surrounding areas.
In summary, trimming is about adjusting the duration of the video, while cropping is about changing the visible area within the video frame.
How to add text overlays to action camera videos?
Adding text overlays to action camera videos can enhance storytelling and provide additional context to your footage. Here are several methods to achieve this:
Using Video Editing Software
- Choose a Video Editor: Free Options: iMovie (Mac): Basic editing features with text overlay capabilities. DaVinci Resolve (Windows, Mac, Linux): Comprehensive suite for professional editing. Shotcut or OpenShot (Windows, Mac, Linux): Simple interfaces with text overlay functions. Paid Options: Adobe Premiere Pro (Windows, Mac): Advanced features for detailed text customization. Final Cut Pro (Mac): User-friendly interface with robust text tools. Sony Vegas Pro (Windows): Known for its fast rendering and editing.
- Import Your Video: Load your action camera footage into the software by using the import or drag-and-drop feature.
- Add Text Overlay: Create a new text layer or use the text tool. Position the text where you want it to appear on-screen. Customize font, size, color, and animation as needed.
- Adjust the Timing: Determine when you want the text to appear and disappear by setting in and out points.
- Preview and Export: Review the video to ensure the text is correctly positioned and timed. Export the final video in your desired format.
Using Online Video Editors
- Select an Online Tool: Kapwing, Canva, or Video: Offer easy-to-use interfaces for simple projects. WeVideo: Provides more advanced editing features with text overlay capabilities.
- Upload Your Video: Follow the website's instructions to upload your action camera footage.
- Add and Customize Text: Use the text tool to create and position text. Customize text appearance with available features.
- Export the Edited Video: Once satisfied with the text overlay, export the video as per the tool's supported formats.
Using Mobile Apps
- Select an App: iMovie (iOS): Simple interface with text overlay options. KineMaster (iOS, Android): Offers text effects and animation features. Adobe Premiere Rush (iOS, Android): User-friendly with multi-platform support.
- Import the Video to the App: Open your video via the app's import feature.
- Insert and Style Text: Add text using the app's tools, placing it as needed. Customize with available options for color, size, and font.
- Save or Share the Video: Export the video once you're happy with the text overlay.
Tips for Effective Text Overlays
- Simplicity: Keep text concise to ensure it's readable.
- Contrast: Use contrasting colors to make text visible against the video background.
- Placement: Position text thoughtfully so it doesn’t obscure important video content.
- Consistency: Maintain a consistent style throughout the video to enhance its professional appearance.
By following these steps, you can add compelling text overlays to your action camera videos, making them more informative and engaging.
How to adjust brightness and contrast in video editing?
Adjusting the brightness and contrast in video editing can significantly improve the visual quality of your video. The exact steps may vary slightly depending on the video editing software you are using, but here are general guidelines you can follow:
Using Adobe Premiere Pro:
- Import Your Video: Open Adobe Premiere Pro and import the video you wish to edit.
- Create a New Sequence: Drag your video clip from the Project panel to the Timeline to create a new sequence.
- Apply Effects: Go to the Effects panel. Search for Brightness & Contrast in the search bar. Drag the Brightness & Contrast effect to your video clip in the Timeline.
- Adjust Settings: Go to the Effect Controls panel. Under the Brightness & Contrast effect, adjust the sliders for Brightness and Contrast to achieve your desired look.
Using Final Cut Pro:
- Import Your Video: Launch Final Cut Pro and import your video.
- Add Video to Timeline: Drag the video clip to the Timeline.
- Open the Color Inspector: Select your video clip in the Timeline. Click on the Color Inspector icon (triangle with lines) above the Viewer.
- Adjust Settings: Navigate to the Exposure tab to adjust brightness. Use the Contrast slider under the Color Board to adjust the contrast accordingly.
Using DaVinci Resolve:
- Import Your Video: Open DaVinci Resolve and import your media.
- Create a New Timeline: Right-click on your video and create a new timeline.
- Go to the Color Tab: Click on the Color tab at the bottom of the screen.
- Adjust Brightness and Contrast: In the Color Wheels panel, adjust the Lift, Gamma, and Gain controls to affect brightness. Use the Contrast slider under the Color Correction wheels to adjust contrast.
Using iMovie:
- Import Your Video: Open iMovie and create a new project, then import your video.
- Place Video in Timeline: Drag your video clip onto the Timeline.
- Open the Adjustments Bar: Click on the video clip in the Timeline to select it. Click on the Adjust button in the toolbar above the Viewer.
- Adjust Settings: Use the Exposure slider to adjust brightness. Use the Contrast slider to adjust contrast.
General Tips:
- Use subtle adjustments. Over-editing can lead to loss of detail or unnatural-looking footage.
- Preview your adjustments in different lighting conditions to ensure balanced settings.
- Consider using scopes or histograms, if available, to achieve precise results.
Always save your project frequently to avoid losing any changes, and remember to experiment with adjustments to find the best settings for your specific video.