
Best Gaming Monitors with FreeSync and G-Sync to Buy in July 2026
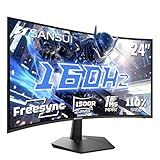
SANSUI 24 Inch Curved 160Hz Gaming Monitor,1500R Curved Gaming Monitor FHD 1080P Computer Monitor,MPRT 1ms Fast VA Display,Freesync,HDR,3000:1, HDMI2.0,DP1.4, VESA Support(ES-G24C1L HDMI Cable Incl.)
-
ULTRA-SMOOTH GAMEPLAY: ENJOY SEAMLESS ACTION WITH 160HZ & 1MS RESPONSE.
-
VIBRANT VISUALS: EXPERIENCE STUNNING COLORS WITH 110% SRGB AND HDR.
-
VERSATILE CONNECTIVITY: MULTIPLE PORTS & TILT ADJUSTMENT FOR COMFORT.


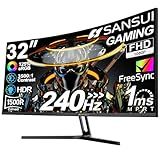
SANSUI 32 Inch Curved 240Hz Gaming Monitor High Refresh Rate, FHD 1080P Gaming PC Monitor HDMI DP1.4, Curved 1500R, 1Ms MPRT, HDR,Metal Stand,VESA Compatible(DP Cable Incl.)
- IMMERSE IN 32 1500R CURVE FOR CAPTIVATING GAMEPLAY EXPERIENCE.
- EXPERIENCE SMOOTH ACTION WITH 240HZ REFRESH RATE & 1MS RESPONSE TIME.
- VIBRANT VISUALS WITH 125% SRGB, HDR, AND IMPRESSIVE 3500:1 CONTRAST.
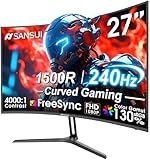
SANSUI 27 Inch Curved 240Hz Gaming Monitor FHD 1080P, 1500R Curve Computer Monitor, 130% sRGB, 4000:1 Contrast, HDR, FreeSync, MPRT 1Ms, Low Blue Light, HDMI DP Ports, Metal Stand, DP Cable Incl.
- EXPERIENCE ULTRA-SMOOTH GAMEPLAY WITH 240HZ AND 1MS RESPONSE TIME.
- ENJOY VIBRANT VISUALS WITH 130% SRGB AND HDR FOR STUNNING COLORS.
- HASSLE-FREE SETUP WITH VERSATILE PLUG & PLAY DESIGN AND VESA MOUNT.
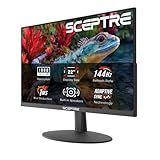
Sceptre New 22-Inch Gaming Monitor, FHD 1080p, Up to 144Hz, HDMI, DisplayPort, Built-in Speakers, Machine Black (E225W-FW144 Series, 2026)
- ENJOY RICH AUDIO WITH INTEGRATED SPEAKERS FOR A CLUTTER-FREE DESK.
- REDUCE EYE STRAIN WITH BLUE-LIGHT SHIFT FOR HEALTHIER VIEWING HABITS.
- EXPERIENCE AN UNOBSTRUCTED VIEW WITH A SLEEK, MINIMAL BEZEL DESIGN.
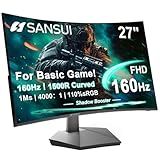
SANSUI 27 Inch Curved 160Hz Gaming Monitor, 1500R Curved Computer Gaming Monitor FHD 1080P, 4000:1, 110% sRGB, FPS/RTS, 1Ms MPRT|FreeSync|HDR|Low Blue Light|HDMI DP| VESA Support, HDMI Cable Incl.
-
IMMERSIVE 1500R CURVATURE FOR REDUCED DISTORTION & EYESTRAIN
-
OPTIMIZED GAMER FEATURES: CROSSHAIR, TIMER, & PRESET MODES
-
VIVID COLORS: 4000:1 CONTRAST & 110% SRGB FOR STUNNING VISUALS
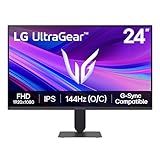
LG 24G411A-B 24-inch Ultragear Full HD (1920 x 1080) IPS Gaming Monitor, 144Hz (O/C), 1ms MBR, NVIDIA G-Sync Compatible, AMD FreeSync, HDR10, HDMI, DisplayPort, Slim Stand, Black
-
VIVID HDR10 COLORS: IMMERSE IN REALISTIC VISUALS FOR EPIC GAMEPLAY.
-
120HZ NATIVE SPEED: ENJOY ULTRA-SMOOTH, CRYSTAL-CLEAR ACTION ON SCREEN.
-
G-SYNC & FREESYNC: EXPERIENCE TEAR-FREE GAMING FOR ENHANCED COMPETITIVENESS.
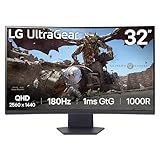
LG 32GS60QC-B Ultragear 32-inch Curved Gaming Monitor QHD (2560x1440) 180Hz 1ms 1000R AMD FreeSync HDR10 HDMIx2 DisplayPort Borderless Design Black Stabilizer DAS Crosshair FPS Counter - Black
- EXPERIENCE NEXT-LEVEL QHD GAMING PERFORMANCE WITH ULTRAGEAR SPEED.
- ENJOY ULTRA-SMOOTH GAMEPLAY WITH 180HZ REFRESH RATE & 1MS RESPONSE.
- IMMERSE IN VIVID COLORS WITH 99% SRGB AND HDR10 PICTURE QUALITY.
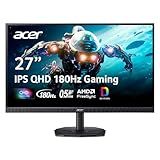
acer Nitro 27 Inch QHD 2560 x 1440 IPS Gaming Monitor | AMD FreeSync | Up to 180Hz Refresh | Up to 0.5ms | DCI-P3 95% | HDR 10 Support | One Display Port 1.2 & Two HDMI 2.0 | KG271U N3bmiipx
- STUNNING 27 QHD VISUALS WITH ZERO-FRAME DESIGN FOR MAX SCREEN SPACE.
- ENJOY SMOOTH GAMEPLAY WITH AMD FREESYNC, ELIMINATING STUTTER AND TEAR.
- ULTRA-FAST 180HZ REFRESH RATE AND 0.5MS RESPONSE FOR SEAMLESS ACTION.
To enable and use FreeSync or G-Sync on a gaming monitor, you will need a compatible monitor and a supported graphics card. Both FreeSync and G-Sync are adaptive sync technologies designed to reduce screen tearing and provide a smoother gaming experience.
Here are the steps to enable and use FreeSync or G-Sync on your gaming monitor:
- Check compatibility: Ensure that your gaming monitor supports either FreeSync (for AMD graphics cards) or G-Sync (for Nvidia graphics cards). Refer to the monitor's specifications or consult the manufacturer's website for this information.
- Verify the graphics card: Your graphics card must be compatible with the adaptive sync technology your monitor supports. AMD graphics cards are compatible with FreeSync, while Nvidia graphics cards are compatible with G-Sync.
- Connect your monitor: Use a DisplayPort cable to connect your monitor to the graphics card. FreeSync and G-Sync require a DisplayPort connection for optimal performance.
- Enable FreeSync or G-Sync in monitor settings: Access your gaming monitor's on-screen display settings by navigating through the physical buttons or using an accompanying software. Find the FreeSync or G-Sync option and enable it.
- Adjust graphics card settings: For AMD graphics cards, open the AMD Radeon Settings software and enable FreeSync. For Nvidia graphics cards, open the Nvidia Control Panel, go to "Display," and enable G-Sync.
- Test and troubleshoot: Launch a game and check whether FreeSync or G-Sync is working. You should notice smoother gameplay and reduced screen tearing. If you encounter any issues, make sure you have the latest graphics card driver installed and update it if necessary.
- Additional settings and optimizations: Depending on your monitor and graphics card, you may have additional settings to fine-tune the adaptive sync technology. Explore your monitor's OSD settings and graphics card control panel for any additional tweaks or optimizations.
Remember, adaptive sync technologies like FreeSync and G-Sync can greatly enhance your gaming experience, but they require compatibility between your monitor and graphics card. Make sure you have a compatible setup and enable the respective technology to enjoy smoother gameplay with reduced screen tearing.
How to disable V-Sync when using FreeSync or G-Sync?
When using FreeSync or G-Sync, the V-Sync (Vertical Sync) option is usually automatically disabled or overridden by these technologies. However, in some cases, you may want to manually disable V-Sync. Here's how to do it:
- Nvidia Control Panel (for G-Sync): a. Right-click on your desktop and select "Nvidia Control Panel" from the context menu. b. In the control panel, navigate to "Display" on the left-hand side and click on "Set up G-Sync." c. In the right-hand panel, check the box for "Enable G-Sync." d. Choose either "Enable for full screen mode" or "Enable for windowed and full-screen mode" depending on your preference. e. Uncheck the box for "Vertical sync" under the "Manage 3D settings" section.
- AMD Radeon Settings (for FreeSync): a. Right-click on your desktop and select "AMD Radeon Settings" from the context menu. b. In the Radeon Settings window, go to "Display" on the left-hand side and click on "AMD FreeSync." c. Ensure that FreeSync is enabled by toggling the switch in the right-hand panel. d. Additionally, you may also need to access the Radeon Settings "Gaming" tab and disable V-Sync for specific games by individual profile.
Please note that these instructions may vary slightly depending on the version of your graphics driver software. Furthermore, it's worth mentioning that disabling V-Sync while using FreeSync or G-Sync can introduce screen tearing, but some users prefer to disable it this way to reduce input lag.
How to disable FreeSync or G-Sync?
To disable FreeSync or G-Sync, you can follow these steps:
For FreeSync:
- Open the Radeon Settings by right-clicking on the desktop and selecting "AMD Radeon Settings."
- Once the Radeon Settings window opens, click on "Display" on the left-hand side.
- In the Display tab, scroll down to "AMD FreeSync" and toggle the switch to "Off" to disable FreeSync.
- Click on "Apply" or "OK" to save the changes.
For G-Sync:
- Right-click on the desktop and select "NVIDIA Control Panel."
- In the NVIDIA Control Panel, click on "Display" on the left-hand side.
- Under "Display," click on "Set up G-Sync."
- In the G-Sync window, uncheck the box that says "Enable G-Sync" to disable G-Sync.
- Click on "Apply" or "OK" to save the changes.
After disabling FreeSync or G-Sync, the adaptive sync technology will no longer be active, and your display will run without the sync feature.
What is the difference between FreeSync 1 and FreeSync 2?
The main difference between FreeSync 1 and FreeSync 2 lies in their respective capabilities and features.
FreeSync 1, also known as AMD FreeSync, is a technology developed by AMD that eliminates screen tearing and stuttering by synchronizing the refresh rate of the display with the variable frame rate output of the graphics card. This synchronization helps to deliver smooth and tear-free gaming experiences. FreeSync 1 has a range of frame rates within which it operates, typically between 30fps and the maximum refresh rate of the monitor.
On the other hand, FreeSync 2, also known as AMD FreeSync 2 HDR, builds upon the foundation of FreeSync 1 while introducing additional features. The primary enhancement offered by FreeSync 2 is support for high dynamic range (HDR) content. HDR provides enhanced contrast, color accuracy, and brightness, resulting in richer and more vibrant visuals. FreeSync 2 HDR also specifies a wider color gamut and lower input latency for improved responsiveness.
Additionally, FreeSync 2 HDR includes stricter certification requirements compared to FreeSync 1. Monitors must meet specific criteria related to HDR quality, luminance levels, and color gamut coverage to be certified as FreeSync 2 HDR-compatible.
In summary, FreeSync 1 provides adaptive sync technology for eliminating screen tearing and stuttering, whereas FreeSync 2 HDR builds upon this foundation by adding HDR support and stricter certification standards.
How to adjust the aspect ratio when using FreeSync or G-Sync?
To adjust the aspect ratio when using FreeSync or G-Sync, you will need to follow the steps below:
For FreeSync:
- Right-click on your desktop and select "AMD Radeon Settings" or "NVIDIA Control Panel" (depending on your GPU brand).
- In the Radeon Settings or NVIDIA Control Panel, navigate to the display settings.
- Look for the option called "Scaling" or "Display Scaling" and click on it.
- In the scaling options, you will see various aspect ratio choices such as "Maintain Aspect Ratio," "Full Panel," or "Stretch." Select the desired aspect ratio you prefer.
- Apply the changes and close the control panel. The aspect ratio should now be adjusted accordingly.
For G-Sync:
- Right-click on your desktop and select "NVIDIA Control Panel."
- In the NVIDIA Control Panel, navigate to the display settings.
- Look for the option called "Adjust desktop size and position" and click on it.
- Under the "Scaling" tab, you will find various options to adjust the aspect ratio, such as "Perform scaling on" or "Aspect ratio." Select the appropriate choice.
- Apply the changes and close the control panel. The aspect ratio should now be adjusted for G-Sync.
Note: The steps provided are general guidelines and may vary slightly depending on your specific GPU brand and driver version.
How to update drivers to enable FreeSync or G-Sync?
To update your drivers and enable FreeSync or G-Sync, follow these steps:
- Identify your graphics card: Determine the make and model of your graphics card (e.g., Nvidia or AMD) as well as the specific model number.
- Visit the official website: Go to the official website of your graphics card manufacturer: For Nvidia: www.nvidia.com For AMD: www.amd.com
- Find the drivers section: Look for the drivers or support section on the website. It is usually listed prominently on the homepage or under a specific product category.
- Select your graphics card model: Choose the correct graphics card model from the list provided. Ensure it matches the make and model of your graphics card.
- Download the latest drivers: Download the latest driver software for your graphics card from the website. It is generally available as an executable file (.exe) or a zipped folder.
- Install the drivers: Once downloaded, run the executable file or extract the zipped folder and then run the installer. Follow the installation prompts and instructions provided.
- Restart your computer: After the driver installation is complete, restart your computer for the changes to take effect.
- Enable FreeSync or G-Sync: Enable FreeSync or G-Sync in the graphics card control panel by following these steps: For Nvidia: Right-click on your desktop and select "Nvidia Control Panel." In the left navigation pane, click on "Display" and then "Set up G-SYNC." Enable G-SYNC for either full screen or windowed and borderless modes. Click "Apply" to save the changes. For AMD: Right-click on your desktop and select "AMD Radeon Software." In the Radeon Software interface, click on the "Settings" tab. Select "Display" from the left sidebar and click on "AMD FreeSync." Enable AMD FreeSync using the toggle switch. Click "Apply" to save the changes.
- Test FreeSync or G-Sync: Verify that FreeSync or G-Sync is properly functioning by launching a supported game or application. Check if the dynamic refresh rate technology is activated.
Note: Ensure that your monitor also supports FreeSync or G-Sync. If it does not, enabling these technologies on your graphics card will not have any effect.