
Best Action Camera Mounts to Buy in July 2026

Universal Action Camera Accessory Kit for GoPro Hero 13 12 11 10 9 8 7 6 5 Go pro Max Insta360 X5/X4/X3 DJI OSMO Action 3 4 5 Pro AKASO APEMAN Sports Cam, Helmet Base Adhesive Tripod Adapter Mount
-
UNIVERSAL COMPATIBILITY: FITS MOST ACTION CAMERAS FOR VERSATILE USE.
-
20-IN-1 ACCESSORY KIT: ALL ESSENTIAL MOUNTS FOR DYNAMIC SHOOTING ANGLES.
-
DURABLE QUALITY: RELIABLE ACCESSORIES WITH EXCELLENT AFTER-SALES SUPPORT.


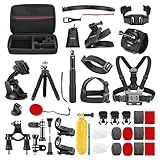
Appolab 61 in 1 Action Camera Accessories Kit for GoPro Hero 13 12 11 10 9 8 7 6, Gopro Max, GoPro Fusion, Xiaomi, Insta360, DJI Osmo Action, AKASO APEMAN, Campark, SJCAM
-
CAPTURE UNIQUE ANGLES: ADJUST YOUR SETUP FOR IMMERSIVE FIRST-PERSON VIEWS.
-
VERSATILE WATER SPORTS USE: SAFELY SHOOT STUNNING UNDERWATER ADVENTURES EASILY.
-
SECURE CAR MOUNTING: RECORD DYNAMIC POV FOOTAGE WHILE DRIVING WITH EASE.
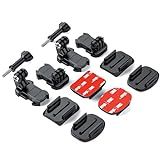
Sametop Helmet Sticky Mounts Adhesive Buckle Mount Screw Accessory Kit Compatible with GoPro Hero 13 12 11 10 Max 9 8 7 6 5 Session DJI Osmo Insta360 AKASO Action Cameras (12 in 1)
- STRONG ADHESION: 3M VHB ADHESIVE ENSURES SECURE, WATERPROOF MOUNTING.
- VIBRATION REDUCTION: RUBBER PLUGS PREVENT ACCIDENTAL RELEASE & REDUCE SHAKES.
- UNIVERSAL COMPATIBILITY: FITS ALL GOPRO MODELS & MAJOR ACTION CAMERAS.
NEEWER 50 in 1 Action Camera Accessory Kit Compatible with GoPro Hero 12 11 10 9 DJI OSMO 4 3 2 Insta360 X3 X2 GO 3 SJCAM DBPOWER AKASO VicTsing APEMAN WiMiUS QUMOX Lightdow Campark Sony Sports DV
-
UNIVERSAL COMPATIBILITY: WORKS WITH ALL MAJOR ACTION CAMERA BRANDS.
-
VERSATILE STRAPS: SECURE SHOTS FROM HEAD, CHEST, OR HELMET FOR ALL ADVENTURES.
-
INNOVATIVE MOUNTS: CAPTURE DYNAMIC ANGLES ON BIKES, CARS, AND IN WATER.
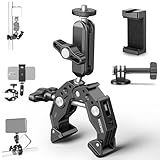
NEEWER Super Clamp with 3" Dual Ballhead Magic Arm, Cold Shoe, 1/4" Threads, Phone/Action Camera Mount Adapter for Desk Tripod Tube Crossbar Gimbal Rods Compatible with SmallRig GoPro DJI, ST83
-
VERSATILE CLAMP FOR ALL GEAR: FITS FLAT/POLE SURFACES (0.6-2.4) SEAMLESSLY.
-
360° ANGLE FLEXIBILITY: DUAL BALL HEADS ENSURE OPTIMAL SHOOTING ANGLES.
-
DURABLE & SCRATCH RESISTANT: BUILT WITH ROBUST MATERIALS FOR LASTING USE.
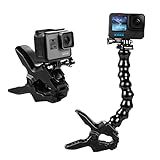
Suptig Jaws Flex Clamp Mount Gooseneck Mount for GoPro Hero 13 Hero 12 Hero 11 Hero 10 Hero 9 Hero 8 Hero 7 Hero 6 Hero 5 Hero 4 Session Hero 3+ Hero 3 Akaso EK7000 DJI osmo Arlo Action Camera.
-
UNIVERSAL COMPATIBILITY: FITS ALL MAJOR ACTION CAMERAS AND ARLO MODELS!
-
ADJUSTABLE GOOSENECK: EASILY CAPTURE THE PERFECT ANGLE FOR EVERY SHOT.
-
DURABLE & EASY SETUP: ROBUST DESIGN ENSURES STABILITY FOR HIGH-QUALITY PHOTOS.
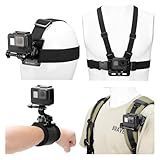
K&F Concept Accessories Set for GoPro Hero 13/12/11/10/9/8/7/6/5/4/DJI Osmo Action Series/Pocket 3/2/Insta360 X5/X4/X3, Chest Harness+Backpack Clip+360 Rotating Head Mount and Wrist Strap
-
QUICK RELEASE FOR SEAMLESS DEVICE SWITCHING ON THE GO!
-
MULTI-ANGLE ADJUSTMENT FOR PERFECT SHOTS EVERY TIME!
-
COMPATIBLE WITH MOST ACTION CAMERAS & SMARTPHONES!
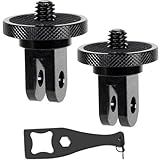
Aluminum Camera Tripod Adapter 1/4"-20 Conversion Adapter Mounts Compatible with Gopro Action Cameras Insta360 and Other Standard 1/4 Accessories, Quarter Inch Mount Adapter (Type AA)
-
VERSATILE COMPATIBILITY: MOUNT ANY 1/4 CAMERA ON GOPRO & TRIPODS.
-
DURABLE CONSTRUCTION: MADE OF STRONG, LIGHTWEIGHT CNC ALUMINUM FOR LONGEVITY.
-
SECURE FIT: RUBBER LOCKING RING PREVENTS CAMERA LOOSENING DURING USE.
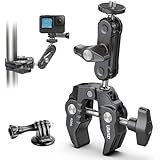
ULANZI Super Clamp Camera Clamp Mount Monitor 360° Ballhead Magic Arm Double Ball Head Adapter with 1/4"-20 & 3/8"-16 Thread for Canon Nikon DSLR Camera/Gopro/LED Lights/Ronin-M/Ronin MX/Freefly MOVI
- VERSATILE CLAMP MOUNTS TO 0.59 RODS; IDEAL FOR VARIOUS SETUPS.
- QUICK, ADJUSTABLE MONITOR POSITIONING FOR OPTIMIZED SHOOTING ANGLES.
- DURABLE ALUMINUM BUILD WITH RUBBER PADS PROTECTS EQUIPMENT DURING USE.
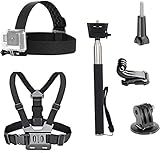
VVHOOY 3 in 1 Universal Action Camera Accessories Kit - Head Strap Mount/Chest Harness/Selfie stick Compatible with Gopro Hero 13 12 11 10 9 8 7 6 5/AKASO EK7000/V50/Brave 7/Dragon Touch Action Camera
- UNIVERSAL FIT: ADJUSTABLE DESIGN FITS ALL GOPRO AND ACTION CAMERAS.
- VERSATILE USE: GREAT FOR SKIING, BIKING, DIVING, AND MORE OUTDOOR SPORTS.
- EASY ADJUSTMENTS: QUICK ANGLE TWEAKS WITH THE ADJUSTABLE BALL-HEAD MOUNT.
Mounting an action camera involves several steps to ensure it is securely attached and positioned for optimal recording. Begin by selecting a suitable mounting surface that provides a stable and secure base, such as a helmet, bike handlebar, or dashboard, depending on the desired perspective. Clean the surface thoroughly to remove any dirt and debris, ensuring the adhesive or mounting mechanism adheres properly. Choose the appropriate mount or accessory for your action camera; common options include adhesive mounts, suction cups, or clamp mounts, each designed for specific surfaces and activities.
When using adhesive mounts, peel off the backing and press the mount firmly onto the surface, applying even pressure to ensure a strong bond. If using a suction cup, attach it to the desired surface, ensuring it's free of dust and moisture, and press it down while engaging the locking mechanism to create a secure seal. For clamp mounts, adjust the size and tighten the clamp onto the chosen surface, ensuring it's firmly secured.
Attach the action camera to the mount using the appropriate connector or screw, typically provided with the camera or mount kit. Adjust the camera angle and orientation to capture the desired field of view, and tighten all screws or locks to prevent movement during recording. Before starting your activity, double-check the stability and security of the mount and camera, making any necessary adjustments to ensure it remains in place throughout the recording session.
What is a gimbal and how does it improve action camera stability?
A gimbal is a mechanical device that is used to stabilize an action camera by allowing it to pivot independently in various directions. It typically has three axes of rotation that correspond to pitch (tilting movement), yaw (panning movement), and roll (rolling movement). By using motors and sensors, a gimbal can counteract unwanted movements and vibrations, providing smooth and stable video footage even in dynamic or shaky environments.
How a Gimbal Improves Action Camera Stability:
- Counteracting Motion: The gimbal's motors automatically adjust to changes in movement. When the camera moves due to shaking, vibrations, or sudden jerks, the gimbal compensates by moving in the opposite direction, keeping the camera steady.
- Maintaining Horizon Level: A gimbal helps maintain a consistent horizon line, preventing the camera from tilting or slanting. This is particularly beneficial for capturing professional-looking footage with consistent framing and level horizons.
- Smoother Pans and Tilts: It enables smooth panning and tilting shots without the abrupt movements that can occur when trying to perform these motions manually.
- Versatility in Motion: Gimbals allow for more creative freedom in camera movement, facilitating complex shots such as tracking, panning, and motion time-lapses, without compromising stability.
- Reducing Shakiness: Gimbals significantly reduce the shakiness in handheld and fast-moving shots, which is common when recording action sports or dynamic activities.
Overall, using a gimbal with an action camera enhances the quality of the video by providing smooth, professional-grade footage, making it an essential tool for filmmakers, vloggers, and content creators aiming for high-quality results.
What is the best way to clean and maintain action camera mounts?
Cleaning and maintaining action camera mounts is vital to ensure their longevity and optimal performance. Here are some steps and tips for proper care:
- Basic Cleaning: Disassemble: Before cleaning, disassemble the mount completely to access all parts. Rinse with Water: Use clean, lukewarm water to rinse off dirt, sand, or salt, especially if you've been using the mount in marine environments. Mild Soap Solution: For stubborn dirt, use a mild soap solution. Avoid harsh chemicals that could damage the material of the mount. Soft Brush: Use a soft-bristled brush or an old toothbrush to scrub away grime, especially in seams or textured areas. Rinse Thoroughly: Make sure to rinse all soap residues off each part to prevent potential damage or slipping during future use.
- Drying: Air Dry: Allow all parts to air dry completely on a clean, dry towel. Ensure they dry thoroughly to avoid any potential rust or corrosion, especially on metal parts. Avoid Direct Sunlight: While drying, keep the mounts out of direct sunlight to prevent fading or warping.
- Lubrication and Inspection: Lubricate Moving Parts: If the mount has any moving parts, lightly lubricate them with a silicone-based lubricant to avoid rust and ensure smooth operation. Inspect for Wear and Damage: Regularly examine the mounts for signs of wear, cracks, or other damages. Replace any parts that seem compromised to maintain safety and functionality.
- Storage: Cool, Dry Place: Store the mounts in a cool, dry place, away from extreme temperatures and humidity. Protect from Sunlight: Keep mounts out of prolonged direct sunlight during storage to prevent material degradation.
- Regular Maintenance: Regular Inspection: Make it a habit to inspect your mounts regularly, especially before and after intense activities or exposure to harsh environments. Check for Integrity: Tighten any loose screws or connections before each use to ensure the mount's integrity.
Being diligent about maintenance will help extend the life of your action camera mounts and ensure they're always ready for your next adventure.
How to use a suction cup mount for an action camera?
Using a suction cup mount for an action camera is a great way to capture footage from a variety of surfaces. Here's a step-by-step guide on how to properly use one:
- Choose a Suitable Surface: Ensure that the surface is clean, smooth, and non-porous. Ideal surfaces include glass, metal, or polished tiles. Avoid rough or curved surfaces which might not provide a secure grip.
- Clean the Surface: Wipe the surface with a clean, damp cloth to remove any dust, dirt, or grease. A clean surface ensures maximum suction power.
- Prepare the Suction Cup: Inspect the suction cup for any dirt or debris and clean it if necessary. Some people lightly moisten the suction cup with water to enhance suction, though this is typically optional.
- Attach the Suction Cup: Position the suction cup on the surface and press down firmly to create a vacuum. Engage the lever or locking mechanism, if available, to secure the suction cup in place. Ensure it feels tight and well-attached.
- Mount the Action Camera: Attach the action camera to the mount. This usually involves screwing the camera onto the mounting screw or snapping it into place, depending on the design of your mount. Make sure it is tight and secure.
- Adjust the Angle: Adjust the angle of the camera by loosening any adjustable joints, positioning the camera as desired, and then tightening them again. This may involve the use of ball joints or pivot points on the mount.
- Test the Stability: Before using it in action, gently tug on the mount to ensure it is securely attached. If there is any movement, reattach and secure it again.
- Capture Footage: Once everything is in place and secure, start recording and capture your footage. Monitor the camera occasionally to make sure it remains stable.
- After Use: Remove the suction cup by releasing the lock or lever mechanism and gently peeling it off the surface. Clean the suction cup and camera for storage.
Additional Tips:
- Avoid placing the mount on a surface that gets extremely hot or cold, as temperature fluctuations can affect suction.
- Regularly check the integrity of the suction cup for any signs of wear or damage.
- Consider using a tether for extra security, especially in high-risk situations or locations.
Using these steps will help ensure your action camera remains secure and you get the best footage possible.
What is a quick-release mount and how is it used with action cameras?
A quick-release mount is a type of mounting system designed to securely attach and detach devices swiftly and easily, often with just a single hand. This system is particularly useful for items like action cameras, where users may need to frequently change camera positions, orientations, or mounts during activities.
How It Works:
- Base and Plate: The quick-release mount typically consists of two parts: a base that attaches to a stable surface or object (such as a helmet, bike, or tripod) and a plate or clip that attaches to the camera.
- Locking Mechanism: The plate or clip snaps or slides into the base, where it is then locked in place for security. The locking mechanism is specifically designed to hold the camera firmly even during high-motion activities.
- Release: To detach the camera, you usually push a button, pull a lever, or apply a bit of pressure in a specific direction to release the lock, allowing you to remove the camera quickly.
Uses with Action Cameras:
- Flexibility: Quick-release mounts allow action camera users to quickly change the camera setup to capture different angles and perspectives without interrupting their activities for long.
- Versatility: They can be used in various locations and activities, such as attaching the camera to a helmet for skiing, a bike for mountain biking, or a car for driving footage.
- Efficiency: For extreme sports or dynamic environments where every second counts, quick-release mounts allow for quick switches between different mounting positions without the need for additional tools.
Overall, a quick-release mount enhances the user experience by providing speed and convenience, making it an essential accessory for capturing action-packed moments with ease and efficiency.
How to attach an action camera to a chest harness?
Attaching an action camera to a chest harness is a straightforward process. Here's a step-by-step guide to help you do it:
- Verify Compatibility: Ensure that both your action camera and the chest harness are compatible. Most action cameras, like GoPro or similar models, come with standard mounting systems that fit various accessories.
- Gather Your Equipment: You will need the chest harness, the action camera, and the appropriate mounting accessories-usually a mounting buckle, thumb screw, and perhaps an adapter depending on the harness and camera model.
- Attach the Mounting Buckle to the Harness: Locate the mounting plate on the chest harness. It is usually at the center of the harness. Slide the mounting buckle into the grooves of the mounting plate until it clicks or feels secure.
- Attach the Camera to the Buckle: Align the camera's mounting frame or housing with the slots on the mounting buckle. Insert the thumb screw through the aligned holes of the camera frame and mounting buckle. Tighten the thumb screw to secure the camera firmly to the buckle. Ensure it’s tight enough to prevent any movement, but avoid over-tightening which might cause damage.
- Adjust the Camera Angle: Once the camera is mounted, adjust the angle according to your preference. The camera should generally point straight ahead or slightly upwards, depending on what you want to capture.
- Secure the Harness on Your Body: Wear the harness by slipping it over your shoulders as you would with a vest. Adjust the straps so it fits snugly but comfortably. The harness should be tight enough to stay in place during activity but not so tight as to restrict movement or cause discomfort. Ensure the camera is centered on your chest for balanced recording.
- Test the Setup: Once everything is secure, perform a quick test by moving around or recording a short video to ensure the camera is capturing as intended without excessive movement.
Remember to check all connections periodically during use to ensure they remain tight and secure throughout your activity.
What is the easiest way to switch an action camera between multiple mounts?
Switching an action camera between multiple mounts can be made easier with a quick release system. Here are some steps to do this effectively:
- Use Quick Release Mounts: Purchase a quick release adapter or system compatible with your action camera brand (such as GoPro or others). These systems allow you to quickly snap your camera on and off different mounts without having to unscrew it each time.
- Universal Mounting Kit: Look for a universal mounting kit that offers quick release plates and adapters. This can be useful if you have multiple types of mounts or even different camera brands.
- Extra Base Plates: Install extra base plates on each of your mounts. This way, you only need to deal with a single quick release mechanism on the camera, instead of fiddling with different mounting systems.
- Standardize Your Mounts: If possible, standardize your mounts to be compatible with the quick release system you choose. This minimizes the hassle of dealing with multiple mounting systems.
- Test Fit and Adjust: Before you need to switch quickly, make sure everything fits and works smoothly. Adjust any tension controls on the quick release mechanism to ensure that the camera is securely attached without excessive wobble or too much force needed to release.
- Familiarize Yourself with the System: Practice removing and attaching your camera with the quick release system to become familiar with its operation. This is helpful for smooth transitions, especially in action-packed or time-sensitive scenarios.
Investing in a robust quick release system can save you a lot of time and effort, especially if you switch mounts frequently during your activities.