Best Virtual Wall Devices to Buy in July 2026
iRobot Roomba Authentic Replacement Parts - Dual Mode Virtual Wall Barrier Compatible with Roomba 600 700 800 900 Series, Black - 4636429
-
CONTROL CLEANING ZONES: CHOOSE WHERE YOUR ROBOT CAN AND CAN'T GO.
-
PROTECT IMPORTANT AREAS WITH HALO MODE, KEEPING ITEMS SAFE.
-
FAST SETUP: GET STARTED QUICKLY WITH EASY INSTALLATION.


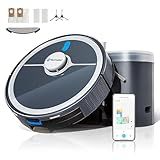
roborock Q7 L5 Robot Vacuum and Mop Combo, 8,000Pa Suction, Upgraded from Q5 Pro, Dual Anti-Tangle System, LiDAR Navigation, No-Go Zones, Self-Charging Robotic Vacuum Cleaner, White
-
POWERFUL 8,000 PA SUCTION: LIFTS DUST AND PET HAIR FROM ANY SURFACE.
-
DUAL ANTI-TANGLE BRUSHES: PERFECT FOR HOMES WITH PETS, MINIMIZES MAINTENANCE.
-
SMART MAPPING & APP CONTROL: EFFORTLESS NAVIGATION AND SCHEDULING AT YOUR FINGERTIPS.
Dual Mode Virtual Wall Barrier for Roomba, Light House Compatible with iRobot Roomba 800 900 600 i S & E Series e5 e6 i4 i6 i7 i8 S9, Replace Part Number: 4636429
- DUAL MODES SIMPLIFY AREA CONTROL: CHOOSE HALO OR BEAM FOR FLEXIBLE USE.
- WIDE COMPATIBILITY: WORKS WITH VARIOUS ROOMBA SERIES FOR VERSATILE CLEANING.
- EASY SETUP & MAINTENANCE: QUICK INSTALLATION AND LOW BATTERY ALERTS ENSURE CONVENIENCE.
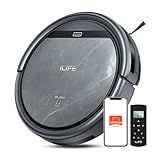
ILIFE V5s Max Robot Vacuum, 4000Pa Max Suction Power, 2.4G WiFi/App/Alexa/Remote Control, Self-Charging Robotic Vacuum Cleaner, for Hard Floors Carpets and Pet Hair
- ADVANCED GYROSCOPE NAVIGATION FOR SEAMLESS CLEANING
- POWERFUL 4000PA SUCTION FOR DEEP DIRT REMOVAL
- CONTROL VIA APP OR VOICE FOR ULTIMATE CONVENIENCE
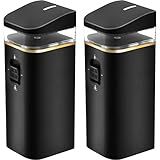
Coodss Dual Model Virtual Wall Barrier Compatible with iRobot Roomba 500/600/700/800/900/e/i/s Series Robot Vacuum. Compare to Part 4636429 (Pack 2)
-
UNIVERSAL COMPATIBILITY: WORKS WITH ALL IROBOT ROOMBA SERIES MODELS.
-
ENHANCED CONTROL: DUAL MODEL OFFERS PRECISE CLEANING MANAGEMENT OPTIONS.
-
USER-FRIENDLY DESIGN: SIMPLE SETUP TO PROTECT AREAS YOU WANT TO KEEP CLEAR.

2-Pack Dual Mode Virtual Wall Barrier for Roomba, Light House Compatible with iRobot Roomba 800 900 600 I S & E Series e5 e6 i4 i6 i7 i8 S9, Replace Part Number: 4636429.
- DUAL MODES FOR VERSATILITY: HALO & BEAM MODES FOR TAILORED BARRIERS.
- WIDE COMPATIBILITY: WORKS WITH MULTIPLE ROOMBA SERIES MODELS.
- EASY SETUP: QUICK INSTALLATION WITH CLEAR LOW BATTERY ALERTS.

Lefant Robot Vacuum, Slim Quiet, 3 Adjustable Strong Suction Levels, Robot Vacuum Cleaner Ideal for Pet Hair Hard Floor and Daily Cleaning, WiFi/App/Alexa/iWatch Control, M210 Pro
- POWERFUL 2200PA SUCTION & TANGLE-FREE BRUSH FOR PET HAIR REMOVAL.
- ULTRA-SLIM DESIGN EASILY CLEANS UNDER FURNITURE AND TIGHT SPACES.
- SMART APP CONTROL & VOICE COMMANDS FOR EFFORTLESS CLEANING SCHEDULES.

Lefant LiDAR Robot Vacuum and Mop, 450ml Visible Dustbin, Upgraded 190° PSD Obstacle Avoidance, Customized Cleaning, Multi-Floor Mapping, 150 Mins Runtime, 2.4G/5G WiFi, Pet Hair & Carpets, M330 Pro
- SMART DTOF NAV & MAPPING FOR EFFICIENT, THOROUGH CLEANING.
- PRECISION DETECTION AVOIDS OBSTACLES, REACHING TIGHT SPACES EASILY.
- AUTO BOOST SUCTION FOR DEEP CLEAN ON ALL FLOOR TYPES, HASSLE-FREE!
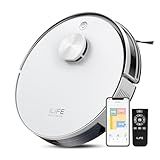
ILIFE A30s Robot Vacuum, 10000Pa Max Suction Robotic Vacuum Cleaner with LiDAR Navigation, Home Mapping, No-Go Zone, 150 Mins, 2.4G WiFi/App/Alexa/Remote Control, for Hard Floor Carpet and Pet Hair
- POWERFUL 10,000PA SUCTION FOR DEEP CLEANING CARPETS AND HARD FLOORS.
- ADVANCED LIDAR MAPPING ENSURES EFFICIENT AND THOROUGH HOME COVERAGE.
- ANTI-TANGLE DESIGN PERFECT FOR HASSLE-FREE PET HAIR COLLECTION.
Vacmaster V10i 3-in-1 Robot Vacuum and Mop Combo with Self-Empty Station for 45 Days, LiDAR Navigation,3000Pa Strong Suction, Multi-Floor Mapping for Homes with Pets, Carpet & Hard Floors
-
PRECISION CLEANING: LIDAR TECH & 3000PA SUCTION FOR FLAWLESS DEBRIS PICKUP.
-
HANDS-FREE CONVENIENCE: SELF-EMPTYING DOCK FOR 45 DAYS OF EFFORTLESS CLEANING.
-
SMART CUSTOMIZATION: CONTROL 6 CLEANING MODES & SET BOUNDARIES VIA APP EASILY.
Setting up virtual walls for a robot vacuum involves using magnetic strips or infrared sensors to create boundaries that the vacuum cannot cross. The virtual walls are placed in areas where you do not want the robot vacuum to go, such as around fragile items or in specific rooms. Some robot vacuums come with virtual wall accessories that can be easily set up and adjusted. Once the virtual walls are in place, the robot vacuum will be confined to the designated areas, allowing for more efficient and targeted cleaning.
What is the compatibility of virtual walls with different models and brands of robot vacuums?
Virtual walls are not universally compatible across all brands and models of robot vacuums. Each brand typically creates its own proprietary virtual wall system that is specifically designed to work with its own robots. However, some virtual walls may be compatible with multiple brands or models within the same brand if they use the same technology or communication protocols.
It is important to check the compatibility of virtual walls with your specific robot vacuum before purchasing or using them together. Additionally, some third-party manufacturers may offer universal virtual walls that are designed to work with a variety of robot vacuum brands, so it is worth exploring third-party options if you are looking for a more versatile solution.
How to set up virtual walls for a robot vacuum with boundary markers?
Setting up virtual walls for a robot vacuum with boundary markers is a fairly simple process. Here's how to do it:
- Determine the areas where you want to create boundaries for your robot vacuum. This could be around furniture, pet bowls, or any other areas you want the robot vacuum to avoid.
- Place the boundary markers in those areas. Boundary markers are typically magnetic strips or physical barriers that the robot vacuum will recognize and avoid. Follow the manufacturer's instructions on how to place them properly.
- Turn on the robot vacuum and let it roam around the space. It will detect the boundary markers and avoid crossing them, ensuring that it stays within the designated areas.
- Adjust the position of the boundary markers if needed to fine-tune the boundaries for the robot vacuum.
- Test the robot vacuum to ensure that it is correctly detecting and avoiding the boundary markers. Make any necessary adjustments to the placement of the markers if the robot vacuum is not responding as expected.
By following these steps, you can easily set up virtual walls for your robot vacuum using boundary markers, ensuring that it cleans the areas you want without straying into unwanted areas.
How to distinguish between virtual walls and no-go zones for a robot vacuum?
Virtual walls and no-go zones are both used to restrict the movement of a robot vacuum, but they function in slightly different ways. Here are some ways to distinguish between the two:
- Virtual walls are typically created by placing physical barriers or setting up electronic signals that the robot vacuum can detect and avoid. No-go zones, on the other hand, are usually defined using a mobile app or control panel, where you can draw boundaries on a map to prevent the vacuum from entering certain areas.
- Virtual walls are often used to create temporary boundaries, such as blocking off a specific room during cleaning. No-go zones are more permanent and can be set up in areas where you never want the robot vacuum to enter.
- Virtual walls may require additional setup or device installation, while no-go zones can be easily configured and adjusted through the robot vacuum's control interface.
- Virtual walls typically emit signals or use infrared technology to create a boundary that the robot vacuum cannot cross. No-go zones rely on software algorithms to recognize and avoid restricted areas.
In summary, virtual walls are physical or electronic barriers that prevent the robot vacuum from entering certain areas, while no-go zones are predefined boundaries created using software or an app. Both serve the same purpose of restricting the robot vacuum's movement, but they differ in terms of setup, functionality, and permanence.
How to adjust the virtual walls for different room layouts?
- Assess the room layout: Before setting up the virtual walls, take a look at the room layout and identify any obstacles or areas you want to block off. This could include furniture, shelves, or other objects that you don't want the robot to approach.
- Use the app or remote control: Many robot vacuum models come with an app or remote control that allows you to easily adjust the virtual walls settings. Use this tool to create virtual barriers in specific areas of the room.
- Position the virtual walls strategically: Place the virtual walls in locations that will effectively block off the areas you want to keep the robot out of. Make sure they are positioned at the right angle to ensure that the robot's sensors will pick up the signal and avoid the restricted areas.
- Test the virtual walls: Once you have set up the virtual walls, test them to see if they are working correctly. Start the robot vacuum and observe how it reacts to the virtual barriers. Make adjustments as needed to ensure that the robot stays within the designated cleaning area.
- Customize the settings: Depending on the specific layout of your room, you may need to adjust the virtual walls settings to create multiple barriers or to increase the range of the barriers. Experiment with different configurations to find the setup that works best for your space.
- Regularly review and adjust: As you rearrange furniture or make changes to the room layout, remember to review and adjust the virtual walls accordingly. Regularly checking and updating the settings will ensure that the robot vacuum continues to clean effectively and efficiently within the designated areas.
How to reset virtual walls for a robot vacuum to factory settings?
To reset virtual walls for a robot vacuum to factory settings, you will typically need to follow these steps:
- Locate the virtual wall device. This is typically a small device that emits a signal to prevent the robot vacuum from entering certain areas.
- Look for a reset button on the virtual wall device. This button is usually a small hole that can be pressed with a paperclip or similar tool.
- Press and hold the reset button for a few seconds until you see the indicator lights on the virtual wall device flash or change to indicate that the reset has been successful.
- If there is no reset button on the virtual wall device, check the user manual or manufacturer's website for specific instructions on how to reset the virtual walls to factory settings.
- Once the virtual walls have been reset to factory settings, you may need to reprogram or set up the virtual walls again using the instructions provided by the manufacturer.
If you are unable to reset the virtual walls to factory settings using the above steps, you may need to contact the manufacturer's customer support for further assistance.