Best On-Screen Display Settings Devices to Buy in July 2026
OSD Audio 4X Speaker Selector w/Volume Control Resistor Audiophile - RSVC4
- CONTROL UP TO 4 SPEAKERS WITH RELIABLE, AFFORDABLY PRICED SELECTOR.
- TAILOR SOUND WITH INDIVIDUAL VOLUME KNOBS FOR EACH AUDIO ZONE.
- PROTECT AMPLIFIERS WHILE ENJOYING VERSATILE SOUND IN ANY SETTING.


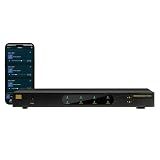
OSD Audio Nero Stream XD2 Stereo Amplifier 150W x2, HDMI ARC, WiFi App Control, Bluetooth, USB DAC, Class D 2 Channel Home Audio Streaming Amp
-
POWERFUL 150W OUTPUT FOR CRISP AUDIO FROM ANY SPEAKER SETUP
-
EASY HDMI ARC CONNECTION FOR CLEAR SOUND & SEAMLESS CONTROL
-
WIFI STREAMING & MULTI-DEVICE INTEGRATION FOR ULTIMATE FLEXIBILITY
OSD Audio OSD XMP100 GEN2 2X 100W Class D High Power Stereo Amplifier, Bass and Treble Control 90 dB SNR, Wireless BT
-
POWERFUL 2 X 100W RMS OUTPUT FOR IMMERSIVE SOUND EXPERIENCE.
-
STREAM MUSIC WIRELESSLY FOR ULTIMATE CONVENIENCE AND FLEXIBILITY.
-
CUSTOMIZABLE SOUND CONTROLS AND MULTI-ROOM AUDIO FOR VERSATILE USE.
OSD Audio SRT4 GEN2 App Control 4 Zone Media Streamer, iOS or Android App, Airplay Compatible, 12V Trigger
-
STREAM DIFFERENT MUSIC IN 4 ZONES: SEAMLESS AUDIO FOR EVERY SPACE!
-
CONTROL ANYWHERE WITH OSD APP: EASY MANAGEMENT FROM IOS AND ANDROID!
-
STREAM FROM TOP SERVICES: ENJOY MUSIC FROM SPOTIFY, TIDAL, AND MORE!
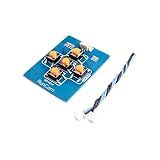
RunCam Key Board for FPV Camera OSD Setting Compatible with Foxeer RunCam FPV Camera
- ULTRA-LIGHTWEIGHT AT JUST 5G FOR OPTIMUM PERFORMANCE.
- COMPATIBLE WITH POPULAR RUNCAM FPV CAMERAS FOR VERSATILE USE.
- INCLUDES ESSENTIAL ACCESSORIES: KEYBOARD AND FPV CABLE BUNDLED.
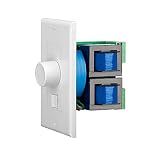
OSD Audio 70V Mono 50W in-Wall Volume Control Unique Thru-Put Easy Daisy Chain Install (White, Almond, Bone) MVC50
-
EFFORTLESS INSTALLATION WITH DAISY CHAIN SUPPORT FOR FLEXIBILITY.
-
STYLISH COLOR MATCH DESIGNS FOR SEAMLESS COMMERCIAL INTEGRATION.
-
HIGH POWER 50W FOR OPTIMAL SOUND PERFORMANCE IN LARGE SPACES.
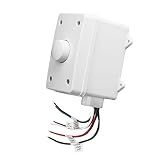
OSD Audio Outdoor 100W Volume Control Impedance Matching, Weather Resistant Enclosure OVC100, White
- WEATHERPROOF DESIGN FOR DURABILITY IN ANY OUTDOOR CONDITION.
- EASY VOLUME CONTROL WITH IMPEDANCE MATCHING FOR EQUIPMENT SAFETY.
- 100 WATTS OF SOUND POWER, SUPPORTS UP TO 8 SPEAKER PAIRS.
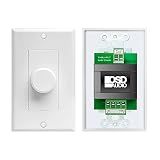
OSD Audio SVC205 in-Wall Volume Control with On/Off Switch, 300W Speaker Control with Impedance Matching, Single Gang Wall Plate, White
- ADJUSTABLE POWER: CONTROL 100W PER CHANNEL FOR OPTIMAL AUDIO EXPERIENCE.
- EASY INSTALLATION: SLEEK DESIGN FITS STANDARD BOXES FOR QUICK SETUP.
- SAFE CONNECTIONS: IMPEDANCE PROTECTION PREVENTS AMP OVERHEATING ISSUES.
On-screen display (OSD) settings refer to the visual overlay that appears on your screen when adjusting certain display settings, such as brightness, contrast, color, and more. It allows you to make real-time adjustments to your display without relying on physical buttons or controls on your monitor.
To use and customize OSD settings, follow these steps:
- Access the OSD menu: Most monitors have dedicated buttons or a joystick located on the front or side panel. Press the OSD button to open the menu.
- Navigation: Once the OSD menu appears, use the navigation buttons, typically labeled with arrows or dots, to move through the different settings and options.
- Select a setting: Use the navigation buttons to highlight the desired setting you want to adjust, such as brightness, contrast, or color balance.
- Adjust the setting: After selecting a particular setting, use the navigation buttons to increase or decrease the value or level of that setting. The changes will be immediately reflected on the screen.
- Additional options: In addition to basic settings like brightness and contrast, OSD menus often provide additional options like aspect ratio, input source selection, language preference, and more. Navigate through the menu to access and customize these settings as needed.
- Save and exit: Once you have finished adjusting all desired settings, navigate to the "Save" or "Exit" option in the OSD menu and press the corresponding button to save your changes and exit the menu.
Customizing OSD settings may vary depending on the brand and model of your monitor. The OSD menu on some displays also offers advanced features like color calibration, gaming presets, and adaptive sync options for a more tailored experience.
By using and customizing OSD settings, you can fine-tune your display to achieve optimal visual quality, color accuracy, and overall viewing experience according to your preferences.
How to adjust the OSD text color?
To adjust the OSD (On-Screen Display) text color, follow these steps:
- Open the OSD menu of your device. The method to access the OSD menu may vary depending on the device you are using. Typically, there is a dedicated button on the monitor or remote control for accessing the menu.
- Navigate to the "Display" or "Image" settings in the OSD menu. Look for options related to color settings.
- Within the color settings, search for an option specifically related to adjusting the OSD text color. This option may be labeled as "OSD Color", "Text Color", or something similar.
- Select the OSD text color option and choose the desired color from the available options. Some devices may offer a selection of preset colors, while others may provide a color wheel or RGB sliders to allow you to create a custom color.
- Once you have selected the desired text color, save the changes and exit the OSD menu. The OSD text color should now be adjusted according to your preference.
Note: Not all devices offer the ability to adjust the OSD text color. In such cases, you may need to refer to the user manual or consult the manufacturer's website for specific instructions on whether this feature is available on your device and how to adjust it.
What is the purpose of the OSD information display?
The purpose of the OSD (On-Screen Display) information display is to provide users with real-time information and settings related to the display device. It is typically found in monitors, televisions, and other visual output devices. The OSD menu allows users to adjust various display settings such as brightness, contrast, color, picture mode, and input source selection. It also provides information about the current display resolution, refresh rate, signal input, and other technical details. The OSD display is used to customize the visual preferences and optimize the display performance according to the user's needs.
How to adjust the OSD sharpness settings?
Adjusting the OSD (On-Screen Display) sharpness settings may vary depending on the specific monitor or display you are using, but here are some general steps that can guide you through the process:
- Access the OSD menu: Press the OSD button typically located on the front or side of your monitor to open the on-screen display menu.
- Navigate to the sharpness settings: Use the arrow buttons on the monitor or display to navigate through the OSD menu options. Look for a section related to picture settings or image adjustments.
- Open the sharpness menu: Within the picture settings or image adjustments, you will likely find a specific option for sharpness. Select it to open the sharpness settings menu.
- Adjust the sharpness level: Once you are in the sharpness settings menu, you can typically use the arrow buttons to increase or decrease the sharpness level. Some monitors use a scale from 1 to 100, while others use a different scale or provide specific preset options. Experiment with different levels to find the desired sharpness.
- Save and exit: After adjusting the sharpness level, navigate to the "Save" or "Apply" option within the OSD menu, and select it to save your changes. Then, exit the menu by selecting the "Exit" or "Menu" button.
It's worth noting that excessive sharpness can sometimes result in an unnatural or overly processed appearance, while too little sharpness can lead to a blurry or soft image. Adjusting sharpness is subjective, so it's recommended to find a level that suits your preferences and provides a clear and detailed image without enhancing artifacts or image noise.
What is the OSD aspect ratio option used for?
The OSD (On-Screen Display) aspect ratio option is used to specify the ratio of the width to the height of the content displayed on a screen. It allows users to adjust the aspect ratio of the image or video to fit their preferences or match the source material accurately. Different aspect ratios, such as 4:3, 16:9, or 21:9, can be selected to ensure the content is displayed without distortion or stretching.
How to adjust brightness using the OSD settings?
To adjust brightness using the OSD (On-Screen Display) settings, follow these steps:
- Press the OSD button on your monitor. This button is usually located on the front or side of the monitor and is labeled with an icon that resembles a screen or menu.
- Navigate through the OSD menu using the arrow buttons on your monitor. The arrow buttons are typically located near the OSD button or are integrated into it.
- Look for the "Brightness" or "Contrast" option in the OSD menu. The specific name may vary depending on the monitor model.
- Select the "Brightness" or "Contrast" option and press the arrow buttons to increase or decrease the brightness level. Some monitors may display a numerical value for the brightness level, while others use symbols or icons.
- After adjusting the brightness to your desired level, select the "Exit" or "OK" option in the OSD menu to save the changes.
Note: The exact steps may vary depending on your monitor's brand and model. Therefore, it's always recommended to consult the monitor's user manual for specific instructions related to adjusting brightness using the OSD settings.