
Best Digital Frames for Video Playback to Buy in July 2026
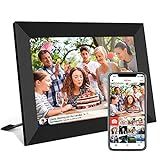
32GB FRAMEO 10.1 Inch Smart WiFi Digital Photo Frame 1280x800 IPS LCD Touch Screen, Auto-Rotate Portrait and Landscape, Built in 32GB Memory, Share Moments Instantly via Frameo App from Anywhere
- SEND PHOTOS/VIDEOS INSTANTLY FROM ANYWHERE WITH FRAMEO APP SUPPORT.
- STUNNING 10.1” IPS HD TOUCH SCREEN FOR VIVID VIEWING AT ANY ANGLE.
- EASY SETUP; USER-FRIENDLY INTERFACE FOR ALL AGES AND OCCASIONS.


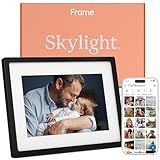
Skylight Frame – WiFi Digital Picture Frame Customer Support, Touch Screen Digital Photo Frame with Easy Setup, Photo Gifts for Parents and Grandparents - 10 Inch Black
-
EFFORTLESS SET-UP: PLUG IN, CONNECT TO WI-FI, AND START SHARING PHOTOS!
-
UNIQUE PHOTO GIFTS: ELEVATE ANY OCCASION WITH HEARTFELT MEMORIES SENT INSTANTLY.
-
CONNECT GENERATIONS: PERFECT FOR ALL AGES, BRIDGING TECH AND NOSTALGIA SEAMLESSLY.
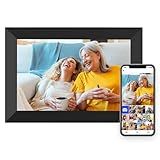
Digital Picture Frame WiFi 10.1 Inch Smart Digital Photo Frame with 1280x800 IPS HD Touch Screen, Auto-Rotate and Slideshow, Easy Setup to Share Photos or Videos Remotely via App from Anywhere
- PRELOADED WITH MEMORIES: PERFECT FOR HEARTFELT GIFTS ON ANY OCCASION!
- STUNNING 10.1 IPS DISPLAY FOR VIBRANT, CLEAR PHOTOS FROM ALL ANGLES.
- EFFORTLESS WI-FI SHARING: CONNECT UP TO 30 MEMBERS TO CHERISH MOMENTS!
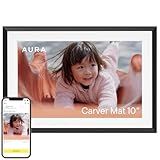
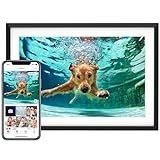
Aura Digital Picture Frame - 10.1" HD Mat Display | Wirecutter's Best Digital Frame for Gifting - Send Photos Directly from Your Phone from Anywhere | Quick & Easy Setup Over WiFi - Free App | Black
-
TOP-RATED BY EXPERTS: LOVED BY MILLIONS, FEATURED IN MAJOR OUTLETS.
-
EFFORTLESS SETUP: CONNECTS EASILY VIA WIFI, ADD PHOTOS IN MINUTES.
-
GIFT-READY DESIGN: PRE-LOAD MEMORIES FOR A PERSONAL TOUCH!
Euphro 10.1'' Digital Picture Frame with 32GB Storage, Digital Photo Frame with 1280x800 IPS Touch Screen, Share Photos/Videos and Send Best Wishes via Free App
- INSTANTLY SHARE PHOTOS PRIVATELY VIA THE UHALE APP ON ANY DEVICE.
- STUNNING 10.1-INCH IPS TOUCH SCREEN DISPLAYS MEMORIES BEAUTIFULLY.
- 32GB STORAGE HOLDS 60,000+ PHOTOS; PERFECT FOR ENDLESS MEMORIES!

Digital Picture Frame, 15.6 Inch Large Frameo Digital Photo Frame WiFi, 32GB, 1920 * 1080 IPS HD Touch Screen, Tabletop&Wall-Mounted, Share Picture Video, Birthday, Wedding, for Mom
-
SHARE 50,000+ PHOTOS INSTANTLY VIA FRAMEO APP, NO LIMITS!
-
PERFECT HEARTFELT GIFTS FOR ANY OCCASION, ELEGANTLY PACKAGED.
-
STUNNING 15.6 HD TOUCH SCREEN DISPLAYS VIVID, DETAILED MEMORIES.

Frameo 10.1 Inch WiFi Digital Picture Frame, Smart Cloud Electronic Photo Frame with HD IPS Touch Screen Slideshow 32GB Memory Auto-Rotate Wall Mount, Share Photos/Videos from Phone by Frameo App
- INSTANT, PRIVATE PHOTO SHARING VIA FRAMEO APP FOR MEMORIES ON-THE-GO.
- STUNNING 10.1 HD TOUCH SCREEN WITH USER-FRIENDLY NAVIGATION.
- STORE 80,000+ PHOTOS; EXPANDS EASILY WITH MICRO-SD CARDS.
Digital picture frames are primarily designed to display images, but many modern models now come with the capability to play videos as well. These frames often include built-in speakers for audio playback, complementing the video feature. The supported video formats can vary depending on the brand and model, with some common formats including MP4, AVI, and MOV. Users can typically upload video files to the frame via USB, SD card, or through wireless methods like Wi-Fi or Bluetooth. The playback options may include looping videos, playing videos after a set interval of displaying pictures, or displaying videos as part of a slideshow. It's important to check the specifications of the digital picture frame to ensure it supports video playback, as not all models may include this functionality.
What is the average battery life of a digital picture frame?
Digital picture frames vary in terms of battery life depending on their size, brand, display quality, and features. However, most digital picture frames are designed to be plugged into a power source and do not rely on battery power for continuous operation. For those that do have a battery, such as smaller, portable models, the battery life generally ranges from a few hours to a day of continuous use.
For frames that use a rechargeable battery, you might typically expect anywhere from 2 to 6 hours of usage on a single charge. It's important to check the manufacturer's specifications for the specific model you are interested in to get a more accurate figure, as these can vary significantly between products.
How to connect a digital picture frame to Wi-Fi?
Connecting a digital picture frame to Wi-Fi usually involves a few straightforward steps, though it can vary somewhat depending on the brand and model of your frame. Here's a general guide to get you started:
- Power On the Frame: Plug in your digital picture frame using the included power adapter and turn it on.
- Access the Settings Menu: Locate the settings menu on the frame. This is typically found by navigating the frame's touchscreen interface or using a set of physical buttons on the frame.
- Select Wi-Fi or Network Settings: In the settings menu, look for a section labeled “Wi-Fi,” “Network,” or “Connectivity.”
- Scan for Networks: Choose to scan for available Wi-Fi networks. The frame will search for nearby Wi-Fi signals and display a list of networks.
- Select Your Wi-Fi Network: From the list of available networks, select your Wi-Fi network. You may need to use buttons or a touchscreen to navigate and make your selection.
- Enter the Wi-Fi Password: If your network is secured, you'll be prompted to enter the Wi-Fi password. Use the on-screen keyboard or button navigation to input the password carefully.
- Connect to the Network: Once the password is entered, confirm your selection to connect the frame to the network. The frame should display a message indicating a successful connection or a notification if there are any issues.
- Verify Connection: Check that the digital picture frame is connected to the internet. This might be shown by an icon or a message in the settings menu.
- Update and Customize: If your frame has internet features, check for any firmware updates that can improve performance or add new features. Customize your settings, such as slide durations, transition effects, or other display preferences.
- Sync Photos: Use any apps or software associated with your digital picture frame to upload or sync photos from the cloud, email, or directly from your phone.
If you run into problems, consult the user manual specific to your frame for troubleshooting and further instructions. If your frame uses a proprietary app for setup, make sure to download it and follow the specific instructions provided there.
How to control a digital picture frame via a smartphone app?
Controlling a digital picture frame via a smartphone app typically involves several steps, but the exact process may vary depending on the brand and model of the frame. Here’s a general guide to get you started:
- Purchase a Compatible Frame: Make sure you have a digital picture frame that supports smartphone connectivity. Popular brands offering app-controlled frames include Nixplay, Aura, and Skylight.
- Download the App: Install the manufacturer’s app from the App Store for iOS devices or Google Play Store for Android devices. The app is usually free and specifically designed for the brand of your digital frame.
- Set Up an Account: Open the app and create an account, if necessary. This typically requires providing an email address and creating a password.
- Connect the Frame to Wi-Fi: Turn on the digital frame and navigate to the Wi-Fi settings. Connect it to your home Wi-Fi network. The process is usually intuitive, but you may need to refer to the manual for specific instructions.
- Pair Your Smartphone with the Frame: Follow the app's instructions to connect it with your digital frame. This often involves entering a code displayed on the frame or scanning a QR code.
- Upload Photos via the App: Once connected, you can use the app to upload photos from your smartphone to the frame. The app may offer options to create albums, sequence photos, and set display durations.
- Invite Family Members: Many digital frames allow you to invite family members to upload photos via the app. You’ll typically send them an invite through email or within the app.
- Manage Settings Remotely: Use the app to adjust settings such as photo transitions, display order, sleep schedule, and more. Some apps also offer cloud storage options, allowing you to manage large collections of photos.
- Troubleshooting: If you encounter issues, consult the user manual or manufacturer’s support page. Common solutions include re-pairing the device, checking Wi-Fi connection, or updating the app and frame firmware.
By following these steps, you can easily control your digital picture frame through your smartphone app, enhancing your experience and making it simple to share memories with family and friends.