
Best Digital Picture Frames to Buy in July 2026
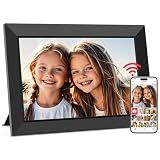
Frameo 10.1 Inch WiFi Digital Picture Frame, Smart Cloud Electronic Photo Frame with HD IPS Touch Screen Slideshow 32GB Memory Auto-Rotate Wall Mount, Share Photos/Videos from Phone - Gifts for Mom
-
INSTANT SHARING & PRIVACY: SECURELY SHARE MEMORIES WITH LOVED ONES ANYTIME!
-
VIVID 10.1 HD DISPLAY: ENJOY STUNNING PHOTOS FROM ANY ANGLE EFFORTLESSLY.
-
32GB STORAGE CAPACITY: STORE 80,000+ PHOTOS AND UPLOAD LONGER VIDEOS EASILY!


Aura 10" HD WiFi Digital Picture Frame – Free Unlimited Cloud Storage – Send Photos from Phone – No Subscription – Auto On/Off – Gift for Parents & Grandparents (Black, 10")
- STUNNING HD DISPLAY FOR VIBRANT COLORS AND EXCEPTIONAL CLARITY.
- EFFORTLESS SETUP IN UNDER A MINUTE, PERFECT FOR ANY AGE.
- FREE UNLIMITED STORAGE WITH AURA APP FOR SHARING AND ORGANIZING.

AEEZO Digital Picture Frame, 10.1 Inch Digital Photo Frame with 1280 * 800 HD IPS Touch Screen, Smart Digital Frame Built-in 32GB Memory, Auto-Rotate Easy Setup via AiMOR APP(Black)
- INSTANTLY SHARE CHERISHED MOMENTS WITH LOVED ONES, ANYTIME, ANYWHERE.
- ENJOY VIBRANT 10.1 TOUCHSCREEN WITH 1280X800 HD CLARITY AND BRIGHTNESS.
- GIFT MEANINGFUL MEMORIES; EASY SETUP FOR ALL AGES, NO TECH SKILLS NEEDED.

64GB 15.6" Frameo Digital Picture Frame WiFi, Large Electronic Photo Frames 1920 x 1080 IPS FHD Touch Screen, Send Photos from Your Phone from Anywhere, Best Gifts for Parents and Grandparents
-
SHARE MEMORIES INSTANTLY WITH FRAMEO APP, NO DISTANCE LIMITS!
-
64GB STORAGE FOR 100,000 PHOTOS-EXPAND WITH SD/USB EASILY!
-
VIVID 15.6” HD TOUCHSCREEN; A PERFECT GIFT FOR ALL OCCASIONS!

32GB FRAMEO 10.1 Inch Smart WiFi Digital Photo Frame 1280x800 IPS LCD Touch Screen, Auto-Rotate Portrait and Landscape, Built in 32GB Memory, Share Moments Instantly via Frameo App from Anywhere
-
SHARE MEMORIES INSTANTLY: SEND PHOTOS/VIDEOS GLOBALLY VIA FRAMEO APP.
-
VIBRANT HD DISPLAY: ENJOY STUNNING VISUALS ON A 10.1” IPS TOUCH SCREEN.
-
SMART FEATURES: CUSTOMIZE SETTINGS, SYNC CALENDARS & REACT WITH EMOJIS!

Digital Picture Frame, Frameo 15.6 Inch Large Digital Photo Frame WiFi, 1920*1080 IPS FHD Touch Screen Large Display, Tabletop&Wall-Mounted, Electronic Photo Frame, Share Video, Birthday Gifts for Mom
-
INSTANT SHARING VIA FRAMEO APP-PHOTOS/VIDEOS ANYTIME, ANYWHERE!
-
ELEGANT GIFT PACKAGING FOR ANY OCCASION-SHARE LOVE & MEMORIES!
-
VIVID 15.6 FHD TOUCH SCREEN-EXPERIENCE EVERY DETAIL IN LIFE!

Skylight Frame – WiFi Digital Picture Frame Customer Support, Touch Screen Digital Photo Frame with Easy Setup, Photo Gifts for Parents and Grandparents - 10 Inch Black
- EASY SETUP: PLUG IN, CONNECT TO WI-FI, AND SHARE PHOTOS INSTANTLY!
- UNIQUE PHOTO GIFTS: TRANSFORM ANY DAY INTO A SPECIAL OCCASION!
- ELEGANT DESIGN: STUNNING DISPLAY WITH CLOUD STORAGE, NO SD CARDS NEEDED!
The ideal size for a digital picture frame for home use depends on various factors, including the intended location, viewing distance, and personal preference. Generally, digital frames range from 7 inches to over 15 inches diagonally. For a living room or a larger space, a frame between 10 to 15 inches is often considered ideal, offering a good balance between visibility and space consumption. This size allows for clear and vibrant images that can be easily seen from a distance. For more compact areas like a desk or a bedroom nightstand, smaller frames, around 7 to 10 inches, might be more suitable. Ultimately, the best size will align with where you plan to place the frame, how far away it will be viewed, and your style preference for how the digital frame integrates with your home decor.
What is the best brand for digital picture frames?
Choosing the best brand for digital picture frames depends on your specific needs and preferences, such as display quality, design, connectivity options, and price. However, some of the top brands consistently recommended by consumers and experts include:
- Nixplay: Known for its user-friendly interface and high-quality displays, Nixplay frames often feature WiFi connectivity, allowing users to easily sync photos from their smartphones or cloud storage.
- Skylight: Skylight offers frames with simple and intuitive designs, making them a great choice for those who want a hassle-free experience. They are popular for their email photo sharing feature.
- Aura: Aura frames are praised for their sleek, modern designs and vibrant displays. They often come with advanced features like gesture control and noise-cancelling audio.
- Pix-Star: This brand is known for its versatile connectivity options, including WiFi and email sharing, as well as compatibility with online photo platforms.
- PhotoSpring: Offers frames with a good mix of features like touchscreens and internal storage, along with a focus on ease of use.
It's a good idea to read reviews and compare features like screen size, resolution, storage capacity, and ease of setup before making a purchase to ensure the frame meets your specific requirements.
How to troubleshoot a digital picture frame that won't turn on?
If your digital picture frame won’t turn on, here are some troubleshooting steps you can try:
- Check the Power Source: Ensure the frame is properly plugged into a working electrical outlet. Test the outlet by plugging in another device to confirm it’s functioning. If the frame uses batteries, make sure they are correctly installed and have a charge. Replace them with new ones to rule out battery issues.
- Inspect the Power Cable and Adapter: Check the power cable and adapter for any visible damage. If any are found, you may need to replace them. Ensure the connections are secure between the frame, the power adapter, and the wall outlet.
- Try a Different Power Outlet: It’s possible the outlet you are using isn't working, so try plugging the frame into a different outlet.
- Reset the Frame: Some frames have a reset button or pinhole. If available, use this feature to reset the device. This may resolve any temporary software glitches.
- Check for a Power Switch: Ensure that any power switch on the frame is in the "on" position. Some frames have an easily overlooked switch for power.
- Consult the User Manual: Refer to the user manual for any model-specific troubleshooting tips and ensure you haven’t missed any setup steps.
- Software or Firmware Issues: If possible, connect the frame to a computer to check for firmware updates. Sometimes updating the software can fix power or startup issues.
- Contact Customer Support: If you’ve tried everything and the frame still won’t turn on, contact the manufacturer’s customer support for further assistance. They might offer additional troubleshooting steps or information about warranty or repairs.
- Professional Repair: If the frame is still under warranty, seek a professional repair or replacement from the manufacturer. If it’s not covered, consider the cost of repair versus replacement.
By following these steps, you can often diagnose and resolve the issue with a digital picture frame that won't turn on.
What is the most common size for a digital picture frame?
The most common size for a digital picture frame tends to be around 10 inches, measured diagonally across the screen. This size offers a good balance between display quality and portability, making it suitable for most households. However, digital frames are available in a wide range of sizes, from smaller 7-inch models to larger options like 15 inches or more, catering to different preferences and display needs.
What is the cost range for digital picture frames?
The cost of digital picture frames can vary widely depending on factors such as size, resolution, brand, features, and additional functionalities like Wi-Fi connectivity, touchscreen interface, and internal storage capacity. As of the latest information:
- Budget Frames: These typically range from $30 to $70. They often have basic features and smaller screen sizes, usually under 8 inches, with lower resolution displays.
- Mid-Range Frames: These generally cost between $70 and $150. They come with better resolution, larger screens (usually 8 to 10 inches), and additional features like Wi-Fi connectivity and support for various media formats.
- Premium Frames: These can range from $150 to $300 or more. Premium frames usually offer larger screens (10 inches or more), high-resolution displays, advanced features like cloud storage, video playback, and touchscreen controls. Some high-end brands can even exceed this price range.
Prices can fluctuate based on brand reputation, retail promotions, and the inclusion of cutting-edge technology. It's also worth checking online reviews and user feedback to determine the best value for your needs.
How to use a USB drive with a digital picture frame?
Using a USB drive with a digital picture frame is generally straightforward, but it can vary slightly depending on the make and model of the frame. Here are some general steps you can follow:
- Check Compatibility: Before starting, ensure that your digital picture frame supports USB drives. Refer to the user manual if necessary.
- Prepare Your USB Drive: Format the Drive: It's often best to format the USB drive to ensure compatibility. Most frames support FAT32, which is a common file system for USB drives. Upload Photos: Copy your photos onto the USB drive. Create folders if your digital frame allows folder navigation, otherwise just drag and drop the images directly onto the drive. Ensure the photo file formats are supported by your frame-commonly JPEG or JPG. Remove Unwanted Files: It's a good idea to remove any unnecessary files from the USB drive to avoid confusion or errors when using the frame.
- Insert the USB Drive: Plug the USB drive into the corresponding port on the digital picture frame. This port is usually located on the side or back of the frame.
- Access USB Content: Turn on the digital picture frame. Some frames will automatically start a slideshow from the USB drive. Others might require manual input. This can involve: Using a remote control or onboard buttons to navigate to the source selection and choosing the USB option. Navigating through menu options where you can select 'USB' or 'External Drive' to begin displaying images.
- Adjust Settings: Once your photos are playing, you can often adjust settings like slideshow speed, transition effects, and whether to display photos in a specific order or shuffle them.
- Troubleshooting: If the photos don’t display, double-check that the USB drive is properly inserted and the files are in a supported format. Ensure the drive is not larger than the maximum supported capacity of your frame. Confirm that there are no other restrictions according to the frame’s manual, such as supported resolutions.
- Safety: When removing the USB drive, it's advisable to first turn off the digital picture frame to prevent data corruption.
By following these steps and consulting your specific digital frame's manual as needed, you should be able to display photos directly from a USB drive with ease.
What is the best resolution for a digital picture frame?
The best resolution for a digital picture frame largely depends on the size of the frame and your personal preferences for image quality. However, here are some general guidelines:
- Small to Medium Frames (7 to 10 inches): A resolution of 1024x768 pixels is often sufficient for smaller frames. This resolution provides decent image clarity and sharpness for most personal photos.
- Larger Frames (12 inches and above): For larger frames, a resolution of at least 1920x1080 pixels (Full HD) is recommended to ensure that images are sharp and clear. Some high-end models even offer 2K or 4K resolutions, which provide exceptional detail.
- Aspect Ratio: Consider the aspect ratio of the frame as well. Common ratios include 4:3, 16:9, and 16:10. Ensure the resolution matches the aspect ratio to avoid image distortion or cropping.
- Viewing Distance: If you plan to view the frame from a distance, slightly lower resolutions might still look great. However, higher resolutions are better for close-up viewing.
- Image Source Quality: Keep in mind the quality of your source images. High-resolution frames will not enhance the quality of low-resolution images.
When choosing a digital picture frame, it's also important to consider other factors like brightness, contrast ratio, color representation, and additional features such as Wi-Fi connectivity, internal storage, and support for various image formats.