Best Ultra-Wide Monitors for Consoles to Buy in July 2026
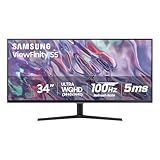
SAMSUNG 34" ViewFinity S50GC Series Ultra-WQHD Monitor, 100Hz, 5ms, HDR10, AMD FreeSync, Eye Care, Borderless Design, PIP, PBP, LS34C502GANXZA, 2023, Black
- MAXIMIZE MULTITASKING WITH A STUNNING 21:9 ULTRA WQHD DISPLAY.
- EXPERIENCE VIBRANT VISUALS WITH OVER 1 BILLION COLORS IN HDR10.
- EYE CARE FEATURES ENSURE COMFORT DURING LONG HOURS OF USE.


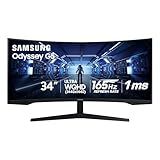
SAMSUNG 34' Odyssey G5 Ultra-Wide Gaming Monitor with 1000R Curved Screen, 165Hz, 1ms, FreeSync Premium, Large Display, Eye Comfort, Multiple Ports, WQHD, LC34G55TWWNXZA, Black
- IMMERSE YOURSELF: 1000R DISPLAY FOR LIFELIKE GAMING EXPERIENCES.
- SMOOTH & SEAMLESS: 165HZ REFRESH RATE ELIMINATES MOTION BLUR.
- STUNNING COLORS: HDR10 TECHNOLOGY REVEALS HIDDEN DETAILS VIVIDLY.
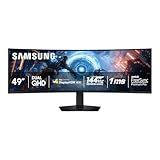
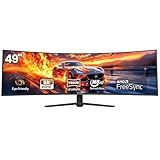
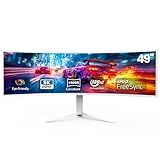
SAMSUNG 49-inch Odyssey G9 (G91F) DQHD, 144Hz, Curved Gaming Monitor, Ultra-Wide 32:9 Screen, DisplayHDR 600, AMD FreeSync™ Premium Pro, Ergonomic Stand, LS49FG910ENXZA, 2025
-
EXPERIENCE IMMERSIVE GAMEPLAY WITH A STUNNING 1000R CURVED DISPLAY.
-
ENJOY VIBRANT VISUALS WITH DISPLAYHDR 600 FOR RICH CONTRASTS AND CLARITY.
-
DOMINATE FAST-PACED GAMES WITH A 144HZ REFRESH RATE AND 1MS RESPONSE TIME.
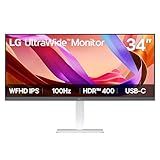
LG 34U530A-W 34-inch UltraWide WFHD (2560 x 1080) IPS Wide Computer Monitor, 100Hz, VESA DisplayHDR 400, HDMI, DisplayPort, USB Type-C, Tilt/Height/Swivel Stand, White
- EFFORTLESS MULTITASKING WITH 34 21:9 ULTRAWIDE FULL HD DISPLAY.
- VIBRANT HDR VISUALS AND 100HZ FOR SMOOTH, CLEAR MOTION.
- EASY CONNECTIVITY VIA USB TYPE-C FOR CLUTTER-FREE SETUPS.

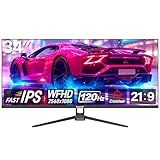
ASUS TUF Gaming 34” Ultra-Wide Curved Monitor (VG34VQ3B) – 21:9 QHD (3440x1440), 180Hz, 1ms, Extreme Low Motion Blur Sync, FreeSync Premium, Speaker, 90% DCI-P3, DisplayWidget Center, 3 yr Warranty
-
180HZ REFRESH RATE OFFERS UNMATCHED SPEED FOR COMPETITIVE GAMERS.
-
1MS RESPONSE TIME AND ELMB TECH ELIMINATE GHOSTING AND BLUR.
-
FREESYNC PREMIUM ENSURES A SMOOTH, TEAR-FREE GAMING EXPERIENCE.
CRUA 49" Curved Gaming Monitor | DQHD(5120 * 1440), 144Hz/165Hz, 1500R, 32:9, AMD FreeSync, 120% sRGB, Height Adjustable Ultra-Wide Screen Monitors, HDMI 2.1 & DP 1.4, Wall Mount Install- Black
-
EXPANSIVE 49 ULTRA-WIDE DISPLAY FOR ULTIMATE GAMING IMMERSION
-
144HZ/165HZ REFRESH RATE WITH FREESYNC FOR SMOOTH GAMEPLAY
-
VIBRANT 120% SRGB COLORS FOR STUNNING CREATIVE WORK
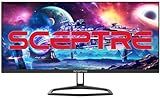
Sceptre 30-inch IPS Monitor 21:9 DisplayPort x2 up to 210Hz 1ms Ultra Wide/Slim Build-in Speakers, Machine Black (E305B-FU200T)
- ULTRA-SMOOTH VISUALS: UP TO 210HZ REFRESH RATES FOR SEAMLESS GAMING.
- TRUE COLORS: 100% SRGB IPS PANEL FOR STUNNING, ACCURATE VISUALS.
- EYE COMFORT: BLUE-LIGHT SHIFT TECH REDUCES STRAIN DURING LONG SESSIONS.
Gawfolk Gaming Monitor 34 inch IPS 120Hz, Ultrawide PC Screen 2560×1080P Ultra-Thin Zero Frame Computer Display for Home Office Business, DP, HDMI, Wall-Mounted, Black
-
MAXIMIZE PRODUCTIVITY WITH 30% MORE SCREEN SPACE AND 2560X1080P.
-
ENJOY STUNNING VISUALS AND SMOOTH GAMEPLAY WITH A 120HZ REFRESH RATE.
-
VERSATILE CONNECTIVITY OPTIONS FOR SEAMLESS USE WITH MULTIPLE DEVICES.
CRUA 49" White Curved Monitor | DQHD(5120 * 1440), 120Hz, 1500R, 32:9, AMD FreeSync, 120% sRGB, Height Adjustable Ultra-Wide Screen Computer Monitors, HDMI 2.1 & DP 1.4, Wall Mount Install
-
IMMERSIVE 49 CURVED DESIGN: EXPAND YOUR VIEW FOR UNPARALLELED IMMERSION.
-
120HZ REFRESH RATE: EXPERIENCE ULTRA-SMOOTH GAMEPLAY WITH SEAMLESS VISUALS.
-
VIBRANT 120% SRGB COLOR: ACCURATE COLORS FOR STUNNING GRAPHICS AND CREATIVITY.
Ultra-wide monitors are typically designed with a 21:9 aspect ratio, offering a wider field of view compared to standard 16:9 monitors. When it comes to compatibility with consoles like the PS5 and Xbox Series X, these consoles are primarily designed to output at a 16:9 aspect ratio, which means that an ultra-wide monitor may not fully utilize its width without some adjustments. Most consoles do not natively support the ultra-wide 21:9 aspect ratio. As a result, when connected to an ultra-wide monitor, the image is often displayed with black bars on the sides to maintain the 16:9 aspect ratio or is stretched or zoomed to fit the screen, potentially distorting the image. Some monitors offer scaling options to minimize distortion, but the experience might not be optimal for full screen gameplay. Nonetheless, ultra-wide monitors can still be used with these consoles, but users should be aware of potential limitations like image scaling and aspect ratio constraints.
What is the best setting for low input lag on ultra-wide monitors?
To achieve the best setting for low input lag on ultra-wide monitors, you can follow these tips:
- Game Mode: Enable 'Game Mode' or 'Low Latency Mode' on the monitor if it's available. This setting is specifically designed to reduce input lag by bypassing certain processing features that are not essential for gaming.
- Refresh Rate: Set your monitor to the highest refresh rate possible that it supports. Higher refresh rates can reduce the time it takes for new images to be displayed.
- Response Time Settings: Use the fastest response time setting available on your monitor's OSD (On-Screen Display) menu. Common settings might be labeled as 'Fast', 'Faster', or 'Fastest'.
- V-Sync: Consider turning off V-Sync in your game's graphics settings. While V-Sync can eliminate screen tearing, it typically adds input lag. If screen tearing becomes an issue, consider using technologies like G-Sync or FreeSync, which can minimize tearing with less impact on input lag.
- GPU Settings: In your GPU control panel or settings (NVIDIA Control Panel or AMD Radeon Settings), you can enable 'Low Latency Mode'. This setting prioritizes reducing input lag by adjusting how the frames are processed.
- Cables: Use a high-quality HDMI 2.1 or DisplayPort 1.4 cable, which can help ensure that you're getting the best possible connection with minimal lag.
- Resolution and Graphics Settings: Sometimes running games at very high resolutions with maximum settings can introduce lag if your system struggles to keep up. Consider optimizing settings for a balance between visual quality and performance.
- Firmware and Drivers: Ensure your monitor's firmware and your GPU drivers are up to date. Manufacturers can release updates that improve performance or reduce input lag.
Following these guidelines should help you achieve the lowest input lag possible on your ultra-wide monitor.
How to measure desk space needed for an ultra-wide setup?
To measure the desk space required for an ultra-wide monitor setup, you'll need to consider several key factors and steps to ensure everything fits comfortably and efficiently:
- Monitor Dimensions: Check the width, height, and depth of your ultra-wide monitor. This information is usually available in the monitor's specifications. Make sure to account for any stand or base that might extend beyond the screen itself.
- Desk Dimensions: Measure your existing desk's length, width, and depth. Ensure it can accommodate the monitor's footprint comfortably without feeling cramped.
- Viewing Distance: For ergonomic reasons and to reduce eye strain, consider the recommended viewing distance for your screen size. Generally, you should sit at least an arm's length away from the screen. For an ultra-wide monitor, you might need more space to ensure comfortable viewing angles across the entire screen.
- Additional Equipment: Plan for any other equipment you may have, such as speakers, a keyboard, mouse, and any docking stations or peripherals. Ensure there’s enough space on the desk for these items without overcrowding.
- Cable Management: Consider where cables will run and ensure that your desk layout has space or accessories (like cable trays) to manage them efficiently.
- Ergonomics: Ensure that the monitor height is adjustable or that you have stands, mounts, or risers to place the monitor at eye level for comfortable usage.
- Future Expansion: If considering additional monitors or accessories, factor in some extra space for potential future upgrades.
- Personal Workspace Needs: Consider how much additional workspace you need for writing, using a tablet, or other activities.
After considering these factors, sketch out a layout or use a room planner tool to visualize the setup and make any adjustments as needed before finalizing your desk arrangement. This planning ensures that you not only fit the monitor but also maintain a comfortable and functional workspace.
How to update firmware on ultra-wide monitors for better performance?
Updating the firmware on ultra-wide monitors can help improve performance, fix bugs, and add new features. Here's a general guide to updating the firmware, although it's important to note that specific steps may vary depending on the manufacturer and model of your monitor:
- Check Manufacturer’s Website: Visit the support section of the manufacturer’s website to see if there is a new firmware update available for your specific monitor model.
- Download Firmware: If an update is available, download the firmware file. This is usually a compressed file format like ZIP.
- Read Instructions: Along with the firmware file, there should be instructions or a readme file provided by the manufacturer. Read these carefully as the update process can vary.
- Backup Settings (if necessary): Some monitors may allow you to backup your current settings. Check your monitor's settings menu for this option.
- Connect Monitor to Computer: Ensure your monitor is connected to your computer using the proper cables (usually HDMI, DisplayPort, USB-C, or sometimes a USB-B or USB-A for firmware updates).
- Prepare the USB Drive (if needed): Some firmware updates require the use of a USB drive. Format the drive to FAT32 as often specified.
- Load Firmware onto USB (if needed): If using a USB drive, copy the firmware file onto it. Make sure it is extracted from the ZIP file if needed.
- Begin Update Process: Depending on the procedure: On-Screen Display Method: Access the monitor’s on-screen menu and look for an option to update firmware. This might be found under settings or support sections. Software/App Method: Some manufacturers offer software for your computer to facilitate the update. Install the software if necessary and follow the instructions to upload the firmware to the monitor.
- Follow On-Screen Instructions: Follow any on-screen instructions displayed by the monitor or the update software. This often involves selecting the firmware file and confirming the update.
- Do Not Power Off: Once the update process begins, do not turn off your monitor or disconnect it from the power source until the update is complete.
- Restart Monitor: After the update is installed, it might automatically restart. If not, restart the monitor manually.
- Verify Update: Once the monitor is back on, verify the firmware update by checking the settings menu in the monitor for the new firmware version.
- Reconfigure Settings: You may need to reconfigure your settings if the update resets the monitor to default configuration.
Important Tips:
- Always make sure the firmware update is for your specific monitor model to avoid any compatibility issues.
- Use only official firmware from the manufacturer’s website.
- Ensure your power connection is stable throughout the process to prevent accidental interruption.
If you have any doubts or concerns, contact customer support for assistance with the update process.
How to adjust screen settings for ultra-wide gaming on consoles?
Adjusting screen settings for ultra-wide gaming on consoles can be a bit challenging, as most consoles typically support standard aspect ratios like 16:9 or 4:3. However, here's a general approach to optimize your experience with ultra-wide monitors:
- Console Settings: Resolution: Go to the settings menu on your console and select the highest resolution available that your monitor supports. While ultra-wide resolutions like 3440x1440 are not typically supported, choosing the highest supported resolution (e.g., 1920x1080 or 3840x2160) is the best option. HDR: If your monitor supports HDR, ensure it is enabled in the console settings for better color performance.
- Monitor Settings: Picture Mode: Select a gaming-focused picture mode if available, usually labeled as "Game Mode" on most monitors, to reduce input lag. Aspect Ratio: Set the aspect ratio on your monitor to "Auto" or "Wide" mode. This may result in black bars on the sides, but it'll preserve the correct image scaling.
- Game Settings: Field of View (FOV): Some games allow you to adjust the FOV, which can enhance your gaming experience on ultra-wide screens. Try increasing the FOV for a wider viewpoint.
- Third-Party Solutions: Although not commonly available on consoles, check if there are adapters or other third-party solutions that could enhance ultra-wide support.
- Additional Tips: PC Connection: If possible, connect your monitor to a PC for ultra-wide gaming and use the console through a separate input or switch connections when needed. Community Forums: Look for online communities or forums for your specific console and monitor setup for potential tips from other users who might have successfully optimized their ultra-wide experience.
Note that the effectiveness of these steps can be limited by the console's native support for ultra-wide resolutions and aspect ratios.
How to enable HDR on ultra-wide monitors for consoles?
Enabling HDR on ultra-wide monitors for consoles involves a few steps to ensure both the console and the monitor are correctly set up to display HDR content. Here's a general guide to help you enable HDR:
Check Monitor Compatibility
- Ensure HDR Support: Verify that your ultra-wide monitor supports HDR. Look for specifications like "HDR10" or similar in the monitor's manual or product page.
- Use Proper Cables: Make sure you're using high-speed HDMI cables that support HDR. HDMI 2.0 or higher is recommended.
Console Settings
- Update Your Console: Ensure your console's firmware is up-to-date. Updates often include compatibility improvements with displays.
- Enable HDR on the Console: PlayStation: Go to Settings. Navigate to Sound and Screen. Select Video Output Settings. Ensure the HDR and Deep Color Output are set to Automatic. Xbox: Go to Settings. Select General, then TV & display options. Choose Video Modes. Enable Allow HDR10.
Monitor Settings
- Enable HDR Mode: Access your monitor's settings menu: Use the physical buttons or joystick on your monitor to open the on-screen display (OSD) menu. Navigate to the picture settings or display settings. Find and enable HDR mode. It may be labeled as "HDR," "HDR Effect," or similar.
- Adjust Picture Settings: Some monitors may require you to select specific picture modes optimized for HDR, like "Game HDR" or "Cinema HDR."
Troubleshooting
- Check Port Compatibility: If your monitor has multiple HDMI inputs, ensure you are connected to a port that supports HDR.
- Resolution and Refresh Rate: Sometimes HDR settings are tied to specific resolution or refresh rate settings, so ensure those match what's supported by both devices.
- Content Compatibility: Remember that only certain games and content support HDR, so test with HDR-compatible media.
Additional Notes
- Aspect Ratio: Ultra-wide monitors may not always display console content natively, as consoles typically output at standard 16:9 resolutions. This could result in black bars or stretching.
- Update Monitor Firmware: Check the manufacturer’s website for any firmware updates for your monitor that may improve HDR functionality or compatibility.
Following these steps should help you enable and enjoy HDR gaming on your ultra-wide monitor with your console. If issues persist, consult the manuals for both your monitor and console, or contact their respective support services for further assistance.