
Best Ultra-Wide Monitors for Mac Users to Buy in July 2026
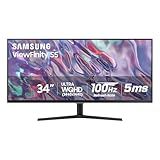
SAMSUNG 34" ViewFinity S50GC Series Ultra-WQHD Monitor, 100Hz, 5ms, HDR10, AMD FreeSync, Eye Care, Borderless Design, PIP, PBP, LS34C502GANXZA, 2023, Black
- MAXIMIZE PRODUCTIVITY WITH A 21:9 ULTRA WQHD SEAMLESS DISPLAY.
- EXPERIENCE VIBRANT VISUALS WITH HDR10 AND OVER 1 BILLION COLORS.
- PROTECT YOUR EYES WITH AMBIENT LIGHT SENSOR AND EYE SAVER MODE.


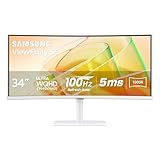
Samsung 34” ViewFinity (S65TC) Series Ultra-WQHD 1000R Curved Computer Monitor, HDR10, 100Hz, AMD FreeSync, Thunderbolt 4, Height Adjustable Stand, Built-in Speakers, Eye Care, LS34C650TANXGO, 2024
-
ULTRA WIDE IMMERSION: EXPERIENCE PRODUCTIVITY WITH A 34 1000R CURVED DISPLAY.
-
CONNECT TO MORE: CONVENIENT THUNDERBOLT 4 AND 90W CHARGING FOR ALL DEVICES.
-
ENHANCED REALISM: HDR10 DELIVERS VIBRANT COLORS FOR LIFELIKE VISUAL EXPERIENCES.
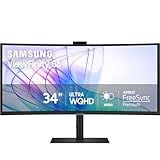
Samsung 34-Inch ViewFinity S65VC Series Ultra-WQHD Curved Computer Monitor, 100Hz, AMD FreeSync, HDR10, USB-C, Built-in Speaker, Camera, KVM Switch, Eye Care, Eco-Packaging, LS34C650VANXGO, Black
-
ULTRA-WIDE 34 CURVED DISPLAY: MAXIMIZE PRODUCTIVITY WITH IMMERSIVE VISUALS.
-
1 BILLION COLORS WITH HDR10: EXPERIENCE VIBRANT, TRUE-TO-LIFE CONTENT EVERY TIME.
-
BUILT-IN KVM SWITCH: EFFORTLESSLY CONTROL MULTIPLE DEVICES WITH ONE SETUP.
ViewSonic VX3276-MHD 32 Inch 1080p Widescreen IPS Monitor with Ultra-Thin Bezels, Screen Split Capability HDMI and DisplayPort
- EXPERIENCE SMOOTH VISUALS WITH 75HZ REFRESH RATE AND FULL HD CLARITY.
- PROTECT YOUR EYES WITH FLICKER-FREE AND BLUE LIGHT FILTER TECHNOLOGY.
- EASILY SWITCH SETTINGS WITH OPTIMIZED PRESETS FOR EVERY USE CASE.
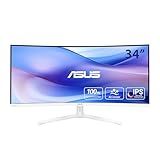
ASUS 34” Ultra-Wide Curved Eye Care Monitor (VU34WCIP-W) – WQHD (3440x1440), 1500R Curvature, Frameless, 100Hz, Nano-ion, SmoothMotion, Eye Care Plus, USB-C PD 65W, Speakers, 3 yr Warranty
- STUNNING 34 WQHD SCREEN WITH IMMERSIVE 1500R CURVATURE.
- BUILT-IN AIR QUALITY ENHANCEMENT FOR A HEALTHIER WORKSPACE.
- USB-C CONNECTIVITY FOR EASY DATA AND CHARGING IN ONE CABLE.
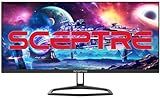
Sceptre 30-inch IPS Monitor 21:9 DisplayPort x2 up to 210Hz 1ms Ultra Wide/Slim Build-in Speakers, Machine Black 2024 (E305B-FU200T)
-
SEAMLESS CONNECTIVITY: DUAL DISPLAYPORTS & HDMI FOR UP TO 210HZ REFRESH!
-
STUNNING VISUALS: IPS PANEL WITH 100% SRGB FOR VIBRANT COLOR ACCURACY.
-
EYE COMFORT: BLUE-LIGHT SHIFT TECHNOLOGY REDUCES STRAIN FOR LONG HOURS.
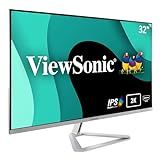
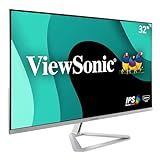
ViewSonic VX3276-2K-MHD 32 Inch Widescreen IPS 1440p Monitor with Ultra-Thin Bezels, HDMI DisplayPort and Mini DisplayPort
- STUNNING 32 QHD DISPLAY WITH VIBRANT COLORS AND THIN BEZELS.
- EYE COMFORT WITH FLICKER-FREE TECH AND BLUE LIGHT FILTER FEATURES.
- MULTIPLE PRESETS FOR TAILORED VIEWING: GAME, MOVIE, WEB, AND MORE!
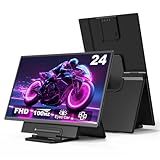
24" Large Portable Monitor, 1080P FHD 100Hz Laptop Screen Extender, 125% sRGB IPS Monitor Extender, USB C HDMI Office Gaming with Detachable Stand, Travel monitor for Window MAC Phone Xbox Switch
-
SEAMLESS MULTITASKING ANYWHERE: BOOST PRODUCTIVITY BY 200% ON-THE-GO!
-
VIBRANT VISUAL EXPERIENCE: ENJOY TRUE-TO-LIFE COLORS WITH 1080 FHD CLARITY!
-
EASY PLUG & PLAY SETUP: CONNECT INSTANTLY WITH INCLUDED CABLES-NO DRIVERS NEEDED!
ViewSonic VX3276-4K-MHD 32 Inch 4K UHD Monitor with Ultra-Thin Bezels, HDR10 HDMI and DisplayPort for Home and Office
- STUNNING 32 4K UHD DISPLAY FOR IMMERSIVE VIEWING EXPERIENCES.
- HDR10 SUPPORT DELIVERS VIBRANT COLORS AND DEEP CONTRASTS EFFORTLESSLY.
- EYE-FRIENDLY FEATURES ENSURE COMFORT DURING LONG HOURS OF USE.
INNOCN 27 Inch 4K Monitor for MacBook Air/Pro, Mac mini PC, 3840 x 2160 LCD IPS Display, HDR400, USB C 65W, DP, HDMI, PC Monitor, 1.07B+ Colors, Built-in Speakers, Pivot Adjustable Stand, Black
-
STUNNING 4K DISPLAY: EXPERIENCE ULTRA-CLEAR 4K UHD VISUALS FOR STUNNING CLARITY.
-
VERSATILE CONNECTIVITY: USB-C, DP, HDMI PORTS FOR SEAMLESS DEVICE CONNECTIONS.
-
ERGONOMIC ADJUSTABILITY: TAILOR YOUR VIEW WITH SWIVEL AND HEIGHT ADJUSTMENTS FOR COMFORT.
When choosing an ultra-wide monitor for Mac users, it's essential to consider compatibility, display quality, and user needs. Many ultra-wide monitors provide an expansive workspace, beneficial for multitasking and creative tasks. Look for monitors with high resolution, typically 1440p or higher, to ensure crisp and clear visuals which align well with Apple's Retina displays. Features like Thunderbolt 3 or USB-C connectivity are advantageous for seamless integration with Macs, offering faster data transfer and power delivery through a single cable. Consider monitors from reputable brands such as LG, Dell, and Samsung, known for their quality display panels and Mac-friendly features. Additionally, curved designs might offer a more immersive experience, which can be particularly beneficial for video editing or gaming on a Mac. Adjustability in terms of height, tilt, and swivel, along with ergonomic stand options, can enhance comfort and usability. Some monitors also include calibrated color settings out of the box or support for macOS color profiles, which is ideal for graphic designers and photographers. Ensure the monitor supports the color accuracy standards essential for creative work, such as sRGB, AdobeRGB, or DCI-P3. Lastly, consider the monitor's refresh rate; while 60Hz is standard, higher refresh rates can offer smoother visuals, especially if you're using the display for video editing or gaming.
What is Thunderbolt, and how does it affect monitor choice for Mac users?
Thunderbolt is a high-speed hardware interface developed by Intel in collaboration with Apple, and it plays a significant role in how Mac users connect peripherals, including monitors, to their computers. The key features of Thunderbolt include:
- High Bandwidth: Thunderbolt offers a high data transfer rate, supporting up to 40 Gbps in its latest versions. This allows for fast data transfer between connected devices.
- Versatility: Thunderbolt uses a USB-C connector, which means it can support a variety of protocols, including DisplayPort, PCI Express, and USB. This versatility allows it to connect to a wide range of devices, from external hard drives to monitors.
- Daisy-Chaining: Thunderbolt supports daisy-chaining, allowing multiple devices to be connected in a series to a single port on the Mac. This can be particularly useful for connecting multiple monitors.
For Mac users, Thunderbolt affects monitor choice in several ways:
- Compatibility: When choosing a monitor, Mac users need to ensure it supports Thunderbolt or at least USB-C with DisplayPort Alt Mode. Monitors with native Thunderbolt support simplify connections and enable additional features like power delivery.
- High Resolution and Refresh Rates: Thunderbolt's high bandwidth allows it to support high-resolution displays, including 4K and 5K monitors, as well as higher refresh rates. This makes it ideal for users who require high-end displays for graphic design, video editing, or gaming.
- Power Delivery: Many Thunderbolt ports support power delivery, meaning they can charge compatible Mac laptops while also serving as display connections. This reduces cable clutter and simplifies setups.
- Daisy-Chaining Multiple Monitors: With Thunderbolt's daisy-chaining capability, users can connect multiple monitors using a single port, minimizing the number of direct connections needed to the Mac.
When selecting a monitor, Mac users should consider whether they need Thunderbolt's full capabilities, such as higher resolutions and additional peripheral connections, to get the most out of their setups. Monitors with true Thunderbolt support provide the most seamless integration with Macs, offering advantages like enhanced power delivery and the ability to daisy-chain other Thunderbolt devices.
How to handle color accuracy on an ultra-wide monitor for creative tasks on a Mac?
Ensuring color accuracy on an ultra-wide monitor for creative tasks on a Mac involves a combination of calibration, configuration, and software settings. Here are some steps to help you maintain color fidelity:
- Choose the Right Monitor: Ensure your ultra-wide monitor supports a wide color gamut (such as sRGB, Adobe RGB, or DCI-P3) and has good factory color calibration, if possible.
- Connect Properly: Use high-quality cables like Thunderbolt 3/4, DisplayPort, or HDMI 2.0/2.1 to connect your monitor. Ensure your Mac supports the monitor's resolution and refresh rate.
- Display Profile: Go to System Preferences > Displays > Color. Choose an appropriate display profile for your monitor. If your monitor came with a profile, install and select it.
- Calibrate Your Display: Use a hardware calibration tool, such as a colorimeter (e.g., from brands like X-Rite or Datacolor), to calibrate your monitor. This will ensure that colors are accurately represented. Follow the software instructions provided by the colorimeter for the calibration process, adjusting brightness, contrast, and color settings.
- Adjust Display Settings: Calibrate under ambient lighting conditions consistent with your creative work environment to avoid glare or color shifts due to lighting variation. Set the white point to match your working standards, usually D65 (6500K) or a custom value that fits your needs.
- Use Software Tools: Applications such as Adobe Creative Cloud Suite have color management settings. Make sure these applications are set to use your monitor's ICC profile. Consistently check that your color settings within software are aligned with industry standards or your project requirements.
- Consistency Across Devices: If working across multiple devices, ensure that all display devices are calibrated and profiled similarly for consistency.
- Monitor Settings: Disable unnecessary monitor enhancements such as dynamic contrast or color enhancements, as these can alter the display of images and colors.
- Check for Updates: Regularly update your Mac OS and graphic drivers, as updates can include improvements to color management and display handling.
- Regular Re-Calibrations: Periodically recalibrate your monitor to account for any shifts in color accuracy over time, particularly under changing environmental conditions.
By following these steps, you can maintain a high standard of color accuracy on an ultra-wide monitor for creative tasks on a Mac, providing reliable and consistent results for your projects.
How to connect an ultra-wide monitor to a Mac?
Connecting an ultra-wide monitor to a Mac can be done fairly easily. Here’s a step-by-step guide to help you set it up:
- Check Compatibility: Ensure that your Mac supports external displays. Most modern Macs, whether desktop or laptop, can support at least one additional display. Check the technical specifications of your Mac model to confirm.
- Identify Ports: Determine what ports your Mac has for video output. Common ports include HDMI, Thunderbolt 3/USB-C, and Mini DisplayPort. The type of port will dictate the cable or adapter you need.
- Select the Right Cable/Adapter: HDMI: If your Mac and the ultra-wide monitor both have HDMI ports, use an HDMI cable. Thunderbolt 3/USB-C: If your monitor and Mac both support Thunderbolt 3/USB-C, use a compatible cable. If your monitor does not have USB-C, you might need a USB-C to HDMI or DisplayPort adapter. Mini DisplayPort: Use a Mini DisplayPort cable if both the Mac and monitor support this, or get the necessary adapter (e.g., Mini DisplayPort to HDMI).
- Connect the Monitor: Plug the cable into the appropriate port on your Mac. Connect the other end of the cable to the monitor.
- Power On: Make sure the monitor is plugged into a power source and turned on.
- Configure Display Settings: Once connected, your Mac should automatically detect the monitor. Go to System Settings (or System Preferences on older macOS versions) > Displays. In the Displays settings, you can configure the display as either "Mirror" (showing the same content on both screens) or "Extended" (using the ultra-wide monitor to extend your desktop space). Adjust the resolution and orientation if necessary to optimize the use of your ultra-wide screen.
- Troubleshooting: If the monitor is not detected, refresh the list of displays by pressing the Detect Displays button in the Displays settings (hold Option to make it appear). Ensure the cable and adapter connections are secure. Restart your Mac and try again if issues persist.
This should cover most setups. Once connected, you can enjoy the extra screen real estate provided by your ultra-wide monitor!
How to mount an ultra-wide monitor for a Mac?
Mounting an ultra-wide monitor for use with a Mac involves several steps. Here's a general guide on how to do it:
- Choose the Right Mounting Equipment: VESA Compatibility: Check if your ultra-wide monitor has VESA mounting holes (usually 75x75mm or 100x100mm). You will need a monitor arm or wall bracket that matches this pattern. Weight and Size Support: Ensure the mount can support the size and weight of your monitor.
- Gather Necessary Tools and Equipment: Screwdriver (usually Phillips) Stud finder (for wall mounting) Level Drill (for wall mounting) Mounting screws (often included with the mount but double-check for your specific monitor model)
- Prepare the Area: Determine the best position for the monitor. Consider factors like eye level, distance from seating position, and desk space. For wall mounting, use a stud finder to locate studs in the wall for secure installation.
- Attach the Mount to the Monitor: Remove the monitor's stand if it's already attached. Line up the VESA mount bracket with the holes on the back of the monitor. Use the provided screws to secure the bracket. Be careful not to overtighten them.
- Install the Mount on the Wall or Desk: Wall Mounting: Drill holes into the wall at the stud locations. Attach the wall bracket securely to the studs using the appropriate screws. Use a level to ensure that it's straight. Desk Mounting: If using a clamp-based arm, attach it to the edge of the desk and tighten the clamp. If it's a grommet-based mount, you may need to drill a hole through the desk or use an existing grommet hole.
- Secure the Monitor to the Mount: Lift the monitor and align it with the mounting arm or bracket. Carefully secure the monitor to the mount according to the instructions, ensuring it clicks or screws into place.
- Adjust Positioning: Once the monitor is mounted, adjust its height, tilt, and rotation as needed for optimal viewing. Ensure it feels stable and secure.
- Connect to Mac: Use the appropriate cable (like HDMI, DisplayPort, Thunderbolt, or USB-C) to connect the monitor to your Mac. Adjust display settings on your Mac via System Preferences > Displays to configure the resolution and arrangement.
- Cable Management: Use cable ties or clips to organize cables, reducing clutter and potential hazards.
- Final Checks: Ensure everything is securely installed and stable. Test the monitor for proper functioning.
If you're unsure about any step, especially drilling into walls, consider consulting a professional to avoid damage or errors. Always refer to the specific instructions provided with your mounting hardware and monitor for best results.