
Best Headlamp Angle Adjustment Tools to Buy in July 2026

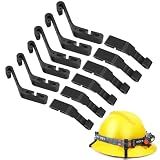
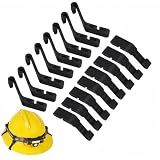
Headlamp Clips Hook Hard Hat Light Clips,Hardhat Headlamp Accessory
-
SECURELY MOUNT HEADLAMPS ON HARD HATS TO PREVENT DROPS!
-
LIGHTWEIGHT CLIPS: EASY TO ATTACH, IDEAL FOR HEAVY-DUTY USE!
-
QUALITY DURABILITY: PREMIUM PLASTIC FOR LONG-LASTING PERFORMANCE!


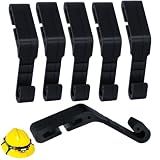
Lenporl 12 Pcs Hard Hat Light Clips,Helmet Light Holder Hook for Headlamp,Anti-Slip Stable Full Brim Hardhat Headlamp Accessory for Worker(6Longer for Back+6 Shtort for Front)
-
SECURE FIT: LIGHTWEIGHT DESIGN KEEPS HEADLAMPS STABLE & COMFORTABLE.
-
QUICK INSTALLATION: EFFORTLESS CLIP-ON DESIGN FOR EASY SETUP ON HELMETS.
-
DURABLE QUALITY: HEAT-RESISTANT CLIPS ENSURE LONGEVITY AND RELIABILITY.
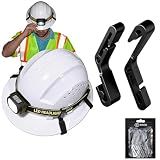
Dekeliy 6 Pcs Hard Hat Light Clips, Anti-Slip Stable Hardhat Headlamp Light Holders,Hard Hat Hook Accessories for Headlamp
- SECURELY FASTENS HEADLAMPS, GOGGLES FOR STABILITY AND SAFETY.
- DURABLE POLYMER DESIGN FITS FULL-BRIM HARD HATS; LIGHTWEIGHT AT 8G.
- 16 REUSABLE CLIPS; PERFECT FOR SHARING WITH COWORKERS OR FRIENDS.
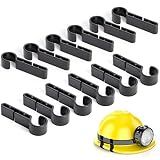
Hard Hat Light Clips 8 Pack,Hardhat Headlamp Clips for Full Brim Helmets, Tool-Free Hardhat Accessories Hard Hat Headlamp Clips for Construction, Mining, Firefighting, Cycling
-
TOOL-FREE INSTALLATION: CLIP ON EASILY FOR HANDS-FREE, SECURE SETUP.
-
WEATHER RESISTANT: DURABLE DESIGN WITHSTANDS HEAT, RAIN, AND MOISTURE.
-
VERSATILE USE: PERFECT FOR HEADLAMPS, GOGGLES, AND MORE. 8-PACK INCLUDED!
Headlamp Clips Hook Hard Hat Light Clips,Hardhat Headlamp Accessory (24)
- SECURELY MOUNT HEADLAMPS TO HELMETS-NO MORE FALLS!
- EASY INSTALLATION: JUST CLIP AND SECURE YOUR HEADLAMP!
- LIGHTWEIGHT, DURABLE PLASTIC ENSURES COMFORT AND STABILITY.
Dekeliy 16Pcs Hard Hat Light Clips, Anti-Slip Stable Hardhat Headlamp Light Holders,Hard Hat Hook Accessories for Headlamp
- SPECIAL BUCKLE DESIGN ENSURES STABLE, SLIP-FREE HEADLAMP ATTACHMENT.
- DURABLE POLYMER CLIPS FIT FULL BRIM HARD HATS; LIGHTWEIGHT AT 8G.
- EASY TO INSTALL AND REUSE; PERFECT FOR NIGHT WORKERS IN VARIOUS FIELDS.
To adjust the angle of the light beam on a headlamp, you'll need to follow a few simple steps.
- Start by locating the adjustment knobs or screws on your headlamp. These are usually located on the side or back of the lamp and are designed for vertical and horizontal adjustment.
- Hold the headlamp in your hand or wear it on your head while facing a flat wall or surface approximately 10 feet away. This will provide a clear reference point for adjusting the angle.
- Turn on the headlamp to illuminate the wall or surface. This will allow you to see the current angle and make necessary adjustments.
- Begin by adjusting the vertical angle of the light beam. Use the designated knob or screw to tilt the light up or down as needed. Pay attention to the beam's coverage; ensure it's neither pointing too high up in the air nor directly towards the ground. Find the optimum angle that provides the best visibility while minimizing blinding glare.
- Once you're satisfied with the vertical adjustment, move on to the horizontal angle. Use the respective adjustment knob or screw to align the beam either to the center or slightly towards the direction you want to illuminate. This is especially useful for activities like hiking or cycling, where you may need to focus the beam more towards the ground or to the side.
- Test the adjusted angle by moving around and observing the beam's reach and coverage. Make further adjustments if necessary until you achieve the desired lighting angle for your particular activity or environment.
Remember that headlamp designs and adjustment mechanisms can vary, so consult the manufacturer's instructions for specific details pertaining to your headlamp model.
What is the recommended angle for the light beam on a headlamp while driving on urban roads?
The recommended angle for the light beam on a headlamp while driving on urban roads is generally low. It is advised to set the headlamp beam in a way that it illuminates the road immediately in front of the vehicle without blinding oncoming motorists or creating excessive glare on road signs or other reflective surfaces. The specific recommended angle may vary depending on the headlamp design and regulations in different countries, but a general guideline suggests aiming the beam slightly downward and towards the right side of the road to optimize visibility while minimizing glare. It is always essential to follow local regulations and adjust the headlamp beam accordingly to ensure safe and courteous driving.
How to troubleshoot if the light beam angle adjustment on a headlamp is not working?
If the light beam angle adjustment on a headlamp is not working, you can troubleshoot the issue by following these steps:
- Verify power source: Ensure that the headlamp has a fully charged battery or if it's connected to a power source, check if it's receiving power.
- Check for loose connections: Inspect the connections between the angle adjustment mechanism and the power source. If any connections appear loose or damaged, reseat them properly or replace them if necessary.
- Clean the adjustment mechanism: Sometimes, dirt, dust, or debris may interfere with the movement of the angle adjustment mechanism. Clean the mechanism using a soft cloth or brush to remove any obstructions.
- Inspect for physical damage: Carefully examine the headlamp and the angle adjustment mechanism for any visible damage, such as broken parts or loose screws. If any damage is found, repair or replace the damaged components.
- Lubricate moving parts: Apply a small amount of lubricant to the moving parts of the angle adjustment mechanism to ensure smooth operation. Be careful not to use too much lubricant as it could attract dust or debris.
- Reset or recalibrate the headlamp: Some headlamps have a reset or recalibration feature that allows you to restore the default settings. Consult the user manual or manufacturer's website for instructions on how to perform this process.
- Contact customer support: If none of the above steps resolve the issue, the problem may require professional help. Contact the headlamp manufacturer's customer support line or visit an authorized service center for further assistance.
Remember to always prioritize safety when troubleshooting or repairing electrical devices.
How to adjust the light beam angle on a headlamp for different vehicle heights?
Adjusting the light beam angle on a headlamp for different vehicle heights can help ensure optimal visibility and prevent blinding oncoming drivers. Here are the steps to adjust the light beam angle:
- Park your vehicle on a flat surface facing a wall or garage door.
- Locate the headlamp adjustment screws. These screws are usually located near the back of the headlamp assembly.
- Use a flat-blade screwdriver or a suitable tool to turn the adjustment screws. There are typically two screws-one for vertical adjustment and another for horizontal adjustment.
- Turn the vertical adjustment screw to raise or lower the beam angle. If your vehicle is taller, such as with an SUV or truck, you may need to lower the beam angle to prevent blinding oncoming drivers. If your vehicle is lower, such as a sedan, you may need to raise the beam angle for better visibility.
- Turn the horizontal adjustment screw to adjust the beam direction to the left or right. This ensures the light is properly aligned with the road.
- To make the adjustments, carefully observe the light beam pattern on the wall or garage door. Adjust each headlamp individually until the desired beam pattern is achieved.
- Once you have adjusted the light beam on both headlamps, take a test drive to confirm the new angle. Ensure that the headlights provide sufficient illumination on the road without causing glare for other drivers.
It's worth noting that headlamp adjustment methods may vary slightly for different vehicle makes and models. Consult your vehicle's user manual for any specific instructions or recommended adjustment procedures.
How to adjust the vertical angle of the light beam on a headlamp?
The method for adjusting the vertical angle of the light beam on a headlamp may vary depending on the specific model or design. However, here are some general steps that may help:
- Locate the adjustment screws: Look for small screws or knobs on the headlamp housing that are specifically designed for adjusting the beam angle. These screws/knobs are usually located at the back or sides of the headlamp.
- Identify the correct screw: Some headlamps have separate screws for vertical and horizontal adjustments, while others have a single screw that adjusts both angles. Refer to the user manual or product specifications to determine which screw controls the vertical angle.
- Prepare the headlamp: Turn the headlamp on and position it on a flat surface or attach it to a helmet if required.
- Adjust the angle: Use a screwdriver, a small coin, or your fingers to turn the appropriate adjustment screw. Rotating the screw counterclockwise typically raises the beam angle, while rotating it clockwise lowers the angle. Start with small adjustments and test the beam angle after each adjustment to ensure desired results.
- Test the beam angle: After making adjustments, check the headlamp’s beam angle by shining it on a wall or surface at a suitable distance. Ideally, the beam should be focused at an optimal angle to provide adequate visibility without blinding or causing discomfort to others.
- Fine-tune the adjustment: If necessary, repeat steps 4 and 5 until you achieve the desired vertical beam angle.
- Secure the adjustment: Once you have set the beam angle as desired, make sure to tighten any screws or knobs used for adjustment. This will prevent the headlamp from shifting its angle while in use.
Remember to consult the specific instructions provided by the manufacturer for your headlamp model, as the adjustment process may vary for different brands or styles.