
Best Headlamp Bulb Replacements to Buy in July 2026
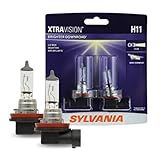
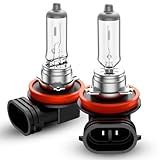
SYLVANIA - H11 XtraVision - High Performance Halogen Headlight Bulb, High Beam, Low Beam and Fog Replacement Bulb (Contains 2 Bulbs)
- ENSURE PERFECT FIT BY USING AMAZON PARTS FINDER FOR YOUR VEHICLE!
- REPLACE BULBS IN PAIRS FOR OPTIMAL PERFORMANCE AND LONGEVITY.
- ENJOY ENHANCED DOWNROAD VISIBILITY WITH REDUCED GLARE FOR SAFETY!


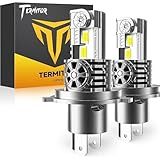
Termitor Latest H4/9003/HB2 Bulbs Hi/Low Beam, 50,000LM Brightness, 6500K Cool White, 1:1 Halogen Size Automotive Replacement H4 9003 HID Fog Lights, Plug-N-Play, IP68 Waterproof, Pack of 2
-
900% BRIGHTER: EXPERIENCE UNMATCHED BRIGHTNESS FOR SAFER NIGHT DRIVING.
-
OPTIMAL LIGHT FOCUS: MINIMIZE GLARE AND ENHANCE VISIBILITY ON THE ROAD.
-
DURABLE DESIGN: ENJOY OVER 70,000 HOURS OF CONSISTENT ILLUMINATION.
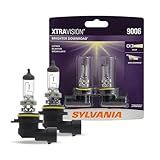
SYLVANIA - 9006 XtraVision - High Performance Halogen Headlight Bulb, High Beam, Low Beam and Fog Replacement Bulb (Contains 2 Bulbs)
- REPLACE BULBS IN PAIRS FOR OPTIMAL PERFORMANCE AND LONGEVITY.
- ENJOY ENHANCED DOWNROAD VISIBILITY WITHOUT ADDED GLARE.
- TRUST SYLVANIA’S 100+ YEARS OF AUTOMOTIVE LIGHTING EXPERTISE.
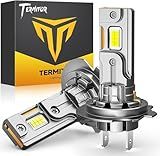
Termitor Latest H7/H7LL Bulbs, 50,000LM 900% Brightness, 6500K White Super Bright, 1:1 Halogen Size, 6500 Cool White H7 Fog Lights, No Adapter Required, Easy Install, Non-Polarity, Pack of 2
-
ILLUMINATE THE ROAD: 900% MORE BRIGHTNESS FOR SAFER DRIVING!
-
PERFECT FIT: 1:1 MINI DESIGN FOR EASY INSTALLATION IN ANY VEHICLE.
-
DURABLE LONGEVITY: OVER 70,000 HOURS OF CONSISTENT, RELIABLE LIGHT.
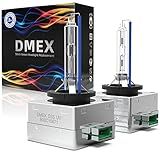
DMEX D3S HID Headlight Bulbs Xenon 35W Replacement 66340 42403 42302 - Pack of 2, 8000K White Blue (Not fit Halogen Headlamp)
-
100% QUARTZ GLASS: SUPERIOR PERFORMANCE & 3800 LUMENS BRIGHTNESS!
-
ENHANCE SAFETY WITH 50M FARTHER IRRADIATION & FASTER BRAKING RESPONSE.
-
OEM QUALITY D3S BULBS: PACK OF 2 WITH 2-YEAR WARRANTY INCLUDED!
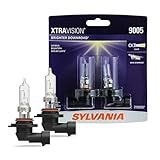
SYLVANIA - 9005 XtraVision Halogen Headlight Bulb - High-Performance Car Headlight - Halogen Light with No Glare - for Automotive - 2 Bulbs
- REPLACE BULBS IN PAIRS FOR BEST PERFORMANCE!
- ENHANCED DOWNROAD VISIBILITY WITHOUT GLARE!
- DURABLE DESIGN FOR SUPERIOR DRIVING SAFETY!
TIRARP H11 Headlight Bulbs, 2Pcs 12V 55W H11 Halogen Bulbs Replacement for Car Truck Headlight Bulb, 3800K Amber Yellow
-
SUPER BRIGHT & SAFE DRIVING: H11 BULBS ENHANCE VISIBILITY IN FOG AND RAIN.
-
LONG LIFESPAN: ENJOY 1000 HOURS OF WORRY-FREE, FLICKER-FREE DRIVING.
-
EASY INSTALLATION: QUICK PLUG-AND-PLAY SETUP FOR HASSLE-FREE UPGRADES.

SYLVANIA - H7 XtraVision - High Performance Halogen Headlight Bulb, High Beam, Low Beam and Fog Replacement Bulb (Contains 2 Bulbs)
-
REPLACE IN PAIRS FOR PEAK PERFORMANCE – ENSURE OPTIMUM RESULTS WITH A MATCHED SET.
-
ENHANCED DOWNROAD VISIBILITY, REDUCED GLARE – DRIVE SAFER WITH IMPROVED ILLUMINATION.
-
BUILT FOR DURABILITY AND RELIABILITY – ENJOY LONG-LASTING PERFORMANCE WITH ROBUST DESIGN.
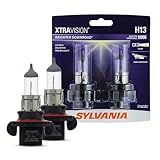
SYLVANIA - H13 XtraVision - High Performance Halogen Headlight Bulb, High Beam, Low Beam and Fog Replacement Bulb (Contains 2 Bulbs)
-
REPLACE H13 BULBS IN PAIRS FOR OPTIMAL PERFORMANCE AND VISIBILITY.
-
ENHANCED DOWNROAD VISIBILITY WITHOUT ADDED GLARE FOR SAFER DRIVING.
-
DURABLE DESIGN WITH OVER 100 YEARS OF SYLVANIA QUALITY ASSURANCE.
DMEX D2S HID Headlight Bulbs Xenon 35W Replacement 85122 66240 66040 66240CBI - Pack of 2, 6000K Cool White (Not fit Halogen Headlamp)
- HIGH BRIGHTNESS: UP TO 3800 LUMENS, BRIGHTER THAN STANDARD BULBS!
- SAFETY BOOST: INCREASES IRRADIATION DISTANCE BY 50M FOR QUICKER REACTIONS.
- DURABLE QUALITY: 100% QUARTZ GLASS WITH 2-YEAR WARRANTY ENSURES LONGEVITY.
To replace the bulb or LED in a headlamp, you will need to follow these steps:
- Start by opening the hood of your vehicle and locating the back of the headlamp assembly.
- Depending on your headlamp design, you may need to remove the headlamp cover or dust cap. This is usually done by twisting or pulling it off.
- Once the cover or dust cap is removed, you will have access to the bulb or LED. Locate the bulb holder, which is typically a plastic or metal piece that holds the bulb in place.
- Gently disconnect the electrical connector from the bulb holder. This might require pressing down or squeezing a release tab to unlock the connector.
- Now, you can remove the bulb holder by twisting it counterclockwise. It may have a retaining clip or other mechanism to hold it in place, so be careful not to break anything.
- After removing the bulb holder, you can take out the old bulb or LED. Depending on the type of headlamp, it may simply pull out, or you may need to push and twist it to remove it.
- When inserting the new bulb or LED, make sure not to touch the glass part with your bare hands, as the oils from your skin can damage it. If you accidentally touch the bulb, wipe it clean with rubbing alcohol or a lint-free cloth.
- Align the new bulb or LED correctly and insert it into the socket. Again, depending on the headlamp design, you may need to push and twist or simply push it in until it locks into place.
- Reinstall the bulb holder by twisting it clockwise until it is securely in place. Make sure it is aligned correctly and locks into position.
- Reconnect the electrical connector to the bulb holder by pushing it in until it clicks or locks into place.
- If you removed a headlamp cover or dust cap earlier, reattach it by twisting or pressing it back into position.
- Finally, close the hood of your vehicle and test the new bulb or LED by turning on your headlights. Ensure it is functioning properly before driving.
Note: The specific steps may vary slightly depending on the make and model of your vehicle. It's recommended to consult your vehicle's owner's manual for detailed instructions tailored to your specific headlamp assembly.
How to replace a headlamp assembly instead of just the bulb?
To replace a headlamp assembly instead of just the bulb, follow the steps below:
- Gather Materials: Ensure you have all the necessary tools, including a replacement headlamp assembly, a socket set, a screwdriver, and gloves.
- Disconnect the Battery: As a precaution, disconnect the negative terminal of the car battery to prevent electrical shocks.
- Access the Headlamp Assembly: Depending on your specific vehicle, you may have to remove the grille, bumper, or front wheel liner to access the headlamp assembly. Consult your vehicle's manual for instructions on how to do this.
- Remove the Retaining Screws or Bolts: Once you have access to the headlamp assembly, locate the retaining screws or bolts holding it in place. Use a socket set or a suitable screwdriver to remove them.
- Disconnect Wiring Connectors: Carefully detach the wiring connectors attached to the headlamp assembly. These connectors often have a latch or release mechanism that needs to be pressed or pulled to disconnect them.
- Remove the Old Headlamp Assembly: Gently pull the old headlamp assembly out from its housing, being cautious not to damage any surrounding parts.
- Install the New Headlamp Assembly: Place the new headlamp assembly into the housing and align it properly. Make sure it fits snugly and securely.
- Reconnect Wiring Connectors: Reattach the wiring connectors you previously disconnected, ensuring they are properly connected and locked into place.
- Secure the Headlamp Assembly: Use the retaining screws or bolts to secure the new headlamp assembly in place. Tighten them appropriately but be cautious not to overtighten, which might damage the assembly or the vehicle.
- Reinstall Any Removed Parts: If you had to remove the grille, bumper, or wheel liner, now is the time to reattach them following the appropriate instructions.
- Reconnect the Battery: Finally, reconnect the negative terminal of the car battery.
- Test the Headlamp: Turn on your headlights and check if the new headlamp assembly is functioning properly. Make sure it illuminates correctly and aligns with the other headlamp.
By following these steps, you should be able to successfully replace a headlamp assembly in your vehicle. However, it is essential to consult your vehicle's manual or seek professional assistance if you are uncertain or uncomfortable performing this task on your own.
How to choose the right LED bulb replacement for a headlamp?
When choosing the right LED bulb replacement for a headlamp, consider the following factors:
- Compatibility: Check the owner's manual or manufacturer's website for recommendations regarding LED bulb replacements for your specific headlamp make and model. Some headlights require specific types or sizes of bulbs, so it's important to ensure compatibility.
- Bulb Type: LED bulbs are available in various types such as H1, H3, H4, H7, etc. Identify the bulb type used in your headlamp and ensure that the replacement LED bulb matches the same type.
- Lumens: Lumens indicate the brightness of the bulb. Determine the desired brightness level based on your preferences and needs. LED bulbs typically provide better illumination than traditional halogen bulbs, so choose one with higher lumens for improved visibility.
- Color Temperature: LED bulbs come in various color temperatures, which determine the color appearance of the light emitted. The most common options are Warm White (~3000K), Cool White (~6000K), and Daylight (~6500K). Decide on a color temperature that suits your personal preference and driving conditions.
- Power Consumption: LED bulbs are energy-efficient compared to traditional bulbs. Check the power consumption or wattage of the LED bulb to ensure it is compatible with the electrical system of your headlamp. Lower wattage generally means lower power consumption.
- Quality and Reviews: Consider opting for LED bulbs from reputable brands known for producing high-quality products. Read customer reviews to ensure that the bulb delivers on its claims and performs well in terms of longevity, durability, and overall satisfaction.
- Warranty: Look for LED bulbs that offer a warranty period. This indicates the manufacturer's confidence in their product. A warranty can provide you with peace of mind and a recourse if the bulb fails prematurely.
Remember to double-check all specifications, consult experts if needed, and follow the installation instructions provided with the LED bulb replacement to ensure a proper fit and function.
How to secure the wiring connectors after replacing the bulb in a headlamp?
Securing the wiring connectors after replacing a bulb in a headlamp is an important step to ensure proper functioning of the headlamp and to prevent any electrical issues. Here's how you can secure the wiring connectors:
- Start by turning off the vehicle's headlights and removing the key from the ignition. Make sure the headlamp is cool to the touch (if recently used).
- Locate the wiring connectors behind the headlamp assembly. These connectors are usually found near or at the back of the headlight bulb.
- Gently disconnect the wiring connectors from the back of the headlight bulb. This may involve twisting or pulling the connectors depending on the specific design.
- Inspect the connectors and the wires for any signs of damage or corrosion. If you notice any issues, clean the connectors or replace them if necessary.
- Insert the wiring connectors back onto the corresponding terminals of the new headlight bulb. Make sure they fit snugly and align properly.
- Give the connectors a gentle tug to ensure they are securely attached to the bulb. This will help to avoid any loose connections or intermittent lighting issues. Be careful not to exert excessive force which can damage the connectors or the bulb.
- Once the connectors are securely attached, turn on the headlights to verify that the bulb is working properly. Check both the low and high beam settings to ensure everything is functioning as expected.
- If all is working well, carefully close the headlamp assembly and secure it back in place following the manufacturer's instructions.
By following these steps, you should be able to securely attach the wiring connectors after replacing the bulb in a headlamp. Remember to always refer to specific instructions provided by your vehicle's manufacturer to ensure the correct procedure for your particular make and model.