
Best Image Processing Tools to Buy in July 2026
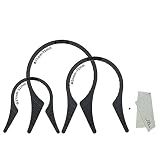
3 Packs Camera Lens Filter Wrench Kit, CPL UV ND Filter Removal Wrench Tool Set, Fit 37mm-52mm 55mm-72mm 77mm-95mm Lens Thread for Canon Nikon Sony Fujifilm Olympus Panasonic and Other Camera
- EFFORTLESSLY REMOVE JAMMED FILTERS WITH ERGONOMIC SAWTOOTH GRIP.
- VERSATILE SETS FOR ALL FILTER SIZES, FROM 37MM TO 95MM.
- LIGHTWEIGHT, DURABLE PC MATERIAL FOR EASY HANDLING AND STORAGE.


BCDHAMATE Stainless Steel Camera Lens Filter Wrench, Durable Filter Removal Tool for UV CPL ND Filters, Fit 37mm–95mm Lens Thread for Canon Nikon Sony Fujifilm Olympus Panasonic
-
ULTIMATE FILTER REMOVAL TOOL: EFFORTLESSLY DETACH UV, CPL, & ND FILTERS.
-
BUILT TO LAST: DURABLE STAINLESS STEEL ENSURES LONG-LASTING RELIABILITY.
-
VERSATILE DESIGN: DOUBLES AS A HOUSEHOLD TOOL FOR JARS, BOTTLES, & NUTS.
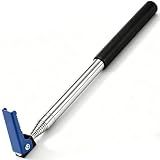
PMTHMPTS FPP-1 FPP1 Telescopic Filter Puller Pusher Tool with Magnet for HVAC Maintenance, Extends 12 Inches to 7 Feet, Heavy-Duty HVAC Air Filter Tool for Technicians and DIY Homeowners
- EFFORTLESS REACH: ADJUSTS FROM 12 INCHES TO 7 FEET FOR ANY FILTER.
- DUAL-FUNCTIONALITY: PIVOTING S-HOOK & MAGNET FOR EASY FILTER TASKS.
- COMPACT & PORTABLE: FOLDS TO 12 INCHES-PERFECT FOR STORAGE AND TRANSPORT.
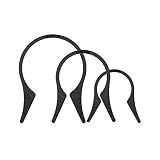
![[Upgraded Version] 3 Packs Camera Lens Filter Wrench Kit, Double-Sided Design, Fit 37mm-52mm 55mm-72mm 77mm-95mm Lens Filter of Different Thicknesses,CPL UV ND Filter Removal Wrench Tool Set](https://cdn.blogweb.me/1/41z_Lj_PH_Ae_TL_SL_160_763adab1c2.jpg)
[Upgraded Version] 3 Packs Camera Lens Filter Wrench Kit, Double-Sided Design, Fit 37mm-52mm 55mm-72mm 77mm-95mm Lens Filter of Different Thicknesses,CPL UV ND Filter Removal Wrench Tool Set
- DUAL DESIGN FITS BOTH STANDARD AND ULTRA-THIN LENS FILTERS.
- COMES IN 3 PACKS FOR MULTIPLE FILTER SIZES (37MM TO 95MM).
- SPECIAL WRENCH REMOVES JAMMED FILTERS EASILY WITH A COMFORTABLE GRIP.
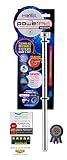
Power Pic Reach - The Ultimate Cartridge Filter Cleaning Tool
- UNIVERSAL FIT FOR ALL WASHABLE FILTERS; EASY TO USE!
- MAXIMIZE CLEANING POWER WITH REDUCED WATER USAGE.
- VERSATILE 3-WAY CLEANING ENSURES THOROUGH RESULTS EVERY TIME!
PROfezzion Camera Lens Filter Wrench Kit for ND UV CPL Filter, 3-Pack
- EFFORTLESSLY REMOVE JAMMED FILTERS WITH OUR ERGONOMIC WRENCH DESIGN.
- DURABLE, LIGHTWEIGHT MATERIAL FOR LONG-LASTING USE AND EASY HANDLING.
- COMPATIBLE WITH FILTERS FROM 37MM TO 95MM; VERSATILE FOR ALL LENSES.
DURATECH Adjustable Oil Filter Wrench, Universal, 3/8" Drive
-
DURABLE HIGH-STRENGTH STEEL: RESISTS CORROSION & DEFORMATION.
-
SPRING-LOADED DESIGN: QUICK ADJUSTMENTS FOR EFFICIENT FILTER REMOVAL.
-
UNIVERSAL FIT: WORKS WITH VARIOUS VEHICLE OIL FILTERS SEAMLESSLY.
To apply a filter to an image in MATLAB, you can follow these steps:
- Read the image using the imread function and store it in a variable.
- Convert the image to grayscale using the rgb2gray function (if necessary) to simplify the filtering process.
- Create a filter (also known as a kernel or mask) using one of the available filter functions in MATLAB, such as fspecial, which generates predefined filters like Gaussian or Laplacian filters, or manually create your own filter using a matrix.
- Use the imfilter function to apply the filter to the image. Specify the image and the filter as input arguments to the function.
- Optionally, you can specify additional parameters in the imfilter function to control the boundary behavior, filter normalization, or filtering method.
- Display the filtered image using the imshow function.
Applying a filter to an image allows you to enhance or alter specific features, reduce noise, or perform various image processing tasks. Filters can be designed to perform operations such as blurring, sharpening, edge detection, or smoothing, among others.
How to check the dimensions of an image in MATLAB?
In MATLAB, you can check the dimensions of an image using the size function. Here's an example:
% Read image image = imread('your_image.jpg');
% Check image dimensions dimensions = size(image);
% Display image dimensions disp(dimensions);
The size function returns a row vector with three elements, where the first element represents the height of the image, the second element represents the width, and the third element represents the number of color channels (e.g., 1 for grayscale, 3 for RGB).
You can also access individual dimensions using indexing. For example, to get the width of the image:
width = dimensions(2); disp(width);
To get the height or number of color channels, you can replace 2 with 1 or 3, respectively.
How to apply a Wiener filter on noisy images?
To apply a Wiener filter on noisy images, follow the below steps:
- Understand the Wiener filtering concept: The Wiener filter is a linear filter that minimizes mean-square error between the desired signal and the filtered signal. It considers both the noise power spectrum and the signal power spectrum.
- Obtain a degraded/noisy image: Start with a noisy image that you want to filter using the Wiener filter. Ensure you have the original clean image for comparison.
- Estimate the noise power spectrum: Estimate the power spectrum of the noise in the image. This can be done by taking a small region within the image where only noise is present (e.g., a patch of sky or background), and analyzing its power spectrum.
- Analyze the power spectrum of the clean image: Estimate the power spectrum of the desired/clean image by applying a Fourier transform on a region that contains only the desired signal.
- Calculate the Wiener filter transfer function: Calculate the Wiener filter transfer function using the estimated noise and signal power spectra. The transfer function is given by: H = (|F_s|² / (|F_s|² + K)) / R, where H is the transfer function, F_s is the Fourier transform of the clean image, K is a constant (usually a small value), and R is the power spectrum of the noise.
- Apply the Wiener filter in the frequency domain: Convert the degraded image to the frequency domain using a Fourier transform. Multiply the Fourier transformed image with the Wiener filter transfer function calculated in the previous step.
- Convert the filtered image back to the spatial domain: Apply an inverse Fourier transform to obtain the filtered image in the spatial domain.
- Evaluate and compare the filtered image: Compare the filtered image with the original clean image to see the improvement in the image quality. Assess if further adjustments or iterations are required.
Note: There are various implementations and adaptations of the Wiener filter, and some advanced techniques utilize wavelet transforms or other methods for more effective noise reduction. Experimentation and fine-tuning may be required based on the specific requirements and characteristics of the noisy images.
How to apply a bilateral filter for image denoising?
To apply a bilateral filter for image denoising, follow these steps:
- Import the image: Load the image you want to denoise into your preferred programming environment or image editing software.
- Convert the image to grayscale: If your image is in color, convert it to grayscale as the bilateral filter typically works better with grayscale images.
- Define the filter parameters: Determine the values for the filter parameters, including the filter size, variance of the domain (space) kernel, and variance of the range (intensity) kernel. These parameters will control the strength and effectiveness of the denoising filter.
- Create a template pixel window: For each pixel in the image, create a small window or template around it, usually a square or circular area.
- Calculate the weights: For each pixel within the template window, calculate the weight based on the Euclidean distance in both the spatial domain and intensity domain. The closer the pixel is to the central pixel, both spatially and in intensity, the higher the weight.
- Normalize the weights: Scale the weights so that they sum up to 1. This step ensures that the filtering process accurately reflects the contributions of nearby pixels.
- Apply the filter: Multiply each pixel's intensity value with its corresponding weight, sum the results, and assign the weighted sum to the pixel. Repeat this process for every pixel in the image.
- Repeat the process: To further enhance the denoising effect, consider applying the bilateral filter multiple times or adjusting the filter parameters as needed. Typically, more iterations or higher intensity kernel variance can result in stronger denoising but may also blur the image.
- Output the denoised image: Save the denoised image after the desired number of iterations or when you are satisfied with the denoising results.
It's worth noting that there are various implementations of the bilateral filter available in programming libraries and image editing software that simplify the process. If you are using software like OpenCV, MATLAB, or Adobe Photoshop, you can leverage their built-in functions to apply a bilateral filter with ease.