Best Python GUI Libraries to Buy in February 2026

A Simple Guide to Python GUI: Using the Standard Tkinter Library


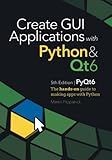
Create GUI Applications with Python & Qt6 (PyQt6 Edition): The hands-on guide to making apps with Python


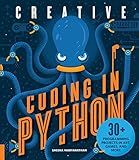
Creative Coding in Python: 30+ Programming Projects in Art, Games, and More


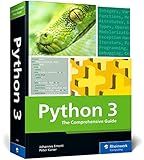
Python 3: The Comprehensive Guide to Hands-On Python Programming (Rheinwerk Computing)


Ultimate Data Science Programming in Python: Master data science libraries with 300+ programs, 2 projects, and EDA GUI tools (English Edition)


Python Programming: An Introduction to Computer Science, 3rd Ed.


PYTHON DESKTOP DEVELOPMENT WITH TKINTER AND PYQT: Design, Develop, and Deploy Cross-Platform GUI Applications with Python's Most Powerful and Flexible Libraries


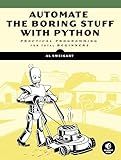
Automate the Boring Stuff with Python: Practical Programming for Total Beginners


Python GUI Programming Cookbook


To create a multiline entry with tkinter, you can use the Text widget instead of the Entry widget. The Text widget allows users to enter and display multiline text in a window. You can specify the number of rows and columns for the Text widget, as well as set options for scrolling, wrapping, and more. To create a Text widget in tkinter, you can use the Text class and specify its parameters, such as height, width, and other configurations. This will allow users to input and view multiple lines of text in a tkinter application.
How to change the font color of a multiline entry in tkinter?
You can change the font color of a multiline entry in tkinter by setting the foreground option of the Entry widget. Here is an example code to change the font color of a multiline entry in tkinter:
import tkinter as tk
root = tk.Tk()
Create a multiline entry widget
entry = tk.Text(root, height=10, width=40) entry.pack()
Change the font color of the entry widget
entry.tag_config("foreground", foreground="red") # Set the font color to red entry.insert("end", "This is a multiline entry", "foreground")
root.mainloop()
In this code, we first create a Text widget (which is a multiline entry widget) and then use the tag_config method to set the font color to red. Finally, we insert text into the entry widget using the insert method and specify the tag (in this case "foreground") to apply the font color.
How to change the text alignment in a multiline entry in tkinter?
To change the text alignment in a multiline entry widget in Tkinter, you can use the justify option. This option allows you to control how the text is aligned within the entry widget.
Here is an example code snippet that demonstrates how to change the text alignment in a multiline entry widget to center alignment:
import tkinter as tk
root = tk.Tk()
entry = tk.Entry(root, width=30, justify='center', font=('Arial', 12), bd=3) entry.pack()
root.mainloop()
In this example, we create a multiline entry widget and set the justify option to 'center' to align the text in the center. You can also set it to 'left' or 'right' for left or right alignment respectively.
How to add a scrollbar to a multiline entry in tkinter?
To add a scrollbar to a multiline entry widget in tkinter, you can use the Scrollbar widget in conjunction with the Text widget. Here's a step-by-step guide on how to do this:
- Import the required libraries:
import tkinter as tk from tkinter import Scrollbar
- Create the root window and the text widget:
root = tk.Tk()
text_widget = tk.Text(root, height=10, width=50) text_widget.pack(side=tk.LEFT, fill=tk.BOTH, expand=True)
- Create a scrollbar widget and attach it to the text widget:
scrollbar = Scrollbar(root, command=text_widget.yview) scrollbar.pack(side=tk.RIGHT, fill=tk.Y)
text_widget.config(yscrollcommand=scrollbar.set)
- Add text to the text widget:
text_widget.insert(tk.END, "Lorem ipsum dolor sit amet, consectetur adipiscing elit. ") text_widget.insert(tk.END, "Pellentesque ac justo id justo efficitur consequat. ") text_widget.insert(tk.END, "Vestibulum ac purus et turpis interdum ullamcorper.")
- Run the main loop:
root.mainloop()
With these steps, you should have a multiline entry widget with a scrollbar in your tkinter application. You can customize the height, width, and content of the text widget to suit your needs.
