
Best Bitbucket Tools to Buy in July 2026
Atlassian DevOps Toolchain Cookbook: Recipes for building, automating, and managing applications with Jira, Bitbucket Pipelines, and more


Bucket Boss The Bucketeer Bucket Tool Organizer in Brown, 10030
- ORGANIZE LONG TOOLS EASILY WITH THREE SECURE INTERIOR LOOPS.
- PERFECT FIT FOR MOST 5-GALLON BUCKETS-VERSATILE AND PRACTICAL!
- CRAFTED WITH EXCELLENT QUALITY FOR DURABILITY AND LONG-LASTING USE.
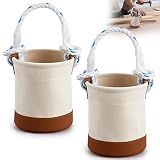
SilTriangle 2 Pcs Mini Tool Buckets 6" x 4.5", All-Purpose Tool Bucket with Leather-Bottom, Nuts and Bolt Bag with Reinforced Rope Handle, Small Utility Pouch for Carrying Nails Bolts Small Supplies
- COMPACT DESIGN: PERFECT FOR ORGANIZING TOOLS IN SMALL SPACES.
- DURABLE & STURDY: HEAVY-DUTY CANVAS WITH A REINFORCED LEATHER BOTTOM.
- EASY TO CARRY: CONVENIENT ROPE HANDLE FOR EFFORTLESS MOBILITY.
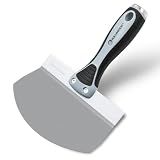
ROLLINGDOG Drywall Bucket Scoop - 6.5 inch Bucket Scraper Mud Scoop for Drywall,Plaster,Stainless Steel Bucket Scoop,Idea for Clean Paint,Mortar,Putty,etc
- DURABLE STAINLESS STEEL BLADE ENSURES LONG-LASTING, SAFE USE DAILY.
- CURVED DESIGN MINIMIZES WASTE AND SPEEDS UP MATERIAL ACQUISITION.
- ERGONOMIC RUBBER HANDLE REDUCES HAND FATIGUE DURING EXTENDED USE.
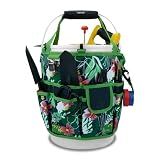
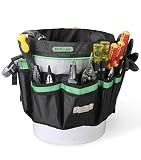
KUNN Bucket Tool Organizer 5 Gallon 18-Pocket Gardening Tool Bag with Hangable Handle | Garden Caddy & Bucket Accessory, Green
-
WATER-RESISTANT & DURABLE: BUILT TO LAST WITH 600D POLYESTER, IDEAL FOR GARDENS.
-
18 POCKET DESIGN: ORGANIZE TOOLS EFFORTLESSLY WITH MULTIPLE POCKETS AND CLIPS.
-
HANGABLE & PORTABLE: EASILY DETACH AND HANG, PLUS COMFORT GRIP FOR CARRYING.

AWP Bucket Tool Organizer 51-Pocket for 5-Gallon Buckets, Water-Resistant Heavy-Duty Utility Tool Bag with Pockets for Tools, Screwdrivers, and Electrical Accessories, 1L-22051-1
-
RUGGED DESIGN: DURABLE, WATER-RESISTANT MATERIAL ENSURES LONG-LASTING USE.
-
MAXIMIZED ORGANIZATION: 51 POCKETS KEEP ALL TOOLS READILY ACCESSIBLE.
-
QUICK ACCESS FEATURES: MAGNET STRIP AND TAPE CLIP STREAMLINE YOUR WORKFLOW.

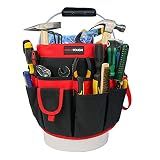
IRONLAND Bucket Tool Organizer Fit 3.5-5 Gallon Bucket, 51 Pockets, Bucket Tool Caddy Organization for Garden, Construction, Carpenter, Electrician, Welding, Builder Red & Black
-
HEAVY-DUTY, WATERPROOF DESIGN FOR LASTING DURABILITY AND PERFORMANCE.
-
FITS MOST 3.5-5 GALLON BUCKETS FOR EASY TOOL ACCESS AND TRANSPORT.
-
51 POCKETS ENSURE OPTIMAL ORGANIZATION FOR ALL YOUR ESSENTIAL TOOLS.
HURRICANE 5 Gallon Bucket Tool Bag Organizer, Garden Tool Caddy with 52 Pockets, Waterproof for Most Buckets
-
RUGGED 1680D POLYESTER: BUILT FOR LONG-LASTING DURABILITY AND WATER RESISTANCE.
-
MAXIMIZE STORAGE: TEN INTERIOR & 42 EXTERIOR POCKETS FOR ULTIMATE ORGANIZATION.
-
VERSATILE USE: PERFECT FOR CONSTRUCTION, GARDENING, AND DIY PROJECTS.
MELOTOUGH Bucket Caddy Organizer Bucket Tool Organizer for Garden Tools Fit 3.5 to 5 Gallon Bucket (Red)
- MAXIMIZE ORGANIZATION: 35 POCKETS FOR EFFICIENT TOOL STORAGE & ACCESS.
- COMFORTABLE CARRYING: EASY-TO-HANDLE DESIGN FOR QUICK TRANSPORT.
- DURABLE BUILD: HEAVY-DUTY, WATER-RESISTANT FABRIC FOR LASTING USE.

Buddy Tools Scoop-N-Scrape Bucket Scoop
-
EFFORTLESSLY CLEANS 5-GALLON BUCKETS WITH A CURVED EDGE DESIGN.
-
VERSATILE TROWEL FOR DRYWALL, PAINT, MORTAR, AND MORE!
-
DURABLE, UNBREAKABLE NYLON THAT WON’T RUST OR NICK PLASTIC.
To create a pull request on Bitbucket from the command line, you can follow these steps:
- Make sure you have Git installed on your system and have it configured with your Bitbucket account.
- Navigate to your local repository directory using the command line.
- Create a new branch for the changes you want to push to Bitbucket using the git checkout -b command.
- Make your changes to the code and commit them using the git add and git commit commands.
- Push your changes to the branch on Bitbucket using the git push command.
- Use the git pull-request command to create a pull request from your branch to the repository on Bitbucket.
- Provide a title and description for the pull request when prompted.
- Submit the pull request, and it will be created on Bitbucket for review by your team members.
By following these steps, you can easily create a pull request on Bitbucket from the command line.
How to close multiple pull requests with a single command in Bitbucket?
In Bitbucket, you can't close multiple pull requests with a single command. You will need to close each pull request individually by clicking the "Close" button on each pull request's page. Alternatively, you can merge multiple pull requests at once by using the "Merge" option on each pull request's page, but this will still require you to manually process each pull request.
How to rebase a branch before creating a pull request in Bitbucket?
To rebase a branch before creating a pull request in Bitbucket, follow these steps:
- Make sure you have the latest changes from the main branch by pulling the changes from the remote repository:
git checkout main git pull
- Switch back to your feature branch that you want to rebase:
git checkout your-feature-branch
- Start the rebase process by using the following command:
git rebase main
- If there are any conflicts during the rebase process, you will need to resolve them manually. Use the following commands to resolve conflicts:
git status
git add
- Once you have resolved all conflicts, finish the rebase process by executing the following command:
git push --force
- Now you can go to Bitbucket and create a pull request for your rebased branch.
By rebasing your branch before creating a pull request, you ensure that your changes are based on the latest version of the main branch, making it easier for reviewers to review and merge your code.
How to create a Bitbucket pull request from the command line?
To create a Bitbucket pull request from the command line, you can use the following steps:
- First, clone the Bitbucket repository to your local machine using the following command:
git clone <repository_url>
- Navigate to the local repository directory using the cd command:
cd <repository_name>
- Create a new branch for your changes using the following command:
git checkout -b <branch_name>
- Make your desired changes in the codebase and stage them for commit using the following command:
git add .
- Commit the changes to your local repository with a descriptive commit message using the following command:
git commit -m "Your commit message"
- Push the changes to the remote repository on Bitbucket using the following command:
git push origin <branch_name>
- Finally, create a pull request on Bitbucket by navigating to the repository online and clicking on the "Create pull request" button. You can also create a pull request using the Bitbucket API by executing a command similar to the following:
curl -s -X POST -u
By following these steps, you can create a Bitbucket pull request from the command line.
What is the recommended workflow for creating and merging pull requests in Bitbucket?
The recommended workflow for creating and merging pull requests in Bitbucket is as follows:
- Create a new branch: Before making any changes to the codebase, create a new branch in the repository to work on your changes. This helps to isolate your changes from the main branch and makes it easier to manage and review your code later on.
- Make your changes: Make the necessary changes to the codebase in your new branch. Be sure to follow best practices for coding and testing to ensure that your changes are high quality and functional.
- Commit your changes: Once you have completed your changes, commit them to your branch with descriptive commit messages that explain the purpose of the changes.
- Push your branch to the remote repository: Push your branch to the remote repository on Bitbucket so that others can access and review your changes.
- Create a pull request: In Bitbucket, navigate to the repository and create a new pull request for your branch. Include a detailed description of your changes, any relevant context or instructions for reviewers, and assign reviewers to provide feedback.
- Review and address feedback: Reviewers will review your code changes and provide feedback and suggestions for improvement. Address any feedback and make additional changes as needed.
- Merge your pull request: Once your changes have been reviewed and approved, merge your pull request into the main branch. Be sure to resolve any conflicts that may arise during the merge process.
- Delete your branch: After your changes have been merged, delete your branch to keep the repository clean and organized.
By following this workflow, you can effectively collaborate with your team and contribute code changes to the project in a structured and efficient manner.