
Best Tools for Monitoring Cloud Infrastructure to Buy in July 2026
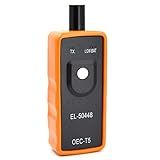
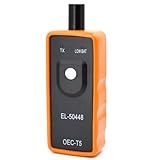
EL-50448 GM TPMS Relearn Tool Chevy TPMS Reset Tool for Cadillac GMC Buick Tire Pressure Relearn Tool Monitoring System Sensor Reset Programming Tool for Chevrolet Cruze Silverado Traverse TPMS Tool
- ONE-BUTTON DESIGN FOR QUICK TPMS ACTIVATION IN JUST 1-2 MINUTES!
- COMPATIBLE WITH 100+ GM VEHICLES FOR MAXIMUM ADAPTABILITY AND USE.
- CLEAR INSTRUCTIONS AND VIDEO TUTORIALS MAKE IT EASY FOR ANYONE!


TPMS Relearn Tool for GM Tire Sensor, EL-50448 Auto Tire Monitoring System Activation Reset Tool, Tire Sensor Reset Tool OEC-T5, TPMS Programming Tool for GM Series Vehicles 2006-2024
- QUICK TIRE SENSOR RESET IN 1-2 MINUTES FOR OPTIMAL PERFORMANCE.
- UNIVERSAL COMPATIBILITY FOR CARS, SUVS, AND PICKUPS (NOT LARGE TRUCKS).
- EASY SINGLE-BUTTON OPERATION FOR HASSLE-FREE TIRE PRESSURE MANAGEMENT.

TPMS Relearn Tool with Battery, TPMS Reset Tool for GM, EL-50448 Tire Sensor Reset Tool, OEC-T5 Auto Tire Monitoring System Activation Reset Tool,TPMS Programming Tool for GM Series Vehicles 2006-2024
-
INSTANT USE: BUILT-IN 9V BATTERY ELIMINATES WAITING FOR SETUP!
-
FAST AND RELIABLE: ACTIVATES TIRE SENSORS IN JUST 1-2 MINUTES.
-
WIDE COMPATIBILITY: WORKS WITH MOST VEHICLES, ENSURING VERSATILITY.

VXDAS TPA01 TPMS Relearn Tool for GM, 150PSI Digital Tire Pressure Gauge, 2 in 1 Tire Pressure Monitoring Sensor Activation Tool for Buick/Chevy/Cadillac/Opel Series Vehicles, 2 Mins Quick Reset
- 2-IN-1 TOOL: RESETS SENSORS & MAINTAINS TIRE PRESSURE EFFORTLESSLY!
- QUICK & ACCURATE: INSTANTLY READS TIRE PRESSURE IN MULTIPLE UNITS!
- COST-EFFECTIVE GIFT: SAVE $$ BY RESETTING TIRE SENSORS AT HOME!
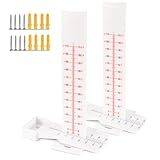
SMTOER Concrete Crack Monitor Gauge - 110mm Displacement & Horizontal Movement Measuring Tool for Wall Deformation Monitoring (2PCS)
- COMPREHENSIVE CRACK ANALYSIS: DUAL MONITORING FOR PRECISE DISPLACEMENT TRACKING.
- PRECISION MEASUREMENT: CALIBRATED RULER ENSURES 0.5MM ACCURACY IN CRACK WIDTH.
- VERSATILE USE: PERFECT FOR MONITORING CONCRETE, BRICK, AND FOUNDATION CRACKS.

Slimpal Body Tape Measure with Case, Tool for Monitoring Body Fat, Measuring Tape for Body, Digital Smart Retractable Measuring Tape for Accurately Measuring BMI Fitness Body Shape and Weight-Loss
-
SMART BODY FAT MEASUREMENT AND INSIGHTS VIA SLIMPAL APP.
-
TRACK WAIST-TO-HIP RATIO FOR BETTER HEALTH VISUALIZATION.
-
MULTI-USER SUPPORT FOR FAMILY TRACKING AND EASY MEASUREMENTS.

EL-50448 TPMS Relearn Tool Chevy TPMS Reset Tool for Chevrolet Cadillac GMC Buick GM Tire Pressure Sensor Reset Tool Chevy Tire Pressure Monitoring System Sensor Activation Tool TPMS Programming Tool
-
COMPATIBLE WITH 100+ GM MODELS-BROADER VEHICLE COVERAGE!
-
ONE-BUTTON DESIGN FOR EFFORTLESS TPMS RESET-DIY FRIENDLY!
-
RELIABLE TOOL ENSURES ACCURATE SENSOR RESETS FOR SAFE DRIVING!
EL-50448 TPMS Relearn Tool GM TPMS Relearn Tool Chevy TPMS Reset Tool Tire Sensor Train Tire Pressure Monitoring System Activation Programming Tool for Chevy Buick GMC for 200+ GM Models
- EASILY ACTIVATE AND RESET GM TPMS SENSORS IN MINUTES FOR DIY SAVINGS.
- COMPATIBLE WITH 200+ GM MODELS; PERFECT FOR ALL YOUR VEHICLE NEEDS.
- ONE-BUTTON OPERATION-NO EXPERIENCE REQUIRED FOR SIMPLE TIRE PRESSURE FIXES.

CRA Handbook - Interim Monitoring Visit: Study Specific IMV Template for Clinical Research Associates - 12 Visits | Monitoring Tool | CRA Authored | ... 74 pages | Professional Clinical Research Aid
To deploy Prometheus on OVHcloud, follow these steps:
- Log in to your OVHcloud account and navigate to the dashboard.
- Create a new virtual machine (VM) instance that meets the system requirements for running Prometheus. Make sure to choose an appropriate operating system for your VM.
- Once the VM is created, establish a secure connection to it using SSH or any other remote access method of your choice.
- Update the system packages on the VM by running the appropriate commands for your operating system. This ensures that you have the latest security patches and updates.
- Install Prometheus on your VM. You can download the latest version of Prometheus from the official Prometheus website or use package managers like apt or yum to install it.
- Configure Prometheus according to your monitoring needs. This involves specifying the targets (endpoints) that Prometheus should scrape for metrics, configuring alerting rules, and defining various other parameters in the Prometheus configuration file. The configuration file is usually named prometheus.yml.
- Start the Prometheus service on your VM. Use the appropriate commands for your operating system to start and enable Prometheus to run at system startup.
- Verify that Prometheus is running correctly by accessing the Prometheus web interface. By default, Prometheus runs on port 9090, so you can access it by opening a web browser and entering http://your_VM_IP_address:9090 in the address bar.
- Secure your Prometheus installation by setting up appropriate access controls and authentication mechanisms. This is especially important if your Prometheus instance is accessible over the internet.
- (Optional) Set up Grafana for visualization and monitoring. Grafana is a popular open-source platform that works seamlessly with Prometheus to create dashboards and visualize different metrics.
By following these steps, you should be able to deploy Prometheus on OVHcloud and start monitoring your system's metrics effectively.
How to install Prometheus on OVHcloud?
To install Prometheus on OVHcloud, you can follow the steps below:
- Configure your OVHcloud instance: Launch a virtual machine or a dedicated server on OVHcloud. Make sure you have SSH access to the instance.
- Connect to your OVHcloud instance using SSH.
- Update the system packages by running the following command: sudo apt-get update
- Install Prometheus and other required dependencies with the following command: sudo apt-get install prometheus
- Once the installation is complete, you will see the Prometheus configuration file located at /etc/prometheus/prometheus.yml. You need to configure this file to set up your target endpoints and other options.
- Open the Prometheus configuration file in a text editor: sudo nano /etc/prometheus/prometheus.yml
- Modify the configuration file according to your requirements. For example, you can add your target endpoints as follows: scrape_configs: - job_name: 'node' scrape_interval: 5s static_configs: - targets: ['localhost:9100', 'example.com:9100'] In this example, Prometheus will scrape metrics from two endpoints: localhost:9100 and example.com:9100.
- Save and exit the file.
- Start the Prometheus service using the following command: sudo service prometheus start
- Verify that Prometheus is running correctly by accessing its web interface. Open your web browser and enter http://your_server_ip:9090 (replace your_server_ip with the IP address of your OVHcloud instance). You should see the Prometheus web interface.
That's it! Prometheus is now installed on your OVHcloud instance. You can continue to configure and customize it according to your specific needs.
How to deploy Prometheus on OVHcloud?
To deploy Prometheus on OVHcloud, you can follow these steps:
- Sign in to your OVHcloud account and go to the OVHcloud Control Panel.
- Create a new Virtual Private Server (VPS) on OVHcloud with the desired specifications.
- Once the VPS is created, connect to it via SSH using a terminal or SSH client.
- Update the system packages by running the following commands:
sudo apt update sudo apt upgrade
- Install Docker on the VPS using the following commands:
sudo apt install docker.io sudo systemctl start docker sudo systemctl enable docker
- Create a new directory to store the necessary Prometheus files:
mkdir ~/prometheus cd ~/prometheus
- Create a Docker Compose file named docker-compose.yml using a text editor:
version: '3' services: prometheus: image: prom/prometheus volumes: - ./prometheus.yml:/etc/prometheus/prometheus.yml - ./data:/prometheus command: - '--config.file=/etc/prometheus/prometheus.yml' ports: - 9090:9090 restart: always
- Create a Prometheus configuration file named prometheus.yml using a text editor:
global: scrape_interval: 15s
scrape_configs:
- job_name: 'prometheus'
static_configs:
- targets: ['localhost:9090']
- Save both files (docker-compose.yml and prometheus.yml).
- Start Prometheus using Docker Compose:
docker-compose up -d
- Access Prometheus by visiting http://your_vps_ip:9090 in a web browser.
That's it! Prometheus is now deployed on OVHcloud and can be used for monitoring and alerting your systems.
What is the recommended monitoring interval for Prometheus scrapes on OVHcloud?
There is no specific recommended monitoring interval for Prometheus scrapes on OVHcloud as it largely depends on your specific monitoring requirements and the resources available to you.
However, a common practice is to scrape Prometheus targets every 15 to 60 seconds, depending on the size and complexity of your infrastructure. If you have a larger number of targets or require more frequent monitoring, you may need to adjust the interval accordingly.
It's important to find a balance between the frequency of scrapes and the resources required to perform them. Too frequent scrapes can put a heavy burden on your system, leading to increased resource usage and potential performance issues.
Consider factors such as the number of targets, the amount of data generated by each scrape, and the resources allocated to Prometheus when determining the appropriate monitoring interval for your OVHcloud setup.