Best Python Development Tools to Buy in February 2026

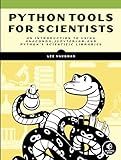
Python Tools for Scientists: An Introduction to Using Anaconda, JupyterLab, and Python's Scientific Libraries


Python Data Science Handbook: Essential Tools for Working with Data


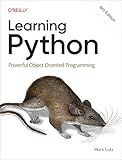
Learning Python: Powerful Object-Oriented Programming


Effective Python Development for Biologists: Tools and techniques for building biological programs


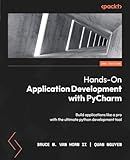
Hands-On Application Development with PyCharm: Build applications like a pro with the ultimate python development tool


Python Machine Learning By Example: Unlock machine learning best practices with real-world use cases


Think Python: How to Think Like a Computer Scientist


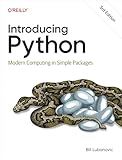
Introducing Python: Modern Computing in Simple Packages


Embedding Python console output into a wxPython application involves redirecting the standard output and error streams to a wxPython widget, such as a wx.TextCtrl. To achieve this, you can create a subclass of Python's built-in io.StringIO or use a simple custom class that overrides the write method to append text to your wxPython widget. First, you need to initialize your wxPython application and create a main window with a wx.TextCtrl configured to handle multiline input and set as read-only. Subclassing or creating a custom writer, override the write method to append text to this wx.TextCtrl. You can then redirect sys.stdout and sys.stderr to an instance of your custom class, ensuring that all printed console output is directed to the widget instead of the terminal. It may be necessary to use wxPython's threading or event mechanism to safely update the UI from non-main threads, particularly if output redirection is done in a threaded or asynchronous manner. After setting this up, any Python statements such as print or error messages will be embedded within your wxPython interface, providing a seamless integration of console output into a GUI environment.
How to redirect sys.stdout and sys.stderr to a wxPython widget?
Redirecting sys.stdout and sys.stderr to a wxPython widget, such as a wx.TextCtrl, is a common technique to capture and display console output in a GUI application. Here's a step-by-step guide to achieve this:
- Define a Custom Redirect Class: Create a class to handle the redirection. This class will write output to both standard streams and to the wxPython widget.
- Redirect Output: Replace sys.stdout and sys.stderr with an instance of the custom redirect class.
- Implement a wxPython GUI: Create a simple wxPython application with a wx.TextCtrl to display the output.
Here's an example implementation:
import wx import sys
class RedirectText: def __init__(self, text_ctrl): self.out = text_ctrl
def write(self, string):
    self.out.WriteText(string)

def flush(self):
    pass  # Leave it empty if you don't have buffer support
class MyFrame(wx.Frame): def __init__(self, parent, title): super(MyFrame, self).__init__(parent, title=title, size=(500, 400))
    # Set up the panel and text control
    panel = wx.Panel(self)
    self.text\_ctrl = wx.TextCtrl(panel, style=wx.TE\_MULTILINE | wx.TE\_READONLY, size=(480, 300))

    sizer = wx.BoxSizer(wx.VERTICAL)
    sizer.Add(self.text\_ctrl, 1, wx.EXPAND)
    panel.SetSizer(sizer)

    # Redirect stdout and stderr
    redir = RedirectText(self.text\_ctrl)
    sys.stdout = redir
    sys.stderr = redir

    # Example button to generate some output
    self.button = wx.Button(panel, label="Generate Output")
    sizer.Add(self.button, 0, wx.ALL | wx.CENTER, 5)
    self.button.Bind(wx.EVT\_BUTTON, self.OnButtonClicked)

def OnButtonClicked(self, event):
    # Generate some stdout and stderr output
    print("This will appear in the wx.TextCtrl via sys.stdout.")
    raise RuntimeError("This is a sample error message sent to sys.stderr.")
class MyApp(wx.App): def OnInit(self): frame = MyFrame(None, title="Redirect stdout and stderr") self.SetTopWindow(frame) frame.Show() return True
if __name__ == "__main__": app = MyApp(False) app.MainLoop()
In this example:
- RedirectText Class: The RedirectText class is responsible for writing output to the wx.TextCtrl. It overrides the write method to append text to the GUI control.
- Setting Up wxPython GUI: The GUI has a wx.TextCtrl for displaying output and a button to simulate output generation.
- Redirecting sys.stdout and sys.stderr: sys.stdout and sys.stderr are redirected to instances of the RedirectText class, allowing any print statements or errors to be directed to the wx.TextCtrl.
- Handle External Calls with GUI: Use additional mechanisms if needed to ensure thread safety when interacting with the GUI outside of the main thread.
This template can be modified to fit more complex applications and aids in debugging GUI applications by visually displaying logs and errors.
How to display real-time console output in a wxPython TextCtrl?
To display real-time console output in a wxPython TextCtrl, you can redirect the standard output to the TextCtrl widget. Here's a step-by-step guide on how to achieve this by creating a custom class to handle the redirection:
- Subclass sys.stdout: Create a class that redirects output to the TextCtrl.
- Implement the GUI with wxPython: Set up a simple application with a TextCtrl widget.
- Redirect Output: Replace sys.stdout with an instance of your custom class to show real-time output in the TextCtrl.
Here's a basic example to demonstrate this process:
import wx import sys import time import threading
Step 1: Create a custom class to redirect stdout to TextCtrl
class RedirectText: def __init__(self, text_ctrl): self.out = text_ctrl
def write(self, string):
    wx.CallAfter(self.out.AppendText, string)

def flush(self):
    pass  # This is typically implemented for file-like objects
Step 2: Set up the wxPython application
class MyFrame(wx.Frame): def __init__(self, *args, **kw): super(MyFrame, self).__init__(*args, **kw)
    panel = wx.Panel(self)
    self.text\_ctrl = wx.TextCtrl(panel, style=wx.TE\_MULTILINE | wx.TE\_READONLY | wx.HSCROLL)

    sizer = wx.BoxSizer(wx.VERTICAL)
    sizer.Add(self.text\_ctrl, proportion=1, flag=wx.EXPAND)
    panel.SetSizer(sizer)

    # Redirect stdout to the TextCtrl
    redir = RedirectText(self.text\_ctrl)
    sys.stdout = redir

    # Start a thread to generate output
    self.thread = threading.Thread(target=self.print\_numbers)
    self.thread.start()

# A method to simulate generating output
def print\_numbers(self):
    for i in range(10):
        print(f"Counting: {i}")
        time.sleep(1)
class MyApp(wx.App): def OnInit(self): self.frame = MyFrame(None, title="Real-Time Console Output to TextCtrl") self.frame.Show() return True
Step 3: Start the wxPython application
if __name__ == "__main__": app = MyApp(False) app.MainLoop()
Explanation:
- RedirectText Class: Redirects the write calls to the AppendText method of the TextCtrl. wx.CallAfter is used to ensure that the AppendText call is made from the GUI thread, which is mandatory for thread safety in wxPython.
- MyFrame Class: Sets up the GUI, creates a TextCtrl, and starts a separate thread to simulate continuous output.
- Threading: A separate thread is used to generate output without blocking the GUI. You may update this to read from a subprocess or any other source of real-time data.
- App and Main Loop: Initializes and runs the wxPython application.
This setup will display real-time output from any print statements in the thread onto the TextCtrl widget in the wxPython application window.
What is wxPython’s RedirectText class?
RedirectText is a class often used in wxPython, a popular library for creating graphical user interfaces (GUIs) in Python. This class facilitates redirecting the standard output (stdout) and standard error (stderr) streams to a wxPython text control widget, such as wx.TextCtrl. This is particularly useful for capturing and displaying console output directly in a GUI application, allowing users to see the output of various processes or debugging information within the main window of the application.
A typical implementation of the RedirectText class might look like this:
import wx import sys
class RedirectText(object): def __init__(self, text_ctrl): self.out = text_ctrl
def write(self, string):
    self.out.WriteText(string)
Example usage in a wxPython application
class MyFrame(wx.Frame): def __init__(self): super().__init__(parent=None, title='Redirect Text Example') panel = wx.Panel(self) my_sizer = wx.BoxSizer(wx.VERTICAL)
    self.text\_ctrl = wx.TextCtrl(panel, style=wx.TE\_MULTILINE | wx.TE\_READONLY)
    my\_sizer.Add(self.text\_ctrl, 1, wx.EXPAND)

    self.redirect\_text = RedirectText(self.text\_ctrl)
    sys.stdout = self.redirect\_text
    sys.stderr = self.redirect\_text

    panel.SetSizer(my\_sizer)
    self.Show()
To run the wxPython application
if __name__ == '__main__': app = wx.App(False) frame = MyFrame() app.MainLoop()
In this example:
- A RedirectText object is created, taking a wx.TextCtrl as an argument.
- The write method appends text to the wx.TextCtrl.
- The sys.stdout and sys.stderr streams are redirected to the RedirectText object, which means any output that would normally be printed to the console will be instead displayed in the text control within the wxPython GUI.
This setup is very useful when developing wxPython applications that need to provide real-time feedback to the user through a text-based interface directly embedded in the application.
What are the differences between classic wxPython and Phoenix?
wxPython is a popular toolkit for creating graphical user interfaces (GUIs) in Python. Over time, it has undergone significant changes to enhance its functionality, usability, and compatibility with modern systems. The move from classic wxPython to wxPython Phoenix represents one of the most substantial evolutions. Here are some key differences between classic wxPython and wxPython Phoenix:
- Compatibility: Classic wxPython: This version was designed to work primarily with Python 2.x. As Python 2.x is no longer officially supported, this has become a limitation. Phoenix: Designed to work with Python 3.x, Phoenix provides better compatibility with modern Python syntax and features.
- Architecture and Design: Classic wxPython: It relied on a hand-crafted build process and bindings, which made it harder to maintain, particularly across different platforms and Python versions. Phoenix: Utilizes a more automated build process using SWIG (Simplified Wrapper and Interface Generator), making it easier to generate wrappers for the wxWidgets library. This process improves maintainability and adaptability across various platforms.
- Performance and Size: Classic wxPython: Generally larger and not optimized for newer Python environments and systems. Phoenix: Aims to be more performance-efficient and has a reduced footprint, primarily due to the updating of code and libraries.
- API and Documentation: Classic wxPython: Had less comprehensive documentation, which could be a limitation for new developers trying to learn the toolkit. Phoenix: Includes improved documentation with automatically generated API reference documentation. It also makes consistent efforts to maintain better backwards compatibility and provide detailed guides on transitioning from classic to Phoenix.
- New Features and Updates: Phoenix often includes new features and improvements over what was available in the classic version, as it aligns more closely with the latest developments in wxWidgets.
- Cross-platform Support: While both versions are cross-platform, Phoenix has improved support for the latest versions of operating systems such as Windows, macOS, and various Linux distributions.
Given these differences, wxPython Phoenix is more suitable for modern application development, especially if you are targeting Python 3 and beyond. It offers a more robust and future-proof solution for creating cross-platform graphical user interfaces in Python.
What is the best way to layout widgets in wxPython?
In wxPython, the most common and flexible way to lay out widgets is by using sizers. Sizers are a way of managing the size and position of widgets within a window or another container, and they automatically adapt to changes in size and orientation. Here are some commonly used sizers in wxPython:
- BoxSizer: This is the most basic sizer and organizes widgets in a single row (horizontally) or column (vertically). You can choose between wx.BoxSizer(wx.VERTICAL) or wx.BoxSizer(wx.HORIZONTAL) depending on your layout needs.
- GridSizer: This sizer lays out widgets in a grid with all cells being of equal size. It’s useful when you need a uniform grid layout. You specify the number of rows and columns when you create the sizer.
- FlexGridSizer: Similar to GridSizer, but it allows for more flexibility by letting you specify different sizes for different rows and columns. It is more flexible but also more complex to set up than a regular GridSizer.
- GridBagSizer: This is the most flexible sizer for grid-based layouts. It allows placing widgets in a grid and spanning them across multiple rows and/or columns. You can control the positioning and size of widgets with more precision compared to GridSizer or FlexGridSizer.
- WrapSizer: This sizer lays out items in a manner similar to text in a paragraph, wrapping items into the next row or column when there is not enough space in the current one. It’s useful for creating flowing layouts where widgets wrap as needed.
- StaticBoxSizer: A special type of BoxSizer that places a static box around the contained widgets. It’s useful for grouping related widgets together within a labelled box.
To use sizers effectively, you typically need to:
- Create the sizer you want to use, typically as an instance of one of the sizers mentioned above.
- Add your widgets (and possibly spacers) to the sizer, specifying how they should grow, shrink, or align within the sizer.
- Set the sizer as the sizer for your panel, frame, or other container using the SetSizer() method.
- Optionally, use SetSizerAndFit() to automatically size the container to fit around the sizer’s contents.
Here's a simple example using a BoxSizer:
import wx
class MyFrame(wx.Frame): def __init__(self, *args, **kwargs): super(MyFrame, self).__init__(*args, **kwargs)
    panel = wx.Panel(self)
    sizer = wx.BoxSizer(wx.VERTICAL)

    # Add a button to the sizer
    button1 = wx.Button(panel, label="Button 1")
    sizer.Add(button1, flag=wx.EXPAND | wx.ALL, border=10)

    # Add another button to the sizer
    button2 = wx.Button(panel, label="Button 2")
    sizer.Add(button2, flag=wx.EXPAND | wx.ALL, border=10)

    panel.SetSizer(sizer)
app = wx.App(False) frame = MyFrame(None, title="wxPython Layout Example") frame.Show() app.MainLoop()
This example lays out two buttons vertically, and they expand to fill the width of their container. Adjusting sizer flags and proportion arguments allows you to fine-tune the layout to your specifications.
