
Best Headlamp Brightness Levels to Buy in July 2026
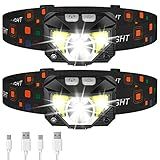
LHKNL Headlamp Flashlight, Lumen Ultra-Light Bright LED Rechargeable Headlight with White Red Light, 2-Pack Waterproof Motion Sensor Head Lamp,8 Modes for Outdoor Camping Running Hiking Fishing
-
LONG PRESS & MOTION SENSOR: EASILY CONTROL LIGHTING WITH HAND WAVES.
-
SUPER BRIGHT: 2X BRIGHTER LED, RECHARGEABLE, AND LONG-LASTING USE.
-
LIGHTWEIGHT & WATERPROOF: COMFORTABLE FIT WITH 8 VERSATILE MODES AVAILABLE.


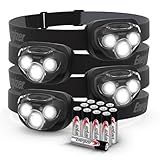
Energizer PRO-260 LED Headlamp (4-Pack), IPX4 Water Resistant Headlamps, High-Performance Head Light for Outdoors, Camping, Running, Storm, Survival LED Light for Emergencies (Batteries Included)
- HANDS-FREE, BRIGHT LED LIGHT WITH LONG RUNTIME FOR EVERY ACTIVITY.
- VERSATILE USE: EMERGENCY, OUTDOOR, OR INDOOR WORK LIGHT.
- ADJUSTABLE BRIGHTNESS WITH THREE MODES FOR TAILORED ILLUMINATION.
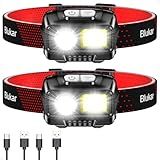
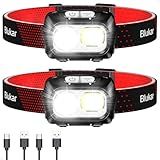
Blukar LED Headlamp Rechargeable,2000L High Lumen Super Bright Dimmable Headlight Flashlight with Motion Sensor- 8 Modes,Spotlight&Floodlight,IPX5 Waterproof for Camping,Hiking,Running,Fishing -2 Pack
-
STEPLESS DIMMING: EASILY ADJUST BRIGHTNESS FROM 100% TO 30% FOR ANY NEED.
-
MOTION SENSOR CONVENIENCE: WAVE TO TURN ON/OFF; HANDS-FREE LIGHTING AT ITS BEST!
-
LIGHTWEIGHT & WATERPROOF: COMFORTABLE, ADJUSTABLE FIT; SAFE IN ANY WEATHER!

Rechargeable Headlamp 3PCS, 230° Wide Beam Head Lamp, Motion Sensor LED Headlamp Rechargeable, 5Mode Bright Headlamps for Adults, Head Lights for Forehead, Hard Hat Headlight, Camping Essentials Gear
-
WIDE 230° BEAM & 300FT RANGE FOR ULTIMATE VISIBILITY ANYWHERE!
-
WAVE-ACTIVATED MOTION SENSING: EFFORTLESS LIGHT CONTROL!
-
LIGHTWEIGHT & WATERPROOF: PERFECT FOR ALL OUTDOOR ADVENTURES!
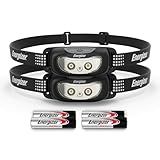
Energizer Universal+ LED Headlamp (2-Pack), Bright Head Lamp for Outdoors, Camping and Emergency Light, IPX4 Water Resistant (Batteries Included)
- DUAL LED HEADLAMPS OFFER POWERFUL, HANDS-FREE ILLUMINATION FOR ALL.
- LIGHTWEIGHT DESIGN ENSURES COMFORT DURING EXTENDED USE AND ACTIVITIES.
- SUPERIOR BRIGHTNESS: 12X STANDARD LEDS, PERFECT FOR NIGHT ADVENTURES.
Blukar LED Headlamp Rechargeable,2000L Super Bright Headlight with Motion Sensor -Dimmable Brightness,8 Modes,Spotlight&Floodlight&Red Light Combination,IPX5 Waterproof for Hiking,Camping - 2 Pack
- STEPLESS DIMMING & BRIGHTNESS CONTROL: CUSTOMIZE LIGHT 30%-100% EASILY!
- SMART MOTION SENSOR: WAVE TO TURN THE LIGHT ON/OFF-HANDS-FREE CONVENIENCE!
- IPX5 WATERPROOF: DURABLE DESIGN FOR ALL WEATHER-IDEAL FOR OUTDOOR USE!
Selecting the appropriate brightness level for different activities with a headlamp is essential to ensure optimal lighting conditions without straining your eyes or wasting power. Here's a guide to help you choose the right brightness level according to your specific needs:
- Evaluate the activity: Consider the type of activity you will be engaging in while using a headlamp. Activities such as reading, cooking, hiking, camping, or running all require different levels of brightness.
- Lumens: Lumens indicate the amount of light emitted by a headlamp. Higher lumens mean brighter light. For activities that require long-range visibility, like exploring a cave or hiking at night, opt for a headlamp with a higher lumen count. If you need less brightness, a lower lumen count will suffice.
- Proximity lighting: Proximity lighting is ideal for activities in close quarters, such as reading or cooking. It provides a softer, less intense light that minimizes eye strain and allows for better focus on nearby objects. Select a lower brightness level to achieve proximity lighting.
- Distance lighting: Distance lighting is required for activities that demand a broader range of illumination, like hiking or running during the night. This helps illuminate the path ahead, making it easier to navigate and avoid obstacles. Choose a higher brightness level to achieve optimal distance lighting.
- Dimmer functions: Many headlamps come with a built-in dimmer function that allows you to adjust the brightness level to your preference. Utilize these features to fine-tune the light output based on your needs. Dimmer settings also help conserve battery life.
- Red light mode: Some headlamps offer a red light mode which is especially useful during activities like stargazing or preserving your night vision. The red light won't disrupt your eyes' ability to adapt to low light conditions. Opt for this mode when needed.
- Trial and error: Experiment with different brightness levels in different scenarios to find what suits you best. Certain activities may have specific requirements, and what works for someone else may not work for you. Practice with your headlamp in various real-life situations to identify the most appropriate brightness level for each activity.
By considering the type of activity, lumens, proximity or distance lighting needs, dimmer functions, and red light mode, you can select the appropriate brightness level for different activities when using a headlamp. Remember, it's vital to strike a balance between providing sufficient light and conserving power to ensure a successful and enjoyable experience.
How to determine the suitable brightness level for night-time orienteering with a headlamp?
Determining the suitable brightness level for night-time orienteering with a headlamp depends on various factors such as the terrain, weather conditions, personal preference, and the specific needs of your activity. However, here are some general guidelines to help you determine the suitable brightness level:
- Consider the terrain and difficulty: If you are navigating through rough, uneven, or unfamiliar terrain, you might need a brighter headlamp to clearly see obstacles, roots, or rocks. On the other hand, if the terrain is relatively flat and easy to navigate, a lower brightness level might suffice.
- Evaluate weather conditions: In clear weather conditions with minimal fog, a moderate brightness level should be sufficient. However, if you anticipate fog, rain, or other adverse weather conditions, you may need a brighter headlamp to enhance visibility.
- Determine pace and activity type: If you plan on moving at a faster pace or engaging in fast-paced activities such as trail running or mountain biking, you might need a brighter headlamp to provide a wider and clearer field of view. For slower-paced activities, a lower brightness level may be adequate.
- Your familiarity with the area: If you are familiar with the area and the trail, you might not need an extremely bright headlamp as you will have a general idea of what to expect. However, if you are exploring a new area or route, a brighter headlamp can help you navigate safely and efficiently.
- Battery life and weight: Keep in mind that higher brightness levels consume more battery power, so depending on the duration of your activity, you should consider the battery life and carry extra batteries or a power source if needed. Additionally, brighter headlamps tend to be heavier, so choose a brightness level that strikes a balance between brightness and weight.
Remember, personal preference plays a significant role in determining the suitable brightness level. It is recommended to try different brightness levels during your training sessions to find the setting that works best for you and your specific needs for night-time orienteering.
How to find the right brightness level for mountaineering with a headlamp?
Finding the right brightness level for mountaineering with a headlamp depends on various factors such as the conditions, terrain, and personal preference. Here are some steps to help you determine the appropriate brightness level:
- Assess the conditions: Consider the amount of ambient light available. If you are climbing in complete darkness or low-light conditions, you may need a higher brightness level to illuminate your surroundings effectively. Alternatively, if there is some natural light or the moon is out, you may be able to use a lower brightness setting.
- Evaluate the terrain: Different terrains require varying levels of illumination. If you are navigating through challenging, technical terrain where every detail counts, you might want a brighter light to ensure better visibility. On the other hand, if you are traversing easy trails or less demanding terrain, a lower brightness setting may suffice.
- Consider battery life: Higher brightness levels consume more power and can drain your batteries quickly. It is essential to find a balance between brightness and battery life, especially for longer mountaineering trips. Take into account the duration of your climb and ensure that your headlamp can provide sufficient brightness throughout.
- Adjust based on personal comfort: Headlamp brightness is subjective, and each individual may have their own preference. Some mountaineers prefer brighter lights to have a broader and clearer view of their surroundings, while others may find it too intense. Experiment with different brightness levels and find what feels comfortable and practical for you.
- Test and adapt: Before heading out on your mountaineering expedition, test your headlamp in various conditions and terrain. Experiment with different brightness settings to identify the level that suits your needs best. Continually assess and adjust the brightness as you climb to ensure optimum visibility.
Remember, it is always a good idea to carry additional backup lights or spare batteries in case of emergencies or unexpected situations.
How to choose the right brightness level for hiking at night with a headlamp?
Choosing the right brightness level for hiking at night with a headlamp is essential to ensure safety, optimize battery life, and maintain visibility without causing excessive strain on your eyes. Here are some steps to help you select the appropriate brightness level:
- Consider the environment: Assess the trail conditions, terrain difficulty, and your familiarity with the area. If you are hiking on well-maintained trails with minimal obstacles, you might need less brightness. In contrast, if you are navigating through rocky or uneven terrain, you may need a brighter setting to see potential hazards clearly.
- Evaluate ambient light: Take note of the ambient light in your surroundings. If there is some moonlight, starlight, or residual city glow, you might be able to use a lower brightness setting. However, in pitch-black conditions with no external light, you will likely require a higher brightness.
- Balance between visibility and battery life: Higher brightness settings will drain your headlamp's batteries faster. Consider the duration of your hike and the battery life of your headlamp. Find a balance that provides adequate visibility throughout your trek without risking a dead battery before you finish.
- Adjust to your comfort level: Different people have different preferences when it comes to the brightness of their headlamp. Start by setting it to a lower brightness and gradually increase it until you find a level that feels comfortable for your eyes, providing sufficient illumination without causing strain or discomfort.
- Use different brightness modes: Many headlamps offer multiple brightness levels or modes. Opt for a headlamp that allows you to easily switch between various settings. This versatility enables you to adjust the brightness as your needs change, such as when reading a map, scanning the surroundings, or conserving battery power.
- Test it out: Before heading out on your hike, try your headlamp in various settings to get a better understanding of how different brightness levels impact your visibility. Experiment in different environments and distances to determine the settings that work best for you.
Remember, it is crucial to preserve your night vision. Avoid using unnecessarily high brightness levels if they are not required, as this can make it more challenging for your eyes to adjust to low-light conditions.