
Best Automation Tools to Buy in July 2026
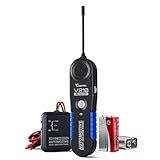
VDIAGTOOL V210 Wire Tracer Electrical Automotive Open & Short Finder Circuit Tester Circuit Breaker Finder Fault Probe Wire Tracker Electrical DC 6-42V
-
QUICKLY LOCATE CIRCUIT ISSUES WITH BUILT-IN BUZZER AND LEDS.
-
EASILY TRACE WIRES WITHOUT DAMAGING INSULATION FOR SAFE USE.
-
ENJOY PEACE OF MIND WITH 2-YEAR WARRANTY AND 24/7 TECH SUPPORT.


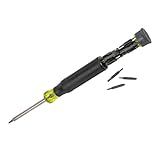
Klein Tools 32327 Precision Screwdriver Set, 27-in-1 Multi-Bit Screwdriver, Onboard Storage, Rare-Earth Magnet, Ideal for Terminal Blocks
- ALL-IN-ONE SOLUTION: 27-IN-1 DRIVER TACKLES DIVERSE TASKS WITH EASE!
- EASY STORAGE: CONVENIENT IN-HANDLE STORAGE, NO BULKY CASES NEEDED!
- ENHANCED CONTROL: PREMIUM SPIN CAP FOR PRECISE FASTENING AND COMFORT!
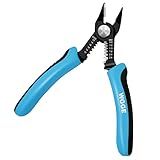
WGGE Wire Cutters Precision Flush Pliers with Supplementary Stripping, Cutting Pliers, Handy and Slim Diagonal Cutters, Ultra Sharp Wire Cutter, 10-20AWG wire stripper (6 inch)
- ERGONOMIC, NON-SLIP HANDLE REDUCES FATIGUE FOR ALL-DAY USE.
- VERSATILE CUTTER HANDLES 10-20 AWG WIRES AND CABLES EFFORTLESSLY.
- SPRING-LOADED DESIGN ENABLES EASY ONE-HANDED OPERATION IN TIGHT SPACES.

Klein Tools 32581 4-in-1 Electronics Screwdriver Set with 2 Slotted, 2 Phillips Precision Machined Bits, Ideal for Terminal Blocks
-
VERSATILE 4-IN-1 DESIGN: TACKLES VARIOUS ELECTRONIC TASKS EFFORTLESSLY.
-
PREMIUM COMFORT CONTROL: FREE-SPINNING CAP ENSURES PRECISION AND EASE.
-
DURABLE & LIGHTWEIGHT: CORROSION-RESISTANT BUILD WITH EASY HANDLING.
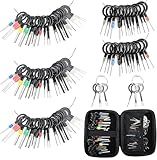
Terminal Pin Removal Tool Kit 82 Pcs Depinning Electrical Connector Pin Extractor Tool Set Wire Terminal Release for Automotive Car Household Devices - Black
-
COMPLETE KIT: 82-PIECE SET WITH TOOLS FOR ALL TERMINAL TYPES AND SIZES.
-
DURABLE & SAFE: HIGH-QUALITY STAINLESS STEEL TOOLS IN A PROTECTIVE CASE.
-
USER-FRIENDLY: EFFORTLESSLY REMOVE PINS WITHOUT DAMAGING CONNECTORS.
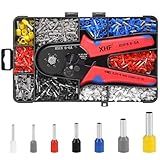
XHF 1700 PCS Ferrule Crimping Tool Kit with Hexagonal Ferrule Crimper Insulated Wire End Ferrules Terminals
- ACHIEVE PERFECT CRIMPING WITH SIX SERRATED SURFACES FOR TIGHT CONNECTIONS.
- INCLUDES 1700PCS FERRULES IN 7 SIZES FOR VERSATILE APPLICATIONS.
- QUALITY COPPER TERMINALS ENSURE SUPERIOR CONDUCTIVITY AND COMPLIANCE.
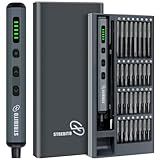
STREBITO Mini Electric Screwdriver Set, 70 in 1 Small Electric Screwdriver - 64 S2 Preicison Bits, 5 Torque Settings, 4 LED Lights, Mini Power Screwdriver Repair Tool Kit for PC Electronic (Standard)
-
VERSATILE TORQUE OPTIONS: 5 TORQUE SETTINGS FOR PRECISE CONTROL OVER VARIOUS TASKS.
-
FAST CHARGING & POWER: 350MAH BATTERY TIGHTENS 500 SCREWS IN 1 HOUR.
-
COMPLETE TOOLSET: INCLUDES 64 BITS, MAGNETIC MAT, AND LIFETIME WARRANTY.
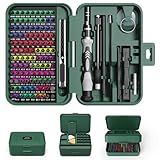
YOYSUN Mini Precision Screwdriver Set with Color-coded Identification, 132 in 1 Micro Magnetic Repair Tool Kits with Storage Box, 108 Bits,Small Manual Screw Driver Toolkits for iPhone/Mac/iPad/Table
-
INTEGRATED MAGNETIZER: SECURE TINY SCREWS AND PREVENT LOSS EFFORTLESSLY.
-
LARGE STORAGE BOX: 18 GRIDS FOR EASY ORGANIZATION OF SMALL PARTS.
-
COLOR-CODED BITS: QUICKLY FIND THE RIGHT SCREWDRIVER WITH EASE.
To send a mouse click in PowerShell, you can use the built-in SendInput function from the user32.dll library. This function allows you to simulate mouse clicks by sending input events directly to the system. You will need to create a couple of structures to define the input events, such as the MOUSEINPUT structure for mouse input.
First, import the necessary functions from the user32.dll library using the Add-Type cmdlet. Then, create the MOUSEINPUT structure to define the parameters of the mouse click event, such as the x and y coordinates of the click, the type of mouse event, and the flags associated with the event. Finally, use the SendInput function to send the mouse input event to the system, which will simulate a mouse click at the specified coordinates on the screen.
Keep in mind that sending mouse clicks programmatically in PowerShell may not be the most reliable or user-friendly way to interact with applications. It is recommended to use other automation tools or frameworks, such as AutoIt or Selenium, for more robust and versatile automation tasks involving mouse clicks.
How to create a mouse click function in Powershell?
You can create a mouse click function in Powershell using the following steps:
- Import the necessary .NET assemblies:
Add-Type -AssemblyName System.Windows.Forms
- Create a function that simulates a mouse click at a specified position on the screen:
function Click-Mouse { param( [int]$X, [int]$Y )
$mouseEvent = \[System.Windows.Forms.MouseEventArgs\]::New(\[System.Windows.Forms.MouseButtons\]::Left, 1, $X, $Y, 0)
\[System.Windows.Forms.Control\]::DoMouseClick($mouseEvent)
}
- Call the function with the desired X and Y coordinates to perform a mouse click at that position:
Click-Mouse -X 100 -Y 100
- You can also use the following function to move the mouse cursor to a specific position before clicking:
function Move-Mouse { param( [int]$X, [int]$Y )
\[System.Windows.Forms.Cursor\]::Position = New-Object System.Drawing.Point($X, $Y)
}
- Use the Move-Mouse function to move the mouse cursor to the desired position before calling the Click-Mouse function:
Move-Mouse -X 100 -Y 100 Click-Mouse -X 100 -Y 100
By following these steps, you can create a mouse click function in Powershell that simulates a mouse click at a specified position on the screen.
How to execute a mouse click command in Powershell?
To execute a mouse click command in Powershell, you can use the Add-Type cmdlet to add a definition for the mouse_event function from the User32.dll library. Here's an example code snippet that demonstrates how to do this:
Add-Type @" using System; using System.Runtime.InteropServices;
public class Mouse
{
    \[DllImport("user32.dll", CharSet = CharSet.Auto, CallingConvention = CallingConvention.StdCall)\]
    public static extern void mouse\_event(uint dwFlags, uint dx, uint dy, uint cButtons, uint dwExtraInfo);

    public const uint MOUSEEVENTF\_LEFTDOWN = 0x0002;
    public const uint MOUSEEVENTF\_LEFTUP = 0x0004;
}
"@
Define the coordinates where you want to click (e.g. 100, 100)
$x = 100 $y = 100
Perform a mouse left click at the specified coordinates
[Mouse]::mouse_event([Mouse]::MOUSEEVENTF_LEFTDOWN, $x, $y, 0, 0) Start-Sleep -Milliseconds 100 [Mouse]::mouse_event([Mouse]::MOUSEEVENTF_LEFTUP, $x, $y, 0, 0)
In the above code snippet, we first use Add-Type to define the Mouse class with the mouse_event function for simulating mouse clicks. We then specify the coordinates where we want to click and use the MOUSEEVENTF_LEFTDOWN and MOUSEEVENTF_LEFTUP flags to simulate a left mouse button click at those coordinates. Make sure to adjust the coordinates and timing as needed for your specific use case.
What is the function of the SendMessage method in sending mouse clicks in Powershell?
The SendMessage method in PowerShell is used to send a specific message to a window or control in order to perform a specific action. When sending mouse clicks, the SendMessage method can be used to simulate a mouse click event on a specific window or control by sending the appropriate message to trigger the desired action. This can be useful for automating tasks that require interacting with GUI elements in applications.
How to send a left mouse click in Powershell?
To send a left mouse click in PowerShell, you can use the .NET framework's SendInput function. Here is an example code snippet to send a left mouse click using PowerShell:
Add-Type -TypeDefinition @" using System; using System.Runtime.InteropServices;
public class MouseInput {
    \[Flags\]
    public enum MouseEventFlags : uint {
        LEFTDOWN = 0x0002,
        LEFTUP = 0x0004,
        ABSOLUTE = 0x8000
    }

    \[StructLayout(LayoutKind.Sequential)\]
    public struct INPUT {
        public uint type;
        public MOUSEINPUT mi;
    }

    \[StructLayout(LayoutKind.Sequential)\]
    public struct MOUSEINPUT {
        public int dx;
        public int dy;
        public uint mouseData;
        public MouseEventFlags dwFlags;
        public uint time;
        public UIntPtr dwExtraInfo;
    }

    \[DllImport("user32.dll", SetLastError = true)\]
    public static extern uint SendInput(uint nInputs, INPUT\[\] pInputs, int cbSize);
}
"@
$mouseEvent = [MouseInput.MouseEventFlags]::LEFTDOWN -bor [MouseInput.MouseEventFlags]::LEFTUP $input = New-Object MouseInput.INPUT $input.type = 0 $input.mi.dwFlags = $mouseEvent
$inputs = New-Object MouseInput.INPUT[] 1 $inputs[0] = $input
[MouseInput]::SendInput(1, $inputs, [System.Runtime.InteropServices.Marshal]::SizeOf($inputs[0]))
You can run this code in PowerShell to simulate a left mouse click. Make sure to run PowerShell with administrative privileges to be able to send input events to the system. Note that this code will only work on Windows operating systems.