
Best Cooling Accessories to Buy in July 2026
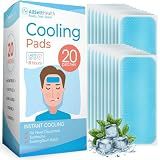
Cooling Patches for Fever, Natural Headache and Migraine Relief, (20 Pack) Soft Gel Sheets, Fever Patch for Kids, Tension/Sinus, Headache Relief Prevention
- INSTANT COOLING RELIEF FOR HEADACHES, MIGRAINES, AND MORE!
- SAFE, DRUG-FREE RELIEF; USE WITH ANY MEDICATION & WORRY-FREE.
- LONG-LASTING CHILL EFFECT UP TO 8 HOURS FOR ULTIMATE COMFORT.


20 Sheets Cooling Patches for Fever Discomfort & Pain Relief, Cooling Relief Fever Reducer, Soothe Headache Pain, Pack of 20 Blue
-
NATURAL HYDROGEL DESIGN: SOOTHES HEADACHES, FEVERS, AND ACHES EFFECTIVELY.
-
INSTANT COOLING RELIEF: GENTLE, SKIN-FRIENDLY PATCHES FOR IMMEDIATE COMFORT.
-
VERSATILE USE: SAFE FOR ALL AGES; FITS ANY FIRST AID KIT FOR CONVENIENCE.
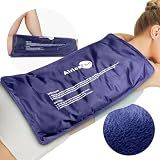
AiricePac Extra Large Gel Flexible Back Ice Packs for Injuries Reusable, 11”x 20” Cold Pack Wrap for Knee Leg Neck Shoulder Hip Back Pain Relief, Cold Compress Therapy for Swelling, Bruises, Surgery
- INSTANT RELIEF WITH PLUSH COVER PREVENTS WATER DRIPPING AND ENHANCES COMFORT.
- ULTRA-FLEXIBLE DESIGN CONFORMS TO BODY FOR EFFECTIVE PAIN RELIEF ANYWHERE.
- DURABLE, LEAK-PROOF CONSTRUCTION ENSURES RELIABLE USE FOR ALL INJURY TYPES.
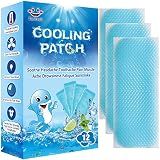
EASYEAH 12 Sheets Cooling Patches for Fever Discomfort & Pain Relief, Cooling Relief Fever Reducer, Soothe Headache Pain, Pack of 12
- INSTANT COOLING RELIEF FOR FEVER, HEADACHES, AND MUSCLE ACHES.
- SKIN-FRIENDLY, MESS-FREE HYDROGEL PATCHES STAY SECURELY IN PLACE.
- VERSATILE USE FOR ALL AGES; PERFECT FOR FIRST AID KITS ANYWHERE.
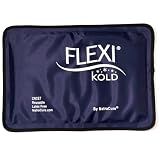
FlexiKold Gel Soft Flexible Ice Packs for Injuries - Reusable Freezer Cold Pack, Cold Compress & Cooling Gel Pad for Face, Shoulder, Hip, Leg, Arm, Ankle & Foot Injury - Medium - 7.5” x 11”
-
STAY COLDER LONGER: PROPRIETARY GEL ENSURES EXTENDED COOLING RELIEF.
-
FLEXIBLE DESIGN: REMAINS PLIABLE WHEN FROZEN, PERFECT FOR ANY INJURY.
-
TRUSTED BY PROS: USED BY THERAPISTS FOR EFFECTIVE PAIN AND SWELLING RELIEF.
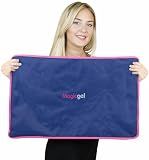
Extra Large & Reusable Ice Pack (15 x 23.5 inches, XL) for Maximum Back and Full Body Pain Relief from Injuries, Swelling, Bruises, Sprains | Ice Blanket for Sleeping & Physical Therapy | By Magic Gel
- TRUSTED BY PROS: DURABLE, LEAK-PROOF, AND LASTS UP TO TWO YEARS.
- PATENTED CLAY DESIGN: STAYS FLEXIBLE AND COLDER FOR LONGER THERAPY.
- VERSATILE RELIEF: USE FOR ACHES, PAINS, CRAMPS, AND POST-SURGERY CARE.
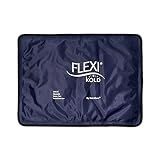
FlexiKold Gel Ice Packs (Standard Large: 10.5" x 14.5") for Injuries Reusable, Back Pain Relief, Knee Wrap, After Surgery, Ice Pack for Knee, Shoulder - 6300-COLD by NatraCure
- STAY COLDER LONGER: PROPRIETARY GEL KEEPS ICE PACKS EFFECTIVE!
- ULTIMATE FLEXIBILITY: PLIABLE GEL ADAPTS TO ANY BODY PART!
- PRO-APPROVED RELIEF: TRUSTED BY THERAPISTS FOR PAIN AND RECOVERY!
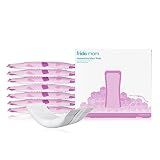
Frida Mom 2-in-1 Postpartum Pads, Absorbent Perineal Ice Maxi Pads, Instant Cold Therapy Packs and Maternity Pad in One
- INSTANT COLD RELIEF ANYWHERE: NO FREEZER NEEDED FOR QUICK THERAPY.
- SUPERIOR ABSORPTION: SOAKS UP 260G FOR POSTPARTUM COMFORT AND CARE.
- FULL COVERAGE SUPPORT: ADHESIVE BACKING ENSURES EASY, SECURE PLACEMENT.
One of the common issues faced by gaming laptop users is overheating. When a gaming laptop overheats, it can lead to performance issues, system crashes, and even long-term damage to the internal components. Fortunately, there are several steps you can take to prevent your gaming laptop from overheating.
- Clean the vents and fans: Dust and debris can accumulate on the laptop's vents and fans, obstructing airflow and causing the system to overheat. Regularly clean these areas using a soft brush or canned air to ensure proper ventilation.
- Elevate the laptop: Using a laptop cooling pad or an elevated stand can help improve airflow underneath your laptop. This helps dissipate heat more effectively and keeps the system cooler.
- Adjust power settings: Customize your power settings to ensure that your laptop is using power efficiently. Reducing the maximum processor state and adjusting cooling policy in the power options can help control heat generation.
- Avoid blocking the vents: Ensure that you are not blocking the laptop's vents while using it. Placing the laptop on soft surfaces like beds or couches can obstruct the vents and hamper airflow, leading to overheating.
- Use power-saving mode: When gaming, it can be helpful to switch to power-saving mode. This can reduce the strain on the system, lowering the temperature and preventing excessive heat buildup.
- Limit background processes: Close unnecessary applications and processes running in the background while gaming. This reduces the overall workload on your laptop's hardware, minimizing heat generation.
- Update drivers and firmware: Keeping your laptop's drivers and firmware up to date can improve performance and stability, reducing the chances of overheating caused by software-related issues.
- Consider thermal paste replacement: Over time, the thermal paste between the CPU/GPU and heat sink can deteriorate, leading to poor heat transfer. If you are comfortable doing so, you can replace the thermal paste to ensure better cooling.
- Optimize game settings: Lowering the graphics settings in-game can reduce the strain on your laptop's hardware, leading to less heat generation. Adjusting frame rates and enabling VSync can also help manage heat output.
- Take breaks during intensive gaming sessions: Gaming for long periods without breaks can strain your laptop's hardware. Take intermittent breaks to let your laptop cool down and prevent excessive heat buildup.
By implementing these measures, you can significantly reduce the chances of your gaming laptop overheating, ensuring optimal performance and prolonging its lifespan.
How to replace the thermal paste in a gaming laptop?
Replacing thermal paste in a gaming laptop is a relatively simple process, but it requires a bit of caution and carefulness. Here's a step-by-step guide to help you do it:
- Prepare your workspace: Find a clean, well-lit, and flat surface to work on. Make sure you have all the necessary tools for the job, such as a screwdriver (usually a Phillips or Torx head), lint-free cleaning cloth, isopropyl alcohol (95% or higher purity), and new thermal paste. Also, ensure you have sufficient space to keep all the screws organized during disassembly.
- Power off and unplug your laptop: Shutdown your laptop properly and disconnect it from any power sources, including the charging cable and battery.
- Remove the bottom panel: Start by removing the screws on the bottom panel of your laptop. These screws may be marked with a small keyboard or fan icon. Keep track of each screw so you can put them back in the right place later. Gently pry open the bottom panel using a plastic pry tool or your fingers, being careful not to damage any cables or other components.
- Locate the cooling system: Once the bottom panel is off, find the cooling system. It is usually a copper or aluminum heatsink with a fan attached to it.
- Disconnect the fan: Carefully detach the fan cables from the motherboard, ensuring you remember how they were initially connected. Take note of the connectors and their positions to avoid any confusion during reassembly.
- Remove the heatsink: Unscrew the screws holding the heatsink in place. It may have several screws securing it to the motherboard. Once the screws are removed, gently lift the heatsink away from the processor and graphic card. Be cautious not to damage any surrounding components.
- Clean the old thermal paste: Use a lint-free cleaning cloth and isopropyl alcohol to thoroughly clean the old thermal paste from both the heatsink and the processor (and graphic card if applicable). Ensure that there is no residue left as it may negatively affect the cooling efficiency.
- Apply new thermal paste: Apply a small pea-sized amount of the new thermal paste in the center of the processor. Spread it out evenly with a plastic card or clean finger, avoiding over-application. The thermal paste helps maximize heat transfer between the processor and heatsink.
- Reassemble: Once the new thermal paste is applied, carefully place the heatsink back onto the processor and firmly screw it back in place. Reconnect the fan cables to the motherboard. Make sure all connections are secure and that nothing is being pinched or obstructed.
- Put back the bottom panel: Align the bottom panel correctly and reattach all the screws according to their original locations. Ensure each screw is tightened securely but be cautious not to overtighten and potentially damage the threads or the laptop's components.
- Test your laptop: Plug in your laptop and power it on. Monitor the temperature levels in a software such as HWMonitor or MSI Afterburner to ensure it is operating within normal ranges. If the temperatures have significantly improved, you have successfully replaced the thermal paste in your gaming laptop.
It's worth noting that this process may vary slightly depending on the specific laptop model, so it's always a good idea to consult the laptop's manual or lookup specific disassembly guides for your machine to ensure you follow the correct steps.
How to monitor the temperature of a gaming laptop?
Monitoring the temperature of a gaming laptop is essential in order to prevent overheating and potential damage to the device. Here are some ways to monitor the temperature:
- Use manufacturer-provided software: Many laptop manufacturers provide their own utility software for monitoring temperatures. These software programs often have specific features to monitor and control the laptop's temperature.
- Third-party monitoring software: There are various applications available on the internet that can be installed to monitor the temperature of your laptop. Some popular options include HWMonitor, SpeedFan, and Core Temp.
- Check BIOS settings: Some gaming laptops have options in the BIOS settings to monitor temperatures. You can access BIOS by restarting your laptop and pressing a specific key (usually Del, F2, or F12) during the boot process. Look for temperature-related options within the BIOS.
- Use cooling pads or laptop cooling stands: These external accessories can help cool down your laptop during intense gaming sessions, reducing the overall temperature stress on your device.
- Keep an eye on fan speed: Pay attention to the audio cues from your laptop fans. If they are constantly running at high speeds, it could be an indicator of higher temperature. Similarly, if they are unusually quiet, it might be a sign of a cooling issue.
- Physical touch: Though less accurate, you can also physically touch the exhaust vents or the area around the keyboard to feel if the laptop is excessively hot. If it feels uncomfortably hot, then it's advisable to take preventive measures.
Remember to clean the laptop's vents and fans regularly and avoid using the laptop on soft surfaces that could block airflow. Additionally, maintaining a clean and dust-free environment for your laptop can help prevent excessive heat buildup.
What are the best cooling pads for a gaming laptop?
There are several cooling pads available in the market that are highly recommended for gaming laptops. Some of the best options include:
- Cooler Master NotePal X3 – It features a large 200mm fan with blue LED lights for enhanced cooling and a mesh surface for optimal airflow.
- Thermaltake Massive 20 RGB – This cooling pad has a massive 200mm fan and 3 built-in RGB LED lights for a stylish look. It also provides excellent cooling performance.
- Havit HV-F2056 – It is a budget-friendly option with three 110mm fans and a metal mesh surface. The cooling pad offers decent cooling performance and is compatible with various laptop sizes.
- Kootek Cooler Pad Chill Mat 5 – This cooling pad comes with five built-in fans, with four of them being adjustable. It also has two USB ports and a small LCD screen to monitor fan speed and temperature.
- Targus Lap Chill Mat – It offers a unique ergonomic design with two fans and a soft neoprene exterior. It is highly portable and suitable for gaming on your lap.
These cooling pads provide effective heat dissipation and are specifically designed for gaming laptops to prevent thermal throttling and improve overall performance during extended gameplay sessions.
How to prevent temperature spikes in a gaming laptop?
To prevent temperature spikes in a gaming laptop, you can follow these tips:
- Keep the laptop on a hard and flat surface: Placing the laptop on a hard and flat surface allows for better airflow and prevents the accumulation of heat.
- Use a cooling pad: Invest in a cooling pad specifically designed for laptops. These pads have built-in fans that effectively cool the laptop, preventing temperature spikes.
- Clean the vents and fans regularly: Over time, dust and debris can accumulate in the laptop's vents and fans, hindering proper airflow and causing temperature spikes. Clean them regularly using compressed air or a soft brush.
- Avoid blocking the vents: Make sure the vents are not blocked while using the laptop. Avoid placing it on surfaces like beds or sofas that can block the vents and restrict airflow.
- Optimize power settings: Adjust the power settings of the laptop to a more balanced mode rather than a high-performance mode. This can help reduce excessive heat generation.
- Limit background applications: Close unnecessary applications and programs running in the background. This reduces the workload on the laptop's components, resulting in lower heat generation.
- Update drivers and firmware: Regularly update the laptop's drivers and firmware. These updates often include optimizations and bug fixes that can improve performance and reduce excessive heat.
- Manage graphics settings: Lower the graphics settings in games or use a frame rate limiter to reduce the workload on the GPU. This can help prevent overheating during intense gaming sessions.
- Monitor temperature: Install temperature monitoring software and keep an eye on the laptop's temperature. If you notice frequent temperature spikes, consider taking additional steps like undervolting or adjusting fan curves (if supported) to control heat more effectively.
- Avoid direct sunlight and high ambient temperatures: Exposure to direct sunlight or high ambient temperatures can worsen heat-related issues. Keep your laptop in a cool and shaded environment.
Implementing these measures can help prevent temperature spikes in your gaming laptop, ensuring optimal performance and longevity of the machine.
How to optimize power settings on a gaming laptop to reduce heat.
Optimizing power settings on a gaming laptop can help in reducing heat generated by the system. Here are some steps to follow:
- Adjust the Power Plan: Press Win + X, and select "Power Options" from the menu. Choose a power plan like "Power Saver" or "Balanced" instead of "High Performance." Click on "Change plan settings" for the selected power plan. Set the "Dim the display" and "Turn off the display" options to lower values. Expand the "Processor power management" section and set the "Maximum processor state" to a lower value, such as 80-90%. Save the changes.
- Control Graphics Settings: Right-click on the desktop and select "NVIDIA Control Panel" or "AMD Radeon Settings" based on your GPU. Go to the "Manage 3D settings" or similar tab. Set the "Power management mode" to "Power saver." Adjust the "Texture filtering - Quality" to a lower value like "Performance" or "High performance mode." Save the changes.
- Limit Background Processes: Open the Task Manager by pressing Ctrl + Shift + Esc or right-clicking on the taskbar and selecting "Task Manager." Go to the "Startup" tab and disable unnecessary programs from starting up with Windows. Switch to the "Processes" tab and identify resource-intensive programs or processes. Right-click on them and select "End Task" to close them (if not required).
- Clean Cooling System: Ensure your laptop's cooling system (fans and vents) are clean and free from dust. Use compressed air or a small vacuum cleaner (specifically designed for electronics) to clean the vents gently. Do this regularly to maintain good airflow and prevent the laptop from overheating.
- Use Cooling Accessories: Invest in a laptop cooling pad or stand, preferably with additional fans, to enhance airflow around the system. These cooling accessories help in dissipating heat, resulting in lower temperatures.
Note: While optimizing power settings can help reduce heat, it may also impact gaming performance. Balancing power and performance is essential, and you may need to tweak the settings based on your specific requirements.
What is undervolting and how can it help with laptop overheating?
Undervolting is the process of reducing the voltage supplied to the CPU (Central Processing Unit) of a device. It is typically done through software tools that allow users to adjust the voltage settings.
Undervolting can help with laptop overheating in multiple ways:
- Reduced Power Consumption: By lowering the voltage supplied to the CPU, the laptop consumes less power. This results in lower heat generation, as more power generally equates to more heat.
- Lower Temperature: The CPU generates heat when it operates, and reducing its voltage helps in reducing the temperature it reaches during intensive tasks. This helps in preventing overheating and potential thermal throttling.
- Longer Battery Life: Undervolting can also result in improved battery life as less power is consumed by the CPU. This can be beneficial for users who rely on their laptops for extended periods of time without access to a power source.
It's important to note that undervolting requires careful monitoring and adjustment, as setting the voltage too low can cause instability and crashes. Some CPUs and laptops may not support undervolting, so it is recommended to check the manufacturer guidelines or consult with experts before attempting it.