
Best Tools for File Management with Delphi 7 to Buy in July 2026
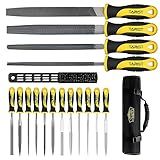
TARIST 17PCS File Set with Tool Bag, Includes 4PCS Large Metal File, 12PCS Needle File and Wire Brush,Work for Metal, Wood and More
- DURABLE T12 CARBON STEEL FOR LONG-LASTING PERFORMANCE
- VERSATILE USE ON METAL, WOOD, PLASTICS, AND MORE
- RESPONSIVE AFTER-SALES SUPPORT WITHIN 24 HOURS GUARANTEED


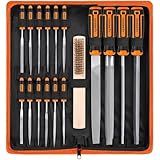
REXBETI 25Pcs Metal File Set, Premium Grade T12 Drop Forged Alloy Steel, Flat/Triangle/Half-round/Round Large File and 12pcs Needle Files with Carry Case, 6pcs Sandpaper, Brush, A Pair Working Gloves
- DURABLE T12 ALLOY STEEL ENSURES LONG-LASTING CUTTING PERFORMANCE.
- COMPLETE 25-PIECE SET FOR VERSATILE WOODWORKING AND PRECISION TASKS.
- ERGONOMIC RUBBER HANDLE OFFERS COMFORT FOR EXTENDED USE.
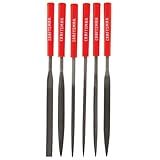
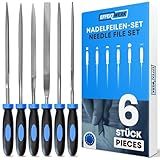
CRAFTSMAN Needle File Set, 6 Piece (CMHT82529)
- PRECISION NEEDLE FILES FOR DETAILED, ACCURATE WORK.
- COMFORTABLE SURE-GRIP RUBBER HANDLES FOR EASY USE.
- SMOOTH PATTERN FOR EFFICIENT LIGHT MATERIAL REMOVAL.
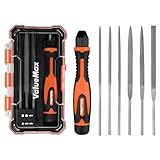
ValueMax 7PCS Interchangeable Needle File Set, Small File Set Includes Flat, Flat Warding, Round, Half-Round, Square, Triangular File and A Handle, Suitable for Shaping Metal, Wood, Jewelry, Plastic
- COMPLETE VERSATILE SET: INCLUDES 6 FILE TYPES FOR ALL YOUR PROJECT NEEDS.
- PORTABLE & ORGANIZED: LIGHTWEIGHT CASE KEEPS FILES SAFE AND ACCESSIBLE.
- ERGONOMIC GRIP: COMFORTABLE HANDLES ENHANCE EFFICIENCY AND CONTROL.
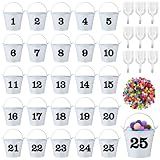
JellyArch Classroom Management Tools Reward for Kids Bucket Filler Activities for Class Have You Filled a Bucket Today Companion Activity for Preschool Elementary Classroom Must Haves. (White)
- ENGAGE KIDS WITH FUN REWARDS AND FOSTER POSITIVE BEHAVIOR DAILY!
- DURABLE METAL BUCKETS & SELF-ADHESIVE LABELS FOR EASY ORGANIZATION.
- VERSATILE FOR CHORES, LEARNING TASKS, AND DEVELOPING GOOD HABITS!

JellyArch Classroom Management Tools Reward for Kids Bucket Filler Activities for Class Have You Filled a Bucket Today Companion Activity for Preschool Elementary Classroom Must Haves.(Colourful)
- BOOST ENGAGEMENT: ENCOURAGE KIDS TO PARTICIPATE AND LEARN JOYFULLY.
- DURABLE DESIGN: TOUGH MATERIALS ENSURE LONG-LASTING CLASSROOM USE.
- VERSATILE FUNCTION: IDEAL FOR CHORES, ACTIVITIES, AND POSITIVE REINFORCEMENT.
E•Werk - 6-pc Needle File Set for Wood, Metal, Plastic & Jewelry - Small Round, Half-Round, Square, Triangle, Flat & Flat Pointed Files - Handy Tools for Fine Finishing w/Ergonomic Handles
-
VERSATILE USE: PERFECT FOR METAL, WOOD, GLASS, AND TIGHT SPACES.
-
COMPREHENSIVE SET: SIX MINI FILES FOR PRECISE FINISHING ON ALL PROJECTS.
-
ERGONOMIC DESIGN: SECURE GRIP ENHANCES CONTROL AND WORK EFFICIENCY.

17Pcs File Tool Set with Carry Case,Premium Grade T12 Drop Forged Alloy Steel, Precision Flat/Triangle/Half-round/Round Large File and 12pcs Needle Files/1 brush
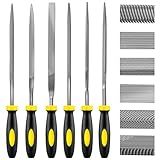
kapoua 6-Piece Metal Needle File Set - Hardened Alloy Steel Includes Flat, Warding, Square, Triangular, Round, and Half-Round Files
- HIGH-PERFORMANCE CARBON STEEL: DURABLE, HARD-WEARING TOOLS FOR LASTING USE.
- VERSATILE FILE SHAPES: SIX DESIGNS CATER TO ALL YOUR DETAILED PROJECTS.
- ERGONOMIC GRIP: COMFORT AND CONTROL ENHANCE SPEED AND EFFICIENCY.

TOOLAN: 8-In-1 Needle File & Saw Set With Storage box, 6 pcs Small Diamond Files, for Metal, Jewlers, Wood, Leather and Plastic, Ergonomic Designed Handle With Quick Change Mechanism
-
VERSATILE 8-IN-1 DESIGN MEETS DIVERSE CUTTING NEEDS EFFORTLESSLY.
-
ERGONOMIC HANDLE REDUCES HAND FATIGUE FOR PROLONGED USE COMFORT.
-
HIGH-QUALITY, DURABLE HSS BLADES ENSURE LONGEVITY AND EFFICIENCY.
To upload files to Dropbox via Delphi 7, you will need to use the Dropbox API and make appropriate HTTP requests. Here is a general outline of the steps involved:
- Create a Dropbox account if you don't already have one.
- Set up a new Dropbox app in the Dropbox Developer Console.
- Obtain an access token for your app. This will be needed to authenticate your requests.
- In your Delphi 7 project, include the necessary HTTP components, such as TIdHTTP, TIdSSLIOHandlerSocketOpenSSL, and TIdMultipartFormDataStream from the Indy library.
- Import the Dropbox API into your project or manually make HTTP requests to the Dropbox API endpoints.
- Use the appropriate endpoint to initiate the file upload process. This usually involves making a POST request to the "/upload" endpoint with the file's content and metadata.
- Set the necessary request headers, including the "Authorization" header with your access token.
- Read the file you want to upload into a TFileStream or another appropriate stream class.
- Create a TIdMultipartFormDataStream object and add the file stream to it using the AddFile method. You may also need to include any additional metadata, like the file name or path.
- Execute the HTTP request by calling the Post method of the TIdHTTP component. Pass the Dropbox API endpoint URL and the TIdMultipartFormDataStream object as parameters.
- Handle the response from the Dropbox API to check if the file upload was successful. You can examine the response code or body to obtain relevant information.
Please note that the Dropbox API may have evolved since Delphi 7 was released, so you may need to adapt the code or explore alternative libraries or components. It's recommended to consult the official Dropbox API documentation and resources specific to Delphi or Indy for more detailed guidance and up-to-date information.
How to encrypt files before uploading to Dropbox in Delphi 7?
To encrypt files before uploading them to Dropbox in Delphi 7, you can make use of the encryption library called LockBox. Follow the below steps to achieve this:
- Download and install LockBox from the official website: http://lockbox.seanbdurkin.id.au/.
- Open your Delphi 7 IDE and create a new project.
- Add the LockBox components to the project by selecting "Component > Import Component" from the Delphi main menu.
- In the "Import Component" dialog, select the "Into existing package" option and click the "Browse" button.
- Browse to the location where you installed LockBox and select the "Delphi7.dpk" file. Click "Open".
- In the "Import Component" dialog, you should see the LockBox components listed. Select the desired components (e.g., TCodec, TCodecCipherSet, etc.) and click "Install".
- Once the components are installed, you can find them in the "LockBox" tab of the "Component Palette".
- Place a TCodec component on your form.
- Set the TCodec properties as per your encryption requirements. For example, set the Cipher to "DES" and the CryptoMode to "cmCipher".
- Write code to handle the encryption and upload process. Here's an example of encrypting a file:
procedure EncryptFile(const SourceFile, DestFile: string; Codec: TCodec); var FileIn, FileOut: TFileStream; begin FileIn := TFileStream.Create(SourceFile, fmOpenRead); try FileOut := TFileStream.Create(DestFile, fmCreate); try Codec.EncryptFile(FileIn, FileOut); finally FileOut.Free; end; finally FileIn.Free; end; end;
- To upload the encrypted file to Dropbox, you can make use of the Dropbox API (specifically, the files/upload endpoint). You will need to obtain an Access Token from the Dropbox Developer Console. Refer to the Dropbox API documentation for more details on authentication and uploading files.
Note: Make sure to handle any exceptions during the encryption and uploading process.
Once you have encrypted the file using LockBox and uploaded it to Dropbox using the API, only users with the appropriate encryption keys will be able to decrypt and access the file.
How to create a new folder in Dropbox via Delphi 7?
To create a new folder in Dropbox using Delphi 7, you can use the Dropbox API v2 to make a HTTP request to the Dropbox API. Here's an example code snippet on how to create a folder in Dropbox using Delphi 7:
uses IdHTTP, IdSSL, IdSSLOpenSSL, IdURI, IdComponent, IdHeaderList;
function CreateDropboxFolder(const accessToken, folderName: string): Boolean; var DropboxApiUrl: string; HTTPClient: TIdHTTP; Params: TStringList; RequestHeaders: TIdHeaderList; Response: string; begin Result := False;
DropboxApiUrl := 'https://api.dropboxapi.com/2/files/create_folder_v2';
HTTPClient := TIdHTTP.Create(nil); Params := TStringList.Create; RequestHeaders := TIdHeaderList.Create;
try HTTPClient.IOHandler := TIdSSLIOHandlerSocketOpenSSL.Create(HTTPClient);
Params.Add('path=' + TIdURI.ParamsEncode('/' + folderName));
Params.Add('autorename=false');

RequestHeaders.Add('Authorization: Bearer ' + accessToken);
RequestHeaders.Add('Content-Type: application/json');

HTTPClient.Request.CustomHeaders := RequestHeaders;

Response := HTTPClient.Post(DropboxApiUrl, Params);

Result := (HTTPClient.ResponseCode = 200);
except // Error handling end;
HTTPClient.Free; Params.Free; RequestHeaders.Free; end;
To use the above function, you need to provide your [access](https://wpcrux.com/blog/how-to-access-the-google-merchandise-store)Token, which you can generate by creating a Dropbox API app in your Dropbox account. Replace {access_token} in the code with your actual access token.
Example usage:
var DropboxAccessToken: string; FolderName: string; begin // Set your Dropbox access token DropboxAccessToken := '{access_token}';
// Set the name of the folder to create FolderName := 'New Folder Name';
// Create the folder in Dropbox if CreateDropboxFolder(DropboxAccessToken, FolderName) then begin ShowMessage('Folder created successfully'); end else begin ShowMessage('Failed to create folder'); end; end;
Make sure you have the necessary HTTP components installed in Delphi 7, like Indy components.
What is the metadata of a file in Dropbox?
The metadata of a file in Dropbox includes information about the file itself, such as its name, size, modification date, and file type. It may also include additional attributes like permissions, whether the file is shared, its location within a folder, and any tags or labels associated with it. This metadata helps organize and manage files within Dropbox and allows for easier searching and sorting of files.
How to handle errors during file upload to Dropbox in Delphi 7?
To handle errors during file upload to Dropbox in Delphi 7, you can use the Dropbox REST API and handle the HTTP status codes returned by the API. Here is a general guideline on how to handle errors during file upload to Dropbox in Delphi 7:
- Install Indy components in Delphi 7 if you haven't already done so.
- Create a new Delphi 7 project and add the following units to the Uses clause: IdHTTP, IdMultipartFormData, IdAuthentication
- Create a function to handle the file upload process. This function should take the file path, access token, and destination path as parameters. function UploadFileToDropbox(const FilePath, AccessToken, DestinationPath: string): Boolean; var IdHTTP: TIdHTTP; IdMultiPartFormDataStream: TIdMultiPartFormDataStream; begin Result := False; try IdHTTP := TIdHTTP.Create(nil); IdMultiPartFormDataStream := TIdMultiPartFormDataStream.Create; try // Set up authentication IdHTTP.Request.CustomHeaders.Add('Authorization: Bearer ' + AccessToken); // Add the file to the multipart form data stream IdMultiPartFormDataStream.AddFile('file', FilePath); // Make the POST request to upload the file IdHTTP.Post('https://content.dropboxapi.com/2/files/upload', IdMultiPartFormDataStream); // Check the response status code if IdHTTP.ResponseCode = 200 then Result := True; except // Handle exception end; finally IdHTTP.Free; IdMultiPartFormDataStream.Free; end; end;
- Call the UploadFileToDropbox function with the appropriate parameters. if UploadFileToDropbox('C:\path\to\file', 'YourAccessToken', '/destination/path') then ShowMessage('File uploaded successfully.') else ShowMessage('Error uploading file.');
In the above example, the function UploadFileToDropbox handles the file upload process using the Indy TIdHTTP component. The function sets up authentication by adding the access token to the request headers. It then adds the file to be uploaded to the TIdMultiPartFormDataStream as a file parameter. Finally, it makes a POST request to upload the file to Dropbox and checks the response status code to determine if the upload was successful.
You can add additional error handling code and customize the function to suit your needs.
How to select a file for uploading to Dropbox in Delphi 7?
To select a file for uploading to Dropbox in Delphi 7, you can use the TOpenDialog component.
- Place a TOpenDialog component on your form (usually located on the "Dialogs" category of the component palette).
- Set the Options property of the TOpenDialog component to include ofFileMustExist and ofPathMustExist so that only existing files and paths can be selected.
- Add a button (TButton) to your form, and in its OnClick event handler, write the following code to open the file dialog and select a file:
procedure TForm1.Button1Click(Sender: TObject); begin if OpenDialog1.Execute then begin // The user has selected a file // Retrieve the selected file using OpenDialog1.FileName // Add your Dropbox upload code here end; end;
- With the selected file, you can perform the upload operation to Dropbox using the Dropbox API or any other relevant library or method.
Note: Be sure to have the necessary Dropbox API credentials and libraries set up in your Delphi project before attempting the upload.
How to install Delphi 7 on Windows?
Here is a step-by-step guide to installing Delphi 7 on Windows:
- Start by inserting the Delphi 7 installation CD into your computer's CD/DVD drive. If you don't have the installation CD, you can download the installer from trusted sources online.
- Run the installer by double-clicking on the setup file. If prompted, grant necessary permissions or confirm running the installer.
- The installation wizard should appear. Click on "Next" to proceed.
- Read and accept the license agreement terms by selecting the checkbox and clicking on "Next."
- Choose the installation directory where you want Delphi 7 to be installed. The default location is usually recommended. Click on "Next."
- Select the components you want to install. By default, all components are selected, but you can uncheck any components you don't want to install. Click on "Next."
- Choose the Start menu folder for Delphi 7 shortcuts. By default, a Delphi 7 folder will be created. You can change this if needed. Click on "Next."
- The installation wizard will now start copying files. Wait for the process to complete.
- Once the installation is finished, you will be presented with the option to register a product. Select "No" and click on "Finish."
- Delphi 7 is now installed on your Windows computer. You can access it from the Start menu or desktop shortcut.
Note: Delphi 7 is an older version, and it may not be officially supported by newer versions of Windows. You may encounter compatibility issues, so it is advisable to consider using newer versions of Delphi if possible.