
Best Tools for Model Visualization to Buy in July 2026
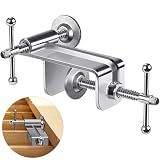
Insaga Enhanced Deck Board Straightening Tool, Portable Lever Deck Board Bending, Adjustable Decking Tools, Board Bender for Straighten and Fasten Boards with Minimal Effort,1Pack
- HEAVY-DUTY STEEL ENSURES DURABILITY AND PREVENTS BENDING.
- ADJUSTABLE UP TO 2.7 FOR VERSATILE USE ON VARIOUS JOISTS.
- EFFORTLESSLY STRAIGHTENS BOARDS-MINIMAL DAMAGE, MAXIMUM EFFICIENCY.


Teenyyou Deck Board Straightening Tool Heavy Duty Carbon Steel Deck Tool for Straightening Bending Boards and Joists, Cushioned Handle for Kneeling to Maintain Pressure(1.77 Inch Wide Hook,Yellow)
- EFFORTLESSLY ALIGNS BOARDS, FREEING HANDS FOR NAILING PRECISION.
- HEAVY-DUTY, RUST-RESISTANT STEEL ENSURES LONG-LASTING DURABILITY.
- CUSHIONED HANDLE OFFERS COMFORT FOR PROLONGED USE AND PRESSURE.
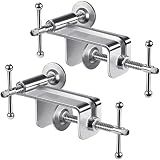
Insaga Enhanced Deck Board Straightening Tool, Portable Lever Deck Board Bending, Adjustable Decking Tools, Board Bender for Straighten and Fasten Boards with Minimal Effort,2Pack
- DURABLE STEEL BUILD: HEAVY-DUTY, REINFORCED FOR LONG-LASTING STRENGTH.
- ADJUSTABLE FOR VERSATILITY: FITS JOISTS UP TO 2.7 WITH SECURE LOCKING.
- USER-FRIENDLY DESIGN: PORTABLE TOOL FOR EASY, EFFICIENT STRAIGHTENING.
Hands-On Machine Learning with Scikit-Learn and TensorFlow: Concepts, Tools, and Techniques to Build Intelligent Systems
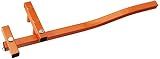
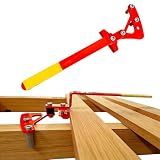
Cepco Tool BW-2 BoWrench Decking Tool , Red
- EFFORTLESSLY STRAIGHTENS DECK BOARDS FOR SMOOTH INSTALLATION.
- DURABLE HEAVY-GAUGE STEEL ENSURES LONG-LASTING PERFORMANCE.
- VERSATILE HANDLE DESIGN EASILY CLOSES GAPS AND JOINS BOARDS.
ZAFortLign Deck Board Straightening & Removal Tool, Steel Decking Board Bender Tool to Straighten Bending Boards & Tighten Gaps, Universal Fit for Wood Decks Tools Orange
-
HEAVY-DUTY DESIGN: BUILT TO LAST WITH RUST-PROOF, STURDY STEEL CONSTRUCTION.
-
VERSATILE USE: PERFECT FOR DECKS, DOCKS, FLOORING, AND MORE PROJECTS.
-
ADJUSTABLE GRIP: FITS VARIOUS SIZES, MAKING STRAIGHTENING EFFORTLESS AND EFFICIENT.
TensorBoard is a powerful visualization tool provided by TensorFlow. It allows you to visualize, analyze, and debug your machine learning models. With TensorBoard, you can track and visualize various aspects of your model's training and evaluation, such as the loss, accuracy, weights, and model architecture.
To use TensorBoard for model visualization, you need to follow these steps:
- Import the necessary libraries: You need to import TensorFlow and any other libraries required for your model.
- Define your model: Create and define your machine learning model using TensorFlow.
- Create a log directory: You need to create a directory where TensorBoard can write its log files. This directory will store the data necessary for visualization.
- Create a summary writer: Instantiate a tf.summary.FileWriter object by specifying the log directory as a parameter.
- Add summary operations to your model: Within your model definition, add TensorFlow summary operations to capture the data you want to visualize. For example, you can add summary operations for loss, accuracy, and other relevant metrics.
- Initialize global variables: Before training your model, you need to initialize all the global variables using tf.global_variables_initializer().
- Run your model: Train your model by executing the training operations. At regular intervals, call the summary writer's add_summary() method to save the summaries to the log directory.
- Launch TensorBoard: Open a terminal, navigate to the log directory, and run the command tensorboard --logdir=./. This starts the TensorBoard server.
- Access TensorBoard: Open your web browser and enter the URL displayed in the terminal when you launched TensorBoard (usually http://localhost:6006/). You will now be able to see and interact with the visualizations of your model.
By following these steps, you can effectively use TensorBoard to visualize your machine learning model, monitor its training progress, and gain insights into its performance.
How to log image data in TensorBoard?
To log image data in TensorBoard, you can follow these steps:
- Import the necessary libraries:
import tensorflow as tf from tensorflow.summary import image
- Create a summary writer to write the logs to a specific directory:
# Replace 'logs/' with your preferred directory summary_writer = tf.summary.create_file_writer('logs/')
- Load or generate the image data you want to log:
image_data = ... # Your image data
- Convert the image data to a tensor format:
# Convert the image data to a tensor image_tensor = tf.convert_to_tensor(image_data)
- Use the image summary to log the image data along with a specified tag:
# Log the image data with summary_writer.as_default(): image('tag_name', image_tensor, step=0)
The tag_name is a unique identifier for the logged data.
- Start the TensorBoard server to view the logs:
tensorboard --logdir logs/
You should now be able to view the logged image data in TensorBoard by accessing the server URL provided.
How to use TensorBoard with TensorFlow 2.x?
To use TensorBoard with TensorFlow 2.x, you need to follow these steps:
- Import the necessary libraries:
import tensorflow as tf from tensorflow.keras.callbacks import TensorBoard
- Create a TensorBoard callback:
tensorboard_callback = TensorBoard(log_dir="path_to_logs_directory")
Make sure to replace 'path_to_logs_directory' with the desired directory where you want to store the TensorBoard logs.
- Add the callback to your model's fit() function:
model.fit(x_train, y_train, epochs=10, callbacks=[tensorboard_callback])
Here, x_train and y_train are your training data and labels, respectively. You can adjust the values as per your requirement.
- Start TensorBoard:
You can start TensorBoard by running the following command in your terminal or command prompt:
tensorboard --logdir=path_to_logs_directory
Make sure to replace 'path_to_logs_directory' with the same directory you specified when creating the TensorBoard callback in step 2.
Once TensorBoard is running, it will provide a URL (usually http://localhost:6006/). Open this URL in your web browser to access the TensorBoard interface.
You can visualize various aspects of your model, such as training/validation loss, accuracy, histograms, and others using TensorBoard.
What is the file format used for saving TensorBoard logs?
The file format used for saving TensorBoard logs is the Protocol Buffers format (often referred to as protobuf). TensorBoard uses the Summary protobuf format to store the logs, which contain the information needed to visualize various aspects of the training process in TensorBoard.
How to view the computation graph in TensorBoard?
To view the computation graph in TensorBoard, you need to follow these steps:
- Import the necessary packages:
import tensorflow as tf from tensorflow.python.platform import gfile
- Save the computation graph as a protocol buffer file when training your model:
# Define your model
Create a session
with tf.Session() as sess: # ...
# Save the computation graph
tf.train.write\_graph(sess.graph\_def, './logs', 'graph.pbtxt')

# Run your training operation
# ...
This will save the computation graph as a protocol buffer file ("graph.pbtxt") in the "logs" directory.
- Launch TensorBoard using the command line:
tensorboard --logdir=./logs
This will start TensorBoard on your local machine. Make sure you have TensorFlow installed and activated in your environment.
- Open your web browser and go to "http://localhost:6006/", which is the default URL for TensorBoard.
- In the TensorBoard dashboard, navigate to the "Graphs" tab. Here, you should see the computation graph visualized as a directed acyclic graph (DAG). You can expand and collapse nodes to explore the structure of the graph.
Note: If you have multiple graph protocol buffer files, you can visualize each graph by specifying the correct log directory when launching TensorBoard.
How to launch TensorBoard in Jupyter Notebook?
To launch TensorBoard in Jupyter Notebook, you need to follow these steps:
- Install TensorBoard: If you haven't installed TensorBoard, you can install it using the following command: pip install tensorboard.
- Load the TensorBoard extension: In your Jupyter Notebook, run the following command to load the TensorBoard extension: %load_ext tensorboard.
- Start TensorBoard: After loading the extension, you can start TensorBoard by running the following command: %tensorboard --logdir , where is the directory where your TensorBoard logs are stored. This command tells TensorBoard to monitor the log directory for any changes and update the dashboard accordingly.
- Access TensorBoard: Once you start TensorBoard, it will create a web server on your localhost. You can access TensorBoard by opening the URL provided in the output of the previous command. By default, it is usually http://localhost:6006/.
Note: Before starting TensorBoard, ensure that you have generated the log files using TensorFlow's summary functions or any other compatible logging libraries.