Best Action Cameras Capable of Slow Motion to Buy in July 2026
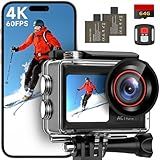
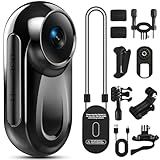
ODDV 4K60FPS 30MP Action Camera with Front LCD and Touch Rear Screens, Underwater Camera with 64GB Memory Card, 132FT Waterproof Camera, EIS, 5X Zoom, WiFi Remote Control(Black)
- RECORD 4K60FPS VIDEO & 30MP PHOTOS WITH 64GB STORAGE INCLUDED!
- DUAL SCREENS FOR EASY SHOOTING MODE SWAPS AND SELFIE PREVIEWS!
- RUGGED WATERPROOF DESIGN FOR UNDERWATER ADVENTURES UP TO 132 FEET!


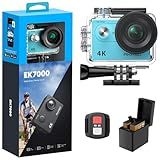
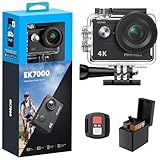
AKASO EK7000 4K30FPS 20MP WiFi Action Camera with EIS Ultra HD 131FT Waterproof Underwater Camera Remote Control 4X Zoom Support External Microphone
- CAPTURE STUNNING 4K VIDEOS & 20MP PHOTOS WITH EASE.
- EXPERIENCE SMOOTH FOOTAGE WITH ADVANCED ELECTRONIC STABILIZATION.
- DIVE DEEP: 131FT WATERPROOF & READY FOR ANY ADVENTURE!
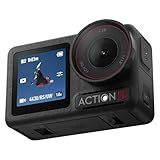
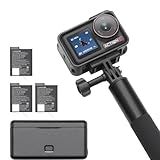
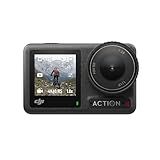
DJI Osmo Action 5 Pro Essential Combo, Waterproof Action Camera with 1/1.3" Sensor, 4K/120fps Video, Subject Tracking, Stabilization, Dual OLED Touchscreens, Action Camera 4K Ideal for Sports, Vlog
-
PRO-GRADE IMAGING - CAPTURE STUNNING 4K VIDEO WITH ADVANCED LOW-LIGHT TECH.
-
HANDS-FREE CONTROL - EASILY SHOOT WITH VOICE COMMANDS FOR SEAMLESS FUN.
-
ALL-WEATHER READY - WATERPROOF AND LONG-LASTING BATTERY FOR ALL-DAY ADVENTURES.
AKASO EK7000 4K30FPS 20MP WiFi Action Camera with EIS Ultra HD 131FT Waterproof Underwater Camera Remote Control 4X Zoom Support External Microphone Black
-
CAPTURE STUNNING 4K VIDEO & 20MP PHOTOS FOR PROFESSIONAL QUALITY.
-
ENJOY SMOOTH, STEADY FOOTAGE WITH ADVANCED ELECTRONIC IMAGE STABILIZATION.
-
DIVE DEEP WITH A 131FT WATERPROOF DESIGN FOR ALL YOUR ADVENTURES.
DJI Osmo Action 5 Pro Adventure Combo, Action Camera 4K with 1/1.3" Sensor, 12h Extended Battery Life with 3 Batteries, Stabilization, Dual OLED Touchscreens, Mini Action Camera for Travel, Vlog
- STUNNING LOW-LIGHT CAPTURE: PERFECT FOR NIGHTTIME BIKING ADVENTURES.
- ULTRA-STABLE FOOTAGE: 360° HORIZONSTEADY ENSURES SMOOTH RECORDINGS.
- HANDS-FREE VOICE CONTROL: EASY CAPTURE WITH VOICE COMMANDS AT YOUR SIDE.
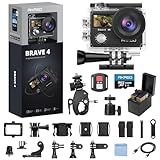
AKASO Brave 4 Action Camera 4K 30fps with 64GB MicroSD U3 Card Bicycle Helmet Accessories Kit Bundle, 20MP Ultra HD 131FT Waterproof Underwater Camera EIS WiFi Remote Control 5X Zoom Sport Cameras
-
CAPTURE STUNNING 4K VIDEOS & 20MP PHOTOS FOR LASTING MEMORIES.
-
ENJOY ADJUSTABLE ANGLES AND SMOOTH FOOTAGE WITH IMAGE STABILIZATION.
-
SHARE EFFORTLESSLY VIA WI-FI AND HDMI FOR FAMILY VIEWING BLISS!
Cecosy Action Camera 4K 30FPS, Waterproof Camera 30M Underwater Ultra HD 131FT 170°Wide Angle Shooting, with 2 x 1050 mAh Batteries for Cycling, Ice Skating, Skiing, Fishing, Climbing
- CAPTURE STUNNING 4K VIDEOS AT 30FPS FOR SMOOTH, HIGH-DEFINITION MOMENTS.
- DIVE DEEPER WITH 30M WATERPROOF CAPABILITIES FOR ALL YOUR ADVENTURES.
- LONG-LASTING FUN WITH 2 BATTERIES FOR UP TO 6 HOURS OF RECORDING TIME.
Mini Body Camera 1080P, 512G Thumb Vlogging Cam Hands-Free Recording, Tiny Portable Action Camera with 360° Rotate Clip & Magnetic Clip, Wearable Video Recorder for Traveling, Motorcycle (No SD Card)
-
ULTRA-COMPACT DESIGN: WEIGHS JUST 0.9 OZ-EFFORTLESS PORTABILITY FOR EVERY ADVENTURE!
-
1080P HD VIDEO: CAPTURE STUNNING FOOTAGE HANDS-FREE WITH PERFECT FRAMING!
-
FLEXIBLE MOUNTING OPTIONS: VERSATILE USE-CLIP, ATTACH, OR WEAR ANYWHERE YOU GO!
DJI Osmo Action 4 Standard Combo, 4K/120fps Waterproof Action Camera with a 1/1.3-Inch Sensor, Stunning Low-Light Imaging,10-bit & D-Log M Color Performance, Long-Lasting 160 Mins, Outdoor Camera
-
CAPTURE BREATHTAKING 4K CLARITY DAY OR NIGHT WITH ADVANCED LOW-LIGHT TECH.
-
ENJOY VIVID COLORS AND STUNNING EFFECTS WITH 10-BIT D-LOG M SUPPORT.
-
RECORD UP TO 150 MINS IN EXTREME COLD WITH RELIABLE, LONG-LASTING POWER.
Yes, action cameras can record in slow motion. Many modern action cameras come equipped with the ability to capture high frame rates, which allows for slow-motion playback. By recording at a higher number of frames per second (fps) than the standard 24 or 30 fps, these cameras can slow down the action significantly when played back at normal speed. Popular models often offer frame rates like 60, 120, or even 240 fps, allowing for varying levels of slow-motion effects. This feature is particularly useful for capturing fast-paced activities or sports, providing an enhanced viewing experience by highlighting details that are otherwise difficult to see at normal speed.
How to edit slow motion footage from an action camera?
Editing slow-motion footage from an action camera can enhance the viewing experience by emphasizing specific moments. Here's a general guide on how to edit slow-motion footage using video editing software:
Step-by-Step Guide
1. Transfer Files to Your Computer
- Connect your action camera through a USB cable or by inserting the memory card into your computer.
- Copy the files to your desired location on your computer for easy access.
2. Choose a Video Editing Software
- Popular options include Adobe Premiere Pro, Final Cut Pro, DaVinci Resolve, and iMovie for Mac users. Free alternatives include HitFilm Express and Lightworks.
3. Import Footage
- Open your editing software and create a new project.
- Use the "Import" function to add your slow-motion footage to the project.
4. Create a Sequence or Timeline
- Drag your footage into the timeline or sequence area. Ensure that your sequence settings match the resolution and frame rate of your footage for best results.
5. Basic Edits
- Trim Clips: Use the blade tool or similar function to cut and trim your footage to the desired length.
- Rearrange Clips: Drag your clips around to establish the desired order in your timeline.
6. Adjust Speed Settings
- Select the Clip: Click on the clip you wish to adjust.
- Modify Speed: In Adobe Premiere Pro, right-click the clip and choose "Speed/Duration" to change the speed percentage. In Final Cut Pro, use the "Retime" options. Other software will have similar options, often found by right-clicking or through a "Clip" or "Modify" menu.
- Stay Smooth: If needed, use optical flow or motion interpolation options to maintain smoothness in extreme slow-motion segments.
7. Enhance with Effects and Music
- Color Correction: Use color correction tools to adjust exposure, contrast, saturation, and color balance.
- Stabilization: Apply stabilization effects if your footage is shaky.
- Add Music or Sound Effects: Import background music or sound effects to enhance your video.
- Titles and Transitions: Add text for titles, captions, and smooth transitions between clips.
8. Preview and Fine-Tune
- Regularly preview your footage within the editing software to ensure edits look as intended.
- Make finer adjustments to speed, color, and audio levels.
9. Export Your Video
- Once satisfied, export your project. Choose a format suitable for your intended use (e.g., MP4 for web).
- Adjust export settings such as resolution and bitrate to balance quality and file size.
10. Review and Share
- Watch your exported video to ensure quality meets expectations.
- Share your video on desired platforms like YouTube, Vimeo, or social media.
Tips
- Quality Check: Ensure your original footage has been shot at a high frame rate (e.g., 60fps or more) for smoother slow-motion.
- Consistency: Maintain a consistent look throughout with uniform adjustments in color grading and audio levels.
- Experiment: Don’t hesitate to try out different effects and speeds to find the most engaging presentation of your slow-motion footage.
By following these steps, you can effectively edit slow-motion footage from an action camera to create a captivating and polished final product.
How to set up an action camera for slow motion?
Setting up an action camera for slow-motion recording involves adjusting a few important settings to ensure optimal video quality. Here's a general guide to help you set up your action camera for slow-motion capture:
- Check Camera Capabilities: Ensure your action camera supports high frame rates, typically 60fps (frames per second) or higher, like 120fps or 240fps, which are commonly used for slow motion.
- Select the Appropriate Frame Rate: Go to the camera's settings and choose a high frame rate. Higher frame rates allow you to slow the footage down more smoothly during editing. For most slow-motion effects, 120fps or more is ideal.
- Choose the Correct Resolution: Depending on your camera's capability, select the highest possible resolution that supports your desired frame rate. Often, filming at a lower resolution can enable higher frame rates (e.g., 1080p at 240fps).
- Lighting Considerations: High frame rates often require more light. Ensure your shooting environment is well-lit to maintain video quality since each frame is exposed for a shorter time, which can lead to darker footage in low light.
- Stabilization Settings: Many action cameras offer electronic image stabilization. Check if your camera stabilizes footage at high frame rates and enable it if possible, but be aware it may crop your frame slightly.
- Adjust Shutter Speed: If your camera allows manual control, set the shutter speed to be at least double the frame rate (e.g., for 120fps, use 1/240s). This reduces motion blur, producing clearer slow-motion footage.
- Use Appropriate Storage: High-resolution, high-frame-rate footage requires more storage space. Make sure you have a fast and high-capacity memory card, like a Class 10 or UHS-I/UHS-II card, to handle the data rate.
- Battery Life Considerations: Shooting at high frame rates can drain your battery faster. Keep spare batteries handy if you plan to record for extended periods.
- Test your Setup: Before filming critical footage, conduct a test shoot to ensure everything is set correctly and the slow-motion effect achieves the desired look.
- Post-Production: Import your footage into a video-editing software that supports slow motion. Adjust the playback speed to create the slow-motion effect and fine-tune as necessary.
By making these adjustments, you can effectively set up your action camera to capture stunning slow-motion footage.
What is the best action camera for slow motion?
As of the latest information available, one of the top action cameras for slow-motion capabilities is the GoPro HERO11 Black. This camera can shoot at high frame rates, such as 240 frames per second (fps) at 1080p, which allows for detailed slow-motion footage. It also offers excellent video stabilization, superior image quality, and a durable design, making it a leading choice for capturing slow-motion sequences in action-packed environments.
Another excellent option is the DJI Osmo Action 3. It can capture 4K video at 120fps, providing clear and smooth slow-motion footage. It also features advanced stabilization technology, strong low-light performance, and an intuitive interface.
Both of these cameras are popular for their combination of performance, durability, and versatility, making them ideal for adventurers and content creators looking to capture high-quality slow-motion action shots. When choosing an action camera, consider other factors such as battery life, additional features, and your specific shooting needs.
What settings should I use for slow motion on an action camera?
When setting up an action camera for slow-motion video, you'll want to consider a few key settings to achieve the best results:
- Frame Rate (fps): Choose a high frame rate to capture more detail in your slow-motion footage. Common options are 60fps, 120fps, or even 240fps, depending on your camera's capabilities. The higher the frame rate, the more smooth and dramatic the slow-motion effect.
- Resolution: While higher frame rates often come with a compromise in resolution, try to choose the highest resolution available at the selected frame rate. For instance, if 4K is not available at 120fps, 1080p might be a good balance between clarity and frame rate.
- Shutter Speed: Follow the 180-degree rule for natural motion blur in videos, which suggests setting a shutter speed that is approximately double your frame rate. For example, for 120fps, use a shutter speed of 1/240 seconds.
- ISO Settings: Keep the ISO as low as possible to reduce noise, especially under bright conditions or in well-lit environments. You might need to adjust depending on lighting conditions and maintain a good exposure.
- Lighting: Slow-motion filming requires good lighting due to higher shutter speeds allowing less light into the camera. Ensure you shoot in well-lit conditions or consider using additional lighting.
- Stabilization: Enable any in-camera stabilization features if available. This helps in maintaining smooth footage, particularly when handheld or during fast-paced action scenes.
- Storage and Battery: High frame rates can quickly consume storage and battery life. Make sure you have enough memory card space and spare batteries for longer shoots.
- Practice and Test: Before shooting critical scenes, practice with different settings to understand your camera's capabilities and limitations. This helps in fine-tuning adjustments for optimal slow-motion footage.
By configuring these settings appropriately, you can capture impressive slow-motion footage with your action camera. Always consult your camera’s manual for specific features and capabilities it offers.
How to optimize lighting for slow motion recording?
Optimizing lighting for slow motion recording is crucial because capturing high-quality footage requires sufficient illumination to accommodate higher frame rates. Here are several tips to help achieve optimal lighting for slow motion recording:
- Use Bright, Continuous Lighting: High frame rate shooting requires a lot of light. Continuous lighting sources such as LEDs, HMIs, or tungsten lights are preferable as they provide consistent illumination without flickering.
- Avoid Flickering Lights: At high frame rates, fluorescent lights or any lighting source that operates with AC current might flicker. Ensure the lights you use are labeled “flicker-free” or have a high refresh rate.
- Increase Light Intensity: Slow motion can significantly reduce the amount of light each frame captures due to the faster shutter speeds. Increasing the intensity of your lights will help maintain proper exposure.
- Use a High CRI Light Source: Choose lighting with a high Color Rendering Index (CRI) to capture colors accurately. A CRI of 90 and above is generally recommended for high-quality color reproduction.
- Balance Ambient and Artificial Light: If you are shooting in a location with natural light, like outdoors, balance it with artificial lights to ensure consistent lighting across frames.
- Control Shadows and Highlights: Use diffusers, reflectors, and softboxes to soften shadows and reduce glare. Soft lighting will enhance the details captured in slow motion without harsh contrasts.
- Position Lights Strategically: Different angles and distances can help highlight details that are important for your slow-motion effect. Experiment with backlighting, side lighting, or underscoring to add depth or texture.
- Utilize Light Modifiers: Accessories like barn doors, snoots, or grids can help direct light more precisely and focus it on your subject, preventing unnecessary spill light.
- Consider Color Temperature: Ensure that all your lights have a consistent color temperature to avoid color shifts or undesirable tinting. A white balance adjustment on your camera can also help maintain consistency.
- Plan and Test Your Setup: Before the actual shoot, test your lighting setup to make necessary adjustments. This helps identify any unintended flickering, exposure issues, or harsh shadows.
By considering these aspects, you can create an optimized lighting environment that enhances the details and quality of your slow motion recordings.