
Best Tools for Accessing JSON Files in Bitbucket Pipeline to Buy in July 2026
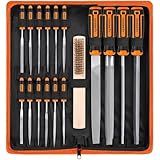
REXBETI 25Pcs Metal File Set, Premium Grade T12 Drop Forged Alloy Steel, Flat/Triangle/Half-round/Round Large File and 12pcs Needle Files with Carry Case, 6pcs Sandpaper, Brush, A Pair Working Gloves
- DURABLE T12 STEEL FILES FOR LASTING CUTTING AND FILING PERFORMANCE.
- COMPLETE 25-PIECE SET WITH TOOLS FOR ALL YOUR WOODWORKING NEEDS.
- ERGONOMIC HANDLE DESIGN ENSURES COMFORT FOR EXTENDED USE.


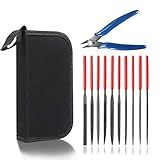
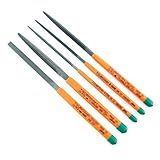
KALIM Needle File Set (10Pcs High Carbon Steel Files) and 1 Wire Cutter in A Carry Bag, File Tools for Soft Metal, Wood, Jewelry, Model, DIY, Hobby, etc.
-
VERSATILE 10 PCS NEEDLE FILES FOR PRECISE, DELICATE SANDING TASKS.
-
DURABLE MINI WIRE CUTTER WITH ERGONOMIC DESIGN FOR EASY USE.
-
INCLUDED STORAGE CASE MAKES IT A PERFECT GIFT FOR ANY DIY ENTHUSIAST.
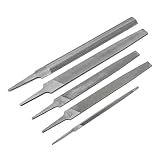
Nicholson 5 Pc 6", 8"& 10" General Purpose File Set - 22040NNN, Multi, One Size
- VERSATILE SET FOR HOME AND PROFESSIONAL FILING NEEDS.
- AGGRESSIVE BASTARD-CUT FILES FOR FAST MATERIAL REMOVAL.
- PRECISION SLIM TAPER FILES FOR DETAILED WORK.
Hi-Spec 17 Piece Metal Hand & Needle File Tool Kit Set. Large & Small Mini T12 Carbon Steel Flat, Half-Round, Round & Triangle Files. Complete in a Zipper Case with a Brush
- VERSATILE FOR ALL TASKS: 16 FILES FOR SMOOTHING, SHAPING, AND DEBURRING.
- DURABLE HIGH CARBON STEEL: ENSURES LONG-LASTING PERFORMANCE AND WEAR RESISTANCE.
- PRECISION IN TIGHT SPACES: NEEDLE FILES FOR INTRICATE WORK AND VARIOUS SHAPES.
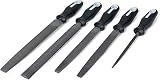
Tsubosan Hand tool Workmanship file set of 5 ST-06 from Japan
- PRECISION FILING FOR SMOOTH FINISHES AND PERFECT RESULTS.
- DURABLE CONSTRUCTION ENSURES LONG-LASTING PERFORMANCE.
- ERGONOMIC DESIGN FOR COMFORTABLE AND EFFICIENT USE.
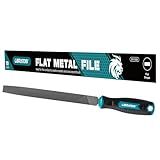
LIBRATON 10-Inch Flat Metal File, Metal File Tool, High Carbon Steel File with Ergonomic Handle, Hand File for Metal, Metalworking, Wood, Plastic, Flat File for Refining, Shaping and Scraping
- DURABLE T12 STEEL FOR LONG-LASTING PERFORMANCE AND EXCELLENT SCRAPING.
- ERGONOMIC RUBBER HANDLE ENSURES COMFORT AND BETTER CONTROL WHILE FILING.
- VERSATILE FOR WOOD, METAL, AND STONE-PERFECT FOR VARIOUS CRAFTING TASKS.
Crescent Nicholson 5 Piece General Purpose File Set with Ergonomic Handles | 22040HNNN
- VERSATILE USE FOR HOME OR PROFESSIONAL PROJECTS.
- ERGONOMIC HANDLES ENSURE COMFORT AND OPTIMAL CONTROL.
- COMPACT POUCH KEEPS FILES SECURE AND ACCESSIBLE.
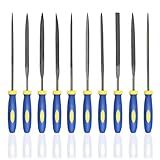
KALIM 10PCS Needle File Set High Carbon Steel File Set with Plastic Non-Slip Handle, Hand Metal Tools for Wood, Plastic, Model, Jewelry, Musical Instrument and DIY (6 Inch Total Length)
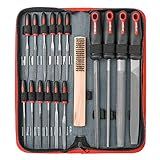
17Pcs File Tool Set with Carry Case,Premium Grade T12 Drop Forged Alloy Steel, Precision Flat/Triangle/Half-round/Round Large File and 12pcs Needle Files/1 brush
- DURABLE T12 ALLOY & GCR15 STEEL FOR SUPERIOR STRENGTH & LONGEVITY.
- 17-PIECE SET INCLUDES VERSATILE FILES FOR ALL YOUR CRAFTING NEEDS.
- COMFORTABLE RUBBER HANDLES & PORTABLE BAG FOR EASY, FATIGUE-FREE USE.
GEARWRENCH 4 Pc. 8" Bastard File Set - 82820H
- QUICK ID WITH LASER-ETCHED PART NUMBERS FOR EASY SELECTION.
- TOOL GRADE STEEL DELIVERS EXCEPTIONAL CUTTING PERFORMANCE.
- PERFECT FOR DEBURRING, ROUNDING, AND TOUGH EDGE REMOVAL.
To access a JSON file in Bitbucket Pipeline, you first need to store the file in your repository. Once the JSON file is saved in your repository, you can use the pipeline script to either fetch or copy the file to your pipeline environment.
You can specify the path to the JSON file within your pipeline script and then perform any operations or processing on the file as needed. Make sure to define the correct path and file name to access the JSON data successfully in your pipeline.
Remember to configure the necessary permissions and access rights for the file in your repository to ensure that the pipeline can read or access the JSON file without any issues. You can also use environment variables or secure variables in your pipeline script to access sensitive JSON data securely.
How to integrate a JSON file into a Bitbucket pipeline process?
To integrate a JSON file into a Bitbucket pipeline process, you can follow these steps:
- Add the JSON file to your repository: First, you need to add the JSON file to your Bitbucket repository. You can do this by simply uploading the file to the repository through the Bitbucket web interface, or you can use the Git command line to push the file to the repository.
- Configure your Bitbucket pipeline: Next, you will need to configure your Bitbucket pipeline to include the JSON file in the build process. You can do this by creating a bitbucket-pipelines.yml file in the root of your repository and defining the pipeline steps. For example, you can use a pipeline step to copy the JSON file to a specific directory in the build environment.
- Use the JSON file in your pipeline script: Once the JSON file is available in the build environment, you can use it in your pipeline script to perform various tasks. For example, you can parse the JSON data to extract values and use them in your build or deployment script.
- Test the pipeline: Finally, you should test the pipeline to ensure that the JSON file is being integrated correctly into the build process. You can do this by triggering a build in Bitbucket and monitoring the pipeline output for any errors related to the JSON file integration.
By following these steps, you can successfully integrate a JSON file into a Bitbucket pipeline process and use it to automate various tasks in your CI/CD workflow.
How to access nested data in a JSON file in Bitbucket pipeline?
To access nested data in a JSON file in a Bitbucket pipeline, you can use a tool like jq which is a lightweight and flexible command-line JSON processor. Here's an example of how you can do this:
- Install jq in your Bitbucket pipeline using the following command:
apk add jq
- Once jq is installed, you can use it to access nested data in a JSON file by providing the path to the nested data you want to access. For example, if you have a JSON file named data.json with the following content:
{ "user": { "name": "John", "age": 30 } }
You can access the value of the name key by running the following command:
jq '.user.name' data.json
This will output:
"John"
- You can also use jq to filter data based on certain conditions. For example, if you want to filter users whose age is greater than 25, you can run the following command:
jq '.user | select(.age > 25)' data.json
This will output:
{ "name": "John", "age": 30 }
By using jq in your Bitbucket pipeline, you can easily access and manipulate nested data in JSON files to perform various tasks during your build and deployment process.
What are the permissions required to access a JSON file in Bitbucket pipeline?
To access a JSON file in a Bitbucket pipeline, the user must have permission to read the file. The specific permissions required may depend on the specific configuration of the pipeline and the access controls set up for the repository. In general, the user should have at least read permissions for the repository where the JSON file is located. Additionally, if the file is located in a specific branch or directory, the user must have access to that branch or directory as well. Understanding and managing permissions is important to ensure that the pipeline can access and use the necessary files and resources.
What steps are involved in accessing a JSON file in Bitbucket pipeline?
To access a JSON file in Bitbucket pipeline, you can follow these steps:
- Create a Bitbucket pipeline configuration file (bitbucket-pipelines.yml) in the root directory of your repository.
- Define the necessary steps in your pipeline configuration file to access the JSON file. You can use the curl command to retrieve the JSON file from a URL or use other commands like git clone or scp if the file is stored in a repository or server.
- Make sure that you have appropriate permissions and access rights to the JSON file or the location where it is stored.
- Use environment variables or secrets to securely handle any sensitive information required to access the JSON file.
- Run the pipeline and check the output to ensure that the JSON file is successfully accessed.
By following these steps, you can access a JSON file in a Bitbucket pipeline and use it in your build or deployment process.
How to update a JSON file in Bitbucket pipeline?
To update a JSON file in Bitbucket pipeline, you can use a script or a command in the pipeline configuration file to make the necessary changes to the JSON file. Here are the general steps to update a JSON file in a Bitbucket pipeline:
- Make sure you have the necessary permissions to make changes to the JSON file in the repository.
- Add a script or command in your pipeline configuration file (e.g., bitbucket-pipelines.yml) to update the JSON file. Depending on your specific requirements, you can use tools like jq (a lightweight and flexible command-line JSON processor) or simple shell commands.
- For example, if you want to update a specific value in the JSON file, you can use jq to modify the JSON file. Here's an example command:
echo '{ "key": "value" }' | jq '.key = "new value"' > updated.json
- Add this script or command in the appropriate step of your Bitbucket pipeline configuration file. Make sure to specify the correct path to the JSON file in the command.
- Run the pipeline to trigger the script or command and update the JSON file in the repository.
- Check the updated JSON file in the repository to ensure the changes have been made successfully.
By following these steps, you can update a JSON file in a Bitbucket pipeline. Remember to test the pipeline configuration and commands thoroughly before running it in a production environment.