
Best Deployment Tools to Buy in July 2026
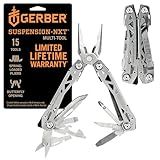
Gerber Gear Suspension-NXT 15-in-1 EDC Multi tool with Pocket Knife, Needle Nose Pliers and Wire Stripper Tools, Gifts for Men, Survival and Camping Gear, Stainless Steel
-
15 VERSATILE TOOLS FOR ANY TASK, PERFECT FOR OUTDOORS AND DAILY USE.
-
DURABLE STAINLESS STEEL WITH A SECURE LOCKING FEATURE FOR SAFETY.
-
COMPACT DESIGN EASILY FITS IN POCKETS OR ATTACHES TO GEAR FOR CONVENIENCE.


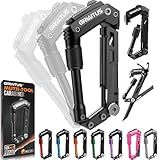
Carabiner Multitool 8-in-1 EDC Carabiners Pocket Knife, Serrated Knife, Rope Cutter, Screwdriver, Can Bottle Opener, Ruler, Survival Gear for Camping Climbing Hiking, Gifts for Men (Black)
-
MULTI-FUNCTIONAL TOOL: POCKET KNIFE, OPENER, SCREWDRIVER & MORE IN ONE!
-
STRONG LOCKING MECHANISM: SAFETY FIRST FOR ALL YOUR OUTDOOR ADVENTURES!
-
PERFECT GIFT: IDEAL FOR MEN, GREAT FOR BIRTHDAYS, HOLIDAYS, & MORE!

Klein Tools 44306 FLICKBLADE 2-in-1 Folding Utility Knife and Scraper with Built-In Blade Storage, Dual Locking Positions, Includes 3 Triple-Ground Carbon Steel Blades
- EFFORTLESSLY SWITCH BETWEEN UTILITY KNIFE AND SCRAPER FUNCTIONALITY.
- DUAL LOCKING FOR PRECISION TASKS OR EVERYDAY CUTTING EASE.
- BUILT-IN BLADE STORAGE KEEPS REPLACEMENTS ORGANIZED AND ACCESSIBLE.
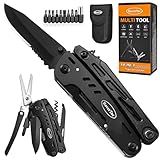
RoverTac 18-in-1 Multitool Pocket Knife with Pliers, Saw, Corkscrew & Detachable Scissors, Multi Tool with Safety Lock, 9 Screwdriver Bits, Camping Gear, Gifts for Men
- VERSATILE 18-IN-1 TOOL COMBINES ESSENTIAL FUNCTIONS
- DETACHABLE SCISSORS FOR TEAMWORK & EFFICIENCY
- DURABLE STAINLESS STEEL WITH SAFETY LOCK FOR RELIABILITY
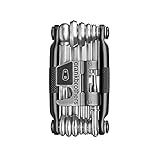
Crankbrothers Multi Tool M 19 Matte Black
- COMPREHENSIVE TOOLSET FOR ALL YOUR BIKING NEEDS IN ONE KIT!
- ERGONOMIC DESIGN ENSURES A COMFORTABLE GRIP DURING USE.
- LIGHTWEIGHT AND COMPACT FOR EASY STORAGE AND TRANSPORT.
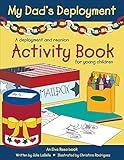
My Dad's Deployment: A Deployment and Reunion Activity Book for Young Children
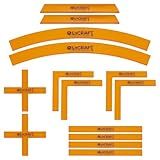
OLYCRAFT 14pcs/1 Set Deployment Zone Template Orange Acrylic Ruler Objective Makers Set Acrylic Rulers Measuring Widget Tool Objective Marker Gaming Accessory for Tabletop Wargames Templates Set
-
14 ACRYLIC RULERS: COMPLETE SET FOR PRECISE DEPLOYMENT AND OBJECTIVES.
-
DURABLE MATERIALS: STURDY, LONG-LASTING RULERS FOR CONSISTENT GAMEPLAY.
-
IDEAL GIFT: PERFECT PRESENT FOR TABLETOP GAME ENTHUSIASTS TO ENJOY TOGETHER.
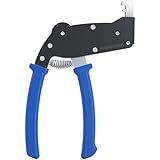
RackSolutions World's Best Cage Nut Tool for IT and Data Center Rack Deployment, Rubberized Grip, Angled Neck for Easy Cage Nut Installation
- INSTALL AND REMOVE CAGE NUTS FASTER THAN EVER!
- SAY GOODBYE TO HAND CUTS AND INSTALLATION STRUGGLES.
- EXPERIENCE THE EASIEST TOOL-TRY IT AND FEEL THE DIFFERENCE!

Gerber Gear Dime 12-in-1 Mini EDC Multitool - Needle Nose Pliers, Pocket Knife, Keychain, Bottle Opener - Gifts for Men, EDC Gear and Equipment - Black
- 12 TOOLS IN 1: VERSATILE MULTITOOL FOR EVERY OUTDOOR ADVENTURE!
- DURABLE STAINLESS STEEL: BUILT TO LAST THROUGH TOUGH CONDITIONS!
- COMPACT DESIGN: FITS IN POCKETS, KEYCHAINS, OR LANYARDS EASILY!
To deploy a React app on an Ubuntu server using Bitbucket Pipeline, you will first need to set up a Bitbucket repository for your project and configure a pipeline for continuous integration and deployment. Inside the pipeline script, you will need to add the necessary commands to build the React app, create a production-ready build, and transfer the build files to your Ubuntu server via SSH.
Make sure to install Node.js and npm on your Ubuntu server before deploying the app. You can use a tool like Nginx to serve the React app in production. Set up a virtual host configuration for Nginx to point to the directory where you have deployed your React app.
When the Bitbucket Pipeline runs successfully and deploys the React app to your Ubuntu server, you should be able to access your app by navigating to the server's IP address in a web browser. Make sure to monitor the deployment process for any issues and troubleshoot as needed to ensure a successful deployment of your React app.
What is the benefit of deploying a React app on a server?
There are several benefits to deploying a React app on a server:
- Improved performance: By deploying a React app on a server, you can take advantage of server-side rendering, which can improve the performance of your app by reducing load times and improving search engine optimization.
- Scalability: Deploying a React app on a server allows you to easily scale your application as needed, by adding more servers or resources to handle increased traffic and requests.
- Security: Server deployment can provide better security for your React app by hosting it on a secure server environment, with proper security measures in place to protect against potential vulnerabilities and attacks.
- Better user experience: Deploying a React app on a server can provide a more seamless and consistent user experience, as users can access the app via a stable and reliable server connection, ensuring faster loading times and consistent performance.
- Monitoring and maintenance: Deploying a React app on a server allows for better monitoring, management, and maintenance of the application, as you can easily track performance metrics, identify and resolve issues, and implement updates and changes as needed.
How to configure a Bitbucket repository for deployment?
To configure a Bitbucket repository for deployment, you can follow these steps:
- Set up a deployment environment: Before you can deploy your code, you'll need to set up a deployment environment. This could be a server, a cloud platform like AWS or Heroku, or a containerized environment like Docker.
- Set up SSH keys: You'll need to set up SSH keys to securely connect your Bitbucket repository to your deployment environment. You can generate SSH keys using the command ssh-keygen.
- Add your SSH key to Bitbucket: In your Bitbucket repository, go to Settings > Access keys and add your SSH key. This will allow Bitbucket to securely connect to your deployment environment.
- Set up webhooks: Webhooks allow Bitbucket to notify your deployment environment whenever there's a new code push. In your Bitbucket repository, go to Settings > Webhooks and add a new webhook with the URL of your deployment environment.
- Configure your deployment scripts: Depending on your deployment environment, you may need to create deployment scripts to automate the deployment process. These scripts could include commands to pull the latest code from Bitbucket, build the project, and restart any services.
- Test your deployment: Before deploying to a production environment, it's important to test your deployment scripts in a staging environment. This will help you catch any errors or issues before they affect your live site.
- Deploy your code: Once everything is set up and tested, you can deploy your code by pushing to your Bitbucket repository. Bitbucket will then trigger the webhook, which will execute your deployment scripts and update your deployment environment with the latest code.
By following these steps, you can configure your Bitbucket repository for deployment and streamline your development workflow.
How to deploy a React app on a localhost server?
To deploy a React app on a localhost server, you can follow these steps:
- Install Node.js: First, make sure you have Node.js installed on your machine. You can download and install it from the official website.
- Create a new React app: You can create a new React app using the create-react-app package by running the following command in your terminal:
npx create-react-app my-app
Replace "my-app" with the name of your app.
- Navigate to your app directory: Once the app is created, navigate to the app directory by running the following command:
cd my-app
- Start the development server: You can start the development server by running the following command:
npm start
This command will start a localhost server and open your React app in a browser.
- Access your React app: Open your web browser and navigate to http://localhost:3000 (or a different port if you're using a different port) to access your React app on the localhost server.
Your React app is now deployed on a localhost server and you can make any changes to the app and see them in real-time by refreshing the browser.
How to push code changes to a Bitbucket repository?
To push code changes to a Bitbucket repository, follow these steps:
- Make sure you have the latest code changes on your local machine. You can do this by running a git pull command in your terminal.
- Add your changes to the staging area by running git add . or git add .
- Commit your changes with a descriptive message using the git commit -m "Your message here" command.
- Verify that your commit is correct by running git log and checking that your commit message is there.
- Push your changes to the Bitbucket repository by running git push origin where is the name of the branch you want to push your changes to.
- If you are pushing to a remote branch for the first time, you may need to set the upstream branch using git push -u origin .
- Enter your Bitbucket username and password if prompted.
- Your changes should now be pushed to the Bitbucket repository. You can verify this by checking the Bitbucket website or running a git status command in your terminal.
That's it! Your code changes have been successfully pushed to the Bitbucket repository.
What is the purpose of npm in React app deployment?
The purpose of npm (Node Package Manager) in React app deployment is to manage and install the dependencies required for the application to run. Npm allows developers to easily install, update, and remove packages that the React app relies on, such as libraries, frameworks, and tools. By using npm, developers can ensure that all necessary dependencies are installed and up to date, making the deployment process smoother and more efficient.