Best Android Development Tools to Buy in July 2026
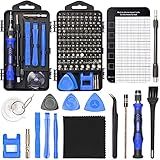
STREBITO Electronics Precision Screwdriver Sets 142-Piece with 120 Bits Magnetic Repair Tool Kit for iPhone, MacBook, Computer, Laptop, PC, Tablet, PS4, Xbox, Nintendo, Game Console
-
COMPREHENSIVE 120-BIT SET FOR ALL YOUR REPAIR NEEDS.
-
ERGONOMIC DESIGN WITH MAGNETIC FEATURES FOR EASY USE.
-
DURABLE CONSTRUCTION BACKED BY A LIFETIME WARRANTY.


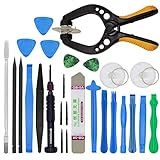
Kaisi Professional Electronics Opening Pry Tool Repair Kit with Metal Spudger Non-Abrasive Nylon Spudgers and Anti-Static Tweezers for Cellphone iPhone Laptops Tablets and More, 20 Piece
-
DURABLE STAINLESS STEEL TOOLS FOR REPEATED USE IN REPAIRS.
-
COMPREHENSIVE 20-PIECE KIT FOR VERSATILE DEVICE DISASSEMBLY.
-
INCLUDES CLEANING TOOLS FOR A POLISHED FINISH POST-REPAIR.

OBD2 Scanner Reader Bluetooth Wireless Auto Diagnostic Scan Tool for iOS & Android for Performance Test Bluetooth 5.4 Car Check Engine Car Code Reader, Clear Error Code Live Data Reset Exclusive APP
-
REAL-TIME DIAGNOSTICS: MONITOR YOUR VEHICLE'S PERFORMANCE INSTANTLY.
-
USER-FRIENDLY APP: TROUBLESHOOT AND CLEAR CODES WITHOUT A MECHANIC.
-
BROAD VEHICLE COMPATIBILITY: WORKS WITH OVER 96% OF MAKES AND MODELS.
EFAITHFIX 22 in 1 Repair Tool Kit, 22-Piece Opening Pry Tool Screwdriver Set, Electronics Magnetic Precision Screwdriver Set for iPhone,iPad,Computer,Cell Phone,Laptop,Tablet,MacBook,Watch,Camera, etc
- 🌟 22-IN-1 SET FOR UNIVERSAL REPAIRS ON ALL YOUR DEVICES!
- 💪 DURABLE, MAGNETIC TIPS ENSURE PRECISION AND EASE IN REPAIRS!
- 🎁 LIGHTWEIGHT, PORTABLE DESIGN FOR HOME, OFFICE, OR TRAVEL USE!
STREBITO Precision Magnetic Screwdriver Set 124-Piece Electronics Tool Kit with 101 Bits, for Computer, Laptop, Cell Phone, PC, MacBook, iPhone, PS4, PS5, Xbox Repair
- ULTIMATE VERSATILITY: 101 PRECISION BITS FOR ALL YOUR ELECTRONICS.
- DURABLE QUALITY: CHROME VANADIUM STEEL BITS FOR LONG-LASTING PERFORMANCE.
- ERGONOMIC DESIGN: COMFORTABLE HANDLE AND FLEXIBLE SHAFT FOR EASY REPAIRS.
22 in 1 Mobile Phone Repair Tools Kit Spudger Pry Opening Tool Screwdriver Set for iPhone 11 12 13 14 15 pro xs max Hand Tools Set
-
DURABLE 22-IN-1 KIT FOR EASY CELLPHONE REPAIRS & MAINTENANCE.
-
DIY SOLUTION: REPAIR YOUR DEVICES WITHOUT PROFESSIONAL HELP!
-
PRECISION TOOLS: IDEAL FOR SMARTPHONES, TVS, AND WATCHES.
Android App Development For Dummies
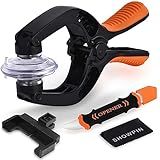
Showpin Smart Phones Suction Cup Tool Opening Pliers Repair LCD Screen, 3 in 1 iPhone Repair Tool Prying Tool Compatible with Cell Phone/Laptop/Tablet PC
- ALL-IN-ONE KIT: 3-IN-1 TOOL FOR EASY SCREEN AND BATTERY REPLACEMENTS.
- SAFE DISASSEMBLY: BUILT-IN LIMIT PREVENTS INTERNAL CABLE DAMAGE.
- ERGONOMIC & DURABLE: COMFORTABLE GRIP AND NON-TOXIC MATERIALS FOR EASY USE.
Creating custom views and view bindings in Kotlin for Android allows you to build unique UI elements and bind them to your application logic. Here's a step-by-step guide on how to do it:
- First, create a new Kotlin file for your custom view. This file will contain your view class definition.
- Inside the file, declare a class that extends an existing view class, such as View or TextView. For example, class CustomView(context: Context) : View(context) {...}.
- Implement the necessary constructors for your custom view. These constructors should call the superclass constructor and pass in the required arguments. You can also override additional constructors as per your needs.
- Override the onDraw method to define the visual appearance and behavior of your custom view. Inside this method, use the provided Canvas object to draw any shapes, text, or images you want.
- If your custom view requires any attributes that can be set in XML layout files, you need to define custom attributes. Create a new XML file in your project's res/values directory, such as attrs.xml. Inside that file, define your custom attributes using the tag.
- In your custom view class, override the init method if you need to initialize any default attributes or perform any setup tasks when creating an instance of the view.
- Now, generate the view binding for your custom view. To do this, create another Kotlin file and declare a function that takes the root view as a parameter and returns an instance of your custom view. Inside this function, use LayoutInflater to inflate the layout file associated with your custom view and return the inflated view.
- Once you have defined your custom view and its associated view binding, you can use it in your XML layouts. Include your custom view using the fully qualified class name as the XML tag, and set any desired attributes specific to your custom view.
- In your Kotlin code, you can access your custom view by using the generated view binding. Call the function from the view binding file, passing in the root view of the layout that contains your custom view. This will give you an instance of your custom view that you can work with programmatically.
By following these steps, you can create and utilize custom views and view bindings in Kotlin for Android, offering more flexibility and control over the user interface of your app.
What is the process of creating a custom animation in Kotlin for Android?
To create a custom animation in Kotlin for Android, you can follow these steps:
- Define the animation: Start by creating an XML resource file in the res/anim directory to define the animation. You can use the following animation types: AlphaAnimation: Fade-in or fade-out animations. ScaleAnimation: Scale animations. TranslateAnimation: Translate animations (moving views). RotateAnimation: Rotate animations. AnimatorSet: Combination of multiple animations.
- Load the animation: In your activity or fragment, load the animation by using the AnimationUtils.loadAnimation() method. Provide the context and animation resource ID as arguments.
val animation = AnimationUtils.loadAnimation(this, R.anim.your_animation)
- Apply the animation: Assign the animation to your desired view using the startAnimation() method.
yourView.startAnimation(animation)
- Customize the animation: If you wish to customize the animation further, you can modify its properties programmatically. For example, you can adjust the duration, interpolator, or fill behavior.
animation.duration = 1000 // Set animation duration in milliseconds animation.interpolator = AccelerateDecelerateInterpolator() // Set animation interpolator
// Customize animation fill behavior (optional) animation.fillAfter = true // View stays at the end state after animation animation.fillBefore = true // View stays at the start state before animation starts
- Implement animation listeners (optional): To perform certain actions when the animation starts, ends, or repeats, you can set animation listeners using the setAnimationListener() method.
animation.setAnimationListener(object : Animation.AnimationListener { override fun onAnimationStart(animation: Animation?) { // Animation started }
override fun onAnimationEnd(animation: Animation?) {
    // Animation ended
}

override fun onAnimationRepeat(animation: Animation?) {
    // Animation repeated
}
})
That's it! Your custom animation is now ready to be used in your Kotlin Android application.
How to use view binding in Kotlin for Android?
To use view binding in Kotlin for Android, you can follow these steps:
- Enable view binding in your project by adding viewBinding.enabled = true in your app-level build.gradle file:
android { ... viewBinding { enabled = true } }
- Create a new XML layout file for your desired activity or fragment. For example, if you have an activity called MainActivity, you can create a layout file called activity_main.xml.
- In the XML layout file, define your UI elements as you normally would:
<LinearLayout xmlns:android="http://schemas.android.com/apk/res/android" xmlns:tools="http://schemas.android.com/tools" android:layout_width="match_parent" android:layout_height="match_parent" android:orientation="vertical" tools:context=".MainActivity">
<TextView
    android:id="@+id/textView"
    android:layout\_width="wrap\_content"
    android:layout\_height="wrap\_content"
    android:text="Hello World!" />

<!-- Other UI elements -->
- Build your project to generate the view binding classes. The generated classes will have the same name as your layout file but with a suffix of "Binding". In this example, the generated class will be ActivityMainBinding.
- In your activity or fragment, initialize the view binding by calling ActivityMainBinding.inflate(layoutInflater) or FragmentMainBinding.inflate(layoutInflater):
class MainActivity : AppCompatActivity() { private lateinit var binding: ActivityMainBinding
override fun onCreate(savedInstanceState: Bundle?) {
    super.onCreate(savedInstanceState)
    binding = ActivityMainBinding.inflate(layoutInflater)
    setContentView(binding.root)

    // To access UI elements, use the binding object followed by the element's ID
    binding.textView.text = "Hello View Binding!"

    // Other code
}
}
- Now you can access the UI elements directly using the binding object without the need for findViewById(). For example, binding.textView refers to the TextView element with the ID textView in the layout file.
That's it! You have successfully used view binding in Kotlin for Android. Repeat these steps for other activities or fragments where you want to use view binding.
What is the purpose of the scaleGestureDetector in a custom view in Kotlin for Android?
The purpose of the ScaleGestureDetector in a custom view in Kotlin for Android is to detect scale gestures performed by the user on the view. It allows the user to perform pinch-to-zoom or other scale gestures on the view. By using the ScaleGestureDetector, you can easily implement zooming or scaling functionality in your custom view.
How to add attributes to a custom view in Kotlin for Android?
To add attributes to a custom view in Kotlin for Android, follow these steps:
- Create a new Kotlin class for your custom view by extending the appropriate Android view class. For example, if you are creating a custom button, extend the Button class.
class CustomButton(context: Context, attrs: AttributeSet) : AppCompatButton(context, attrs) { // Your custom view implementation }
- Define the custom attributes you want to add to your view in a XML file (usually in the res/values/attrs.xml file) using the tag. For example, if you want to add a customText attribute, you can define it as follows:
- In your custom view class, obtain a TypedArray from the AttributeSet parameter passed in the constructor. This TypedArray will provide the attribute values for your view.
class CustomButton(context: Context, attrs: AttributeSet) : AppCompatButton(context, attrs) {
private var customText: String? = null

init {
    val typedArray = context.obtainStyledAttributes(attrs, R.styleable.CustomButton)
    customText = typedArray.getString(R.styleable.CustomButton\_customText)
    typedArray.recycle()
}

// Your custom view implementation using the customText attribute
}
- You can now use the customText attribute value within your custom view class implementation.
You can then use your custom view in your XML layouts, and set the custom attributes like any other attribute. For example:
<com.example.CustomButton android:layout_width="wrap_content" android:layout_height="wrap_content" app:customText="Hello Custom View" />
Note: Make sure to replace com.example.CustomButton with your actual package and class name for the custom view.
How to access the custom attributes of a view in Kotlin for Android?
In Kotlin for Android, you can access the custom attributes of a view by following these steps:
- Define the custom attributes in your project's res/values/attrs.xml file. For example, let's say you want to create a custom attribute called customText for a TextView. In attrs.xml, add the following code:
- In your layout XML file, use the custom attribute with the desired view. For example:
<com.yourpackage.CustomTextView android:id="@+id/customTextView" android:layout_width="wrap_content" android:layout_height="wrap_content" app:customText="Hello, Custom TextView!" />
- In your Kotlin code, access the custom attribute using the context.theme.obtainStyledAttributes method. For example, in your Activity or Fragment, you can access the customText attribute like this:
val typedArray = theme.obtainStyledAttributes(R.styleable.CustomTextView) val customText = typedArray.getString(R.styleable.CustomTextView_customText)
if (customText != null) { // Use the customText attribute customTextView.text = customText }
typedArray.recycle()
Note: In the example above, R.styleable.CustomTextView is the styleable resource generated by the Android build system that contains the custom attributes defined in attrs.xml.