
Best Android Kotlin Extensions (KTX) Tools to Buy in July 2026
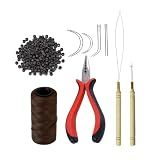
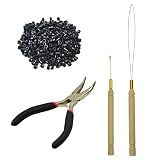
Hair Extensions Tool Kit: 200 Pcs Silicone Lined Micro Links Beads, 1 Three Hole Hair Pliers, 1 Roll Sewing Thread, 1 Loop Needle Threader, 1 Pulling Hook Needle, 8 Sewing Needles (Dark Brown)
- EASY-TO-USE PLIERS ENSURE GENTLE INSTALLATION AND REMOVAL OF BEADS.
- SOFT SILICONE MICRO BEADS PROTECT YOUR HAIR WHILE PROVIDING SECURE HOLD.
- COMPLETE KIT WITH ESSENTIAL TOOLS FOR VERSATILE HAIR EXTENSION OPTIONS.


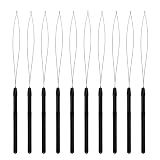
10 Pcs Hair Extension Loop Needle Threader Pulling Hook Tool and Bead Device Tool for Hair Extensions (Black)
-
10-PIECE SET: AMPLE QUANTITY ENSURES YOU'RE ALWAYS PREPARED.
-
DURABLE DESIGN: STRONG METAL NEEDLE WITH COMFORTABLE PLASTIC HANDLE.
-
EFFORTLESS USE: STREAMLINED TOOL FOR QUICK FEATHER HAIR INSTALLATIONS.

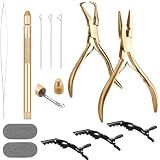
Quacc Hair Extension Pliers 3-Hole Mini Hair Extension Tool for Micro and Nano Ring Hair Extensions (Pink)
- DURABLE NICKEL IRON CONSTRUCTION ENSURES LONG-LASTING PERFORMANCE.
- ERGONOMIC DESIGN FOR COMFORTABLE, NON-SLIP OPERATION AND GRIP.
- VERSATILE TOOL WITH MULTIPLE SIZE HOLES FOR ALL HAIR EXTENSION NEEDS.
Hair Extension Tools Kit, Stainless Steel Hair Extensions Micro Bead Closer pliers and hair extension beads remover plier set, 4 Hook Needle Pulling Loop Tool Set (Gold)
-
COMPLETE KIT: ALL ESSENTIAL TOOLS INCLUDED FOR SEAMLESS HAIR EXTENSIONS.
-
QUALITY TOOLS: SURGICAL STEEL PLIERS ENSURE DURABILITY AND EASE OF USE.
-
DIY FRIENDLY: PERFECT FOR SALON PROS AND AT-HOME STYLING ENTHUSIASTS.

NEWISHTOOL Micro Links Hair Extensions Kit, Hair Extension Pliers for Beads, Hair Extension Loop Needle Pulling Hook Tool Bead Device Tool Kits, Micro Link Tools for Hair or Feather Extensions Styling
-
ALL-IN-ONE KIT: GET EVERYTHING YOU NEED FOR FLAWLESS MICROBEAD EXTENSIONS!
-
DURABLE & COMPACT: STAINLESS STEEL PLIERS ENSURE PRECISION WITH EVERY USE.
-
VERSATILE STYLING: PERFECT FOR DIY OR PROFESSIONAL USE ON ANY OCCASION!

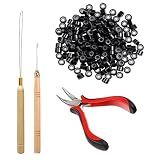
Duufin Hair Extension Tool Kit 500 Pcs Dark Blonde Hair Extension Beads
- COMPLETE KIT: 500 MICRO BEADS & TOOLS FOR EFFORTLESS HAIR EXTENSIONS.
- DURABLE PLIER & EASY-TO-USE LOOP ENSURE FRUSTRATION-FREE STYLING.
- VERSATILE FOR EXTENSIONS OR FEATHER ACCESSORIES; GREAT FOR DIY!
Orgrimmar 500 PCS Hair Extension Tool Kits Professional Hair Styling Black
- VERSATILE TOOLS: USE FOR MICRO RINGS AND VARIOUS HAIRSTYLES EASILY.
- LIGHTWEIGHT DESIGN: COMPACT AND USER-FRIENDLY FOR EFFORTLESS STYLING.
- GENTLE SILICONE RINGS: SECURE HOLD WITHOUT DAMAGING YOUR HAIR.

QWORK Professional Hair Extension Pliers, Stainless Steel Micro Link Bead Remover Tool for Micro Rings, Microlink & Feather Hair Extensions
-
DAMAGE-FREE APPLICATION: SAFELY APPLIES MICRO LINKS WITHOUT HARMING HAIR.
-
DURABLE & COMFORTABLE: STAINLESS STEEL BUILD ENSURES LONGEVITY AND EASE OF USE.
-
FAST & VERSATILE: QUICK MICRO BEAD REMOVAL FOR STYLISTS AND DIY ENTHUSIASTS.

SIVOTE Hair Extension Beads Remover Pliers – Pink Stainless Steel Hair for Extensions – Microlink Hair Extension Pliers for Beads – Professional Extension Tool
- SEAMLESS MICROLINK BEAD REMOVAL FOR STYLISTS AND DIY ENTHUSIASTS.
- DURABLE STAINLESS STEEL ENSURES LONG-LASTING SALON-QUALITY PERFORMANCE.
- ERGONOMIC DESIGN PROVIDES NON-SLIP GRIP FOR USER COMFORT AND CONTROL.
Hair Extensions Tool Kit Black Hair Pliers Pulling Hook Bead Device Tool Kits and 500 Pcs 5 mm Micro Links Rings Beads (Black)
- COMPLETE HAIR EXTENSION KIT WITH ESSENTIAL TOOLS & 500 MICRO RINGS!
- SAFE AND VERSATILE, PERFECT FOR VARIOUS HAIR STYLES AND OCCASIONS.
- DURABLE, COMPACT TOOLS ENSURE EASY AND EFFECTIVE HAIR EXTENSIONS.
The Android Kotlin Extensions, also known as KTX, is a library that provides a set of Kotlin extensions for Android development. It aims to simplify Android development by offering concise and idiomatic Kotlin code for common Android tasks.
To use the Android Kotlin Extensions library:
- Add the library to your project: To start using KTX, include the following dependency in your app-level build.gradle file: implementation 'androidx.core:core-ktx:version_number' Replace version_number with the latest version of the library (check the official documentation for the current version).
- Enable Kotlin extensions: In your Kotlin files, import the KTX extensions by adding the following line at the top of your file: import androidx.core.content.res.* This allows you to use Android framework APIs with Kotlin extensions.
- Use the provided extensions: The Android Kotlin Extensions library offers various extensions that simplify Android development. For example, you can use extensions for common operations like accessing views, working with resources, handling dialogs, and more. Accessing views: With KTX, you can directly access views from XML layouts without the need for findViewById(). For instance: val myButton: Button = findViewById(R.id.myButton) is replaced with: val myButton: Button = findViewById(R.id.myButton) Working with resources: KTX provides improved resource access, eliminating the need for repetitive boilerplate code. You can access resources directly using property syntax. For example: val myString: String = resources.getString(R.string.my_string) is replaced with: val myString: String = getString(R.string.my_string) Handling dialogs: KTX simplifies the creation and showing of dialogs. You can create and show a dialog using simple extension functions. For instance: val dialog = AlertDialog.Builder(context) .setTitle("Title") .setMessage("Message") .create() dialog.show() is replaced with: val dialog = AlertDialog.Builder(context) .setTitle("Title") .setMessage("Message") .create() dialog.show()
- Explore the documentation: The Android Kotlin Extensions library offers a wide range of extensions for different Android components. Explore the official documentation to learn more about the available extensions and their usage.
By using the Android Kotlin Extensions library, you can write concise and more readable Kotlin code, making Android development in Kotlin even more enjoyable and efficient.
What is the syntax for using the Android Kotlin Extensions (KTX) library?
The syntax for using the Android Kotlin Extensions (KTX) library is as follows:
- Add the KTX dependency to your app's build.gradle file:
dependencies { implementation "androidx.core:core-ktx:1.6.0" }
- In your Kotlin file, import the required extension functions:
import androidx.core.content.ContextCompat import androidx.lifecycle.lifecycleScope import androidx.fragment.app.viewModels
- Use the extension functions provided by KTX in your code. For example:
// Simplified view binding
val textView = findViewById
// Simplified resource access val color = ContextCompat.getColor(context, R.color.my_color)
// Coroutines support lifecycleScope.launch { // Run your asynchronous code here }
// ViewModel creation using by viewModels() val viewModel: MyViewModel by viewModels()
By using the Kotlin Extensions (KTX) library, you can simplify and streamline common Android development tasks by eliminating boilerplate code and providing convenient extension functions.
How to install the Android Kotlin Extensions (KTX) library?
To install the Android Kotlin Extensions (KTX) library, follow these steps:
Step 1: Open the build.gradle (Module: app) file in your Android project.
Step 2: Add the following dependency to the dependencies block:
implementation 'androidx.core:core-ktx:1.7.0'
Step 3: Sync the project with Gradle files. Android Studio will download the required dependencies.
Step 4: Once the sync is complete, you can start using the Kotlin Extensions in your project.
Note: Make sure you are using the latest version of the KTX library by checking for updates on the official Android developer website or in the Maven repository.
How to handle network requests using the Android Kotlin Extensions (KTX) library?
To handle network requests using the Android Kotlin Extensions (KTX) library, you can follow these steps:
- Add the required dependencies to your project by including the following line in your app-level build.gradle file:
implementation 'androidx.core:core-ktx:1.5.0' implementation 'androidx.lifecycle:lifecycle-runtime-ktx:2.3.1' implementation 'androidx.lifecycle:lifecycle-viewmodel-ktx:2.3.1'
- Create a ViewModel class that handles the network requests. For example:
import androidx.lifecycle.ViewModel import androidx.lifecycle.viewModelScope import kotlinx.coroutines.Dispatchers import kotlinx.coroutines.launch import kotlinx.coroutines.withContext
class NetworkViewModel : ViewModel() {
fun fetchData(url: String) {
    viewModelScope.launch {
        val data = withContext(Dispatchers.IO) {
            // Perform the network request here
            // Use libraries like Retrofit, OkHttp, etc.
            // For example, using OkHttp:
            val client = OkHttpClient()
            val request = Request.Builder().url(url).build()
            val response = client.newCall(request).execute()
            response.body()?.string()
        }
        // Process the data here
    }
}
}
- In your Activity or Fragment, instantiate the ViewModel and call the fetchData() method. Note that you should use the by viewModels() extension function from the kotlinx.coroutines library:
import androidx.fragment.app.Fragment import androidx.fragment.app.viewModels
class NetworkFragment : Fragment() {
private val viewModel by viewModels<NetworkViewModel>()

override fun onViewCreated(view: View, savedInstanceState: Bundle?) {
    super.onViewCreated(view, savedInstanceState)

    val url = "https://example.com/api/data"

    viewModel.fetchData(url)
}
}
By using the Android Kotlin Extensions (KTX) library, you can simplify your code by using the viewModelScope and withContext() extensions. Additionally, the by viewModels() extension provides the ViewModel instance associated with the Activity or Fragment, ensuring it survives configuration changes.
Remember to replace the network request code with your preferred networking library and adjust the processing logic according to your requirements.
What is the process of handling data binding adapters with the Android Kotlin Extensions (KTX) library?
In Android, the data binding library allows you to bind UI components in your layout files to data sources in your app. Kotlin Extensions (KTX) is a set of Kotlin extension functions provided by the Android team to simplify common tasks when working with Android.
Handling data binding adapters with the Android Kotlin Extensions (KTX) library involves the following steps:
- Enable data binding in your project: Open your app-level build.gradle file. Add the following lines inside the android block: dataBinding { enabled = true }
- Create a layout file: Create a new XML layout file or modify an existing one. Wrap the root view with a tag. Add the data variables using the tag, specifying the types and names of the variables you want to bind. Define the UI components and use the data variables to bind them. For example:
- Build your project to generate the binding classes: After creating or modifying the layout file, build your project once to generate the binding classes. The generated binding classes will have the same names as your layout files with the "Binding" suffix added. For example, if your layout file is activity_main.xml, the generated binding class will be ActivityMainBinding.
- Use the binding in your activity or fragment: In your activity or fragment, get an instance of the binding class by calling DataBindingUtil.setContentView or FragmentBinding.inflate. For example: val binding: ActivityMainBinding = DataBindingUtil.setContentView(this, R.layout.activity_main)
- Use the generated binding class to access the UI components and bind data: You can now use the binding class to access the UI components defined in your layout file. For example, if you have a TextView with an id textViewName, you can access it using binding.textViewName. You can also set the data variables using the binding class. For example, binding.user = user will bind the user object to the layout.
By following these steps, you can handle data binding adapters using the Android Kotlin Extensions (KTX) library.