Best Image Display Frameworks in WxPython to Buy in July 2026
FrameWorks 2-pack, 10" x 12.5" Black Wooden Kids Art Frame with Magnetic Door – Display for 3D Artwork, Photos, Crafts – Gallery Style Edges Wall Decor for Home, Playroom, Easy Access Frame
- STURDY, HIGH-QUALITY WOOD DESIGN FOR LASTING ARTWORK DISPLAY.
- VERSATILE MOUNTING OPTIONS FOR ANY WALL SPACE; VERTICAL OR HORIZONTAL.
- EFFORTLESS ACCESS FOR QUICK ARTWORK CHANGES; SECURE ELASTIC STORAGE.


Lunarable Digital Tapestry, Web Computer Programmer Futuristic Matrix Display with Algorithms Code Image, Fabric Wall Hanging Decor for Bedroom Living Room Dorm, 30" X 45", Petrol Blue
- VIVID COLORS, CLEAR IMAGE-PERFECT FOR EYE-CATCHING DECOR!
- LIGHTWEIGHT, SUPER SOFT MICROFIBER FOR A UNIQUE TOUCH.
- EASY CARE: MACHINE WASHABLE AND DRYER SAFE FOR CONVENIENCE!
Home Book of Picture Framing: Professional Secrets of Mounting, Matting, Framing, and Displaying Artwork, Photographs, Posters, Fabrics, Collectibles, Carvings, and More

Ambesonne Modern Shower Curtain, Vintage World Map with Dark Nostalgic Tones Featured Displays Background Image, Cloth Fabric Bathroom Decor Set with Hooks, 69" W x 75" L, Grey
- HIGH-QUALITY TURKISH FABRIC: WATER-RESISTANT, NO LINER NEEDED.
- UNIQUE DESIGNER ARTWORK: VIBRANT, BOLD GRAPHICS THAT STAND OUT.
- EASY CARE: MACHINE WASHABLE, QUICK-DRY FOR HASSLE-FREE MAINTENANCE.
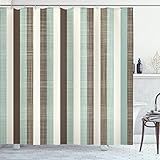
Ambesonne Retro Shower Curtain, Classical Vertical Stripes Pattern Texture Image Old Fashioned Display, Cloth Fabric Bathroom Decor Set with Hooks, 69" W x 75" L, Green Cream
- UNIQUE TURKISH DESIGN: ELEVATE YOUR SPACE WITH EXCLUSIVE ARTWORK.
- WATER-RESISTANT FABRIC: DURABLE, EASY CARE-MACHINE WASHABLE & QUICK-DRYING.
- BOLD DIGITAL PRINTS: STUNNING COLORS THAT WON’T FADE OVER TIME!
To display an image in wxPython, you typically create a panel or frame to act as the container for the image. You will need to use the wx.Image class to load the image file and then convert it to a wx.Bitmap, which can be used in a wx.StaticBitmap widget to render the image within the window. When you load the image, you specify the file path and any necessary scaling transformations. After conversion to a bitmap, the wx.StaticBitmap widget is initialized with the parent container and the bitmap object. Finally, you display the frame. This approach ensures the image is properly loaded and displayed within a wxPython GUI application.
How to use wx.BoxSizer in wxPython?
wx.BoxSizer is a very useful layout manager in wxPython that arranges widgets in a horizontal or vertical line. Here’s a basic guide on how to use wx.BoxSizer in a wxPython application:
Step 1: Set up wxPython
First, make sure you have wxPython installed. You can install it via pip if you haven't yet:
pip install wxPython
Step 2: Create a basic wxPython application
You'll need to set up a basic wxPython application structure. Here's a simple example:
import wx
class MyFrame(wx.Frame): def __init__(self, parent, title): super(MyFrame, self).__init__(parent, title=title, size=(300, 200))
    # Call the method to set up the sizer
    self.InitUI()

def InitUI(self):
    # Create a panel
    panel = wx.Panel(self)

    # Create a BoxSizer
    vbox = wx.BoxSizer(wx.VERTICAL)

    # Add some widgets
    btn1 = wx.Button(panel, label="Button 1", size=(70, 30))
    btn2 = wx.Button(panel, label="Button 2", size=(70, 30))
    btn3 = wx.Button(panel, label="Button 3", size=(70, 30))

    # Add buttons to the sizer
    vbox.Add(btn1, flag=wx.EXPAND | wx.ALL, border=5)
    vbox.Add(btn2, flag=wx.EXPAND | wx.ALL, border=5)
    vbox.Add(btn3, flag=wx.EXPAND | wx.ALL, border=5)

    # Set the sizer for the panel
    panel.SetSizer(vbox)

    # Fit the frame to the panel
    self.Fit()
class MyApp(wx.App): def OnInit(self): frame = MyFrame(None, "wx.BoxSizer Example") frame.Show(True) return True
app = MyApp() app.MainLoop()
Explanation
- wx.BoxSizer(wx.VERTICAL): We create a vertical box sizer. You can replace wx.VERTICAL with wx.HORIZONTAL if you want the widgets to be laid out horizontally.
- Add method: The Add method is used to add widgets to the sizer. You can specify various flags and options: flag=wx.EXPAND: Tells the sizer to expand the widget to fill available space. wx.ALL: Applies the border to all sides of the widget. border=5: Sets the border size to 5 pixels.
- Panel's sizer: Remember to set the sizer to a container like a panel using panel.SetSizer(vbox). This instructs the panel to use the vbox as its layout manager.
- Fit method: self.Fit() is called to automatically size the frame to fit its contents.
With these steps, you should be able to create more advanced GUIs using wx.BoxSizer by adding more widgets and configuring their properties as needed.
How to display multiple images in wxPython?
Displaying multiple images in wxPython can be achieved by using a combination of widgets provided by the library. One common approach is to use a wx.Panel to hold the images and a layout sizer like wx.GridSizer or wx.BoxSizer to arrange them. Below is an example demonstrating how you can display multiple images in a window using wxPython.
First, ensure you have wxPython installed in your environment. If it isn't installed, you can install it via pip:
pip install wxPython
Here's a simple example of how you can display multiple images in a wxPython application:
import wx
class MyFrame(wx.Frame): def __init__(self, parent, title): super(MyFrame, self).__init__(parent, title=title, size=(800, 600))
    # Create a panel in the frame
    panel = wx.Panel(self)

    # List of image file paths
    image\_paths = \["image1.jpg", "image2.jpg", "image3.jpg"\]

    # Create a grid sizer with 1 row and len(image\_paths) columns
    num\_columns = len(image\_paths)
    grid\_sizer = wx.GridSizer(1, num\_columns, 0, 0)

    # Load each image, convert it to a bitmap, and add it to the grid sizer
    for image\_path in image\_paths:
        image = wx.Image(image\_path, wx.BITMAP\_TYPE\_ANY)
        bitmap = wx.StaticBitmap(panel, wx.ID\_ANY, wx.Bitmap(image))
        grid\_sizer.Add(bitmap, 0, wx.EXPAND | wx.ALL, 5)

    # Set the sizer for the panel
    panel.SetSizer(grid\_sizer)

    # Fit the frame to the grid sizer
    self.Fit()
class MyApp(wx.App): def OnInit(self): frame = MyFrame(None, title='Multiple Images in wxPython') frame.Show() return True
if __name__ == '__main__': app = MyApp() app.MainLoop()
Explanation:
- wx.Frame: This is the main window container.
- wx.Panel: Acts as a container for other widgets (like images) within the frame.
- wx.GridSizer: Lays out the images in a grid. Here, we use a 1-row grid with as many columns as there are images.
- wx.Image and wx.StaticBitmap: Load each image and convert it into a bitmap that can be added to the GUI.
You can arrange the images in different configurations by modifying the GridSizer parameters or by using a different sizer like BoxSizer. Also, adjust the size of the frame and the panel to best fit your needs.
Remember to replace "image1.jpg", "image2.jpg", and "image3.jpg" with the actual paths of the images you want to display. The wx.Bitmap supports various image formats, so your images should load without issue, provided the file paths are correct.
How to resize an image in wxPython?
To resize an image in wxPython, you typically work with the wx.Image class, which provides several methods for manipulating images. Below, I'll guide you through the process of resizing an image using wxPython:
- Load the Image: You need to start by loading the image into a wx.Image object.
- Resize the Image: Use the Scale() method of the wx.Image object to resize the image to the desired dimensions.
- Convert to wx.Bitmap: If you need to display the image in a wxPython control, you'll likely convert it to a wx.Bitmap.
Here's a sample code snippet demonstrating how to do this:
import wx
class MyFrame(wx.Frame): def __init__(self, *args, **kwargs): super(MyFrame, self).__init__(*args, **kwargs)
    # Load the image file
    image\_path = 'path/to/your/image.jpg'
    image = wx.Image(image\_path, wx.BITMAP\_TYPE\_ANY)

    # Resize the image
    new\_width = 200  # Replace with desired width
    new\_height = 200  # Replace with desired height
    image = image.Scale(new\_width, new\_height, wx.IMAGE\_QUALITY\_HIGH)

    # Convert the wx.Image to wx.Bitmap
    bitmap = wx.Bitmap(image)

    # Create a wx.StaticBitmap to display the image in the window
    static\_bitmap = wx.StaticBitmap(self, wx.ID\_ANY, bitmap)

    self.SetSize((new\_width, new\_height))
class MyApp(wx.App): def OnInit(self): frame = MyFrame(None, title="Image Resizer") frame.Show() return True
if __name__ == "__main__": app = MyApp() app.MainLoop()
Key Points:
- wx.Image: This class is used for image manipulation. It supports various formats like BMP, JPEG, PNG, etc.
- Scale method: Scale(width, height, quality) where quality can be wx.IMAGE_QUALITY_HIGH, wx.IMAGE_QUALITY_BILINEAR, etc., to improve the quality of the resized image.
- wx.Bitmap: This is used for displaying images on wxPython widgets. Images need to be converted to wx.Bitmap to be shown in controls like wx.StaticBitmap.
This example creates a simple wxPython application with an image resized to 200x200 pixels and displayed in a wx.StaticBitmap. You can adjust the new_width and new_height variables to your desired dimensions.