
Best Python Books to Buy in July 2026
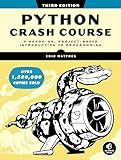
Python Crash Course, 3rd Edition: A Hands-On, Project-Based Introduction to Programming


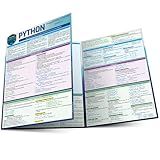
Python Programming Language: a QuickStudy Laminated Reference Guide
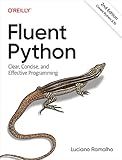
Fluent Python: Clear, Concise, and Effective Programming
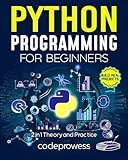
Python Programming for Beginners: The Complete Python Coding Crash Course - Boost Your Growth with an Innovative Ultra-Fast Learning Framework and Exclusive Hands-On Interactive Exercises & Projects

Python All-in-One For Dummies (For Dummies: Learning Made Easy)
Python QuickStart Guide: The Simplified Beginner's Guide to Python Programming Using Hands-On Projects and Real-World Applications (Coding & Programming - QuickStart Guides)
Automate the Boring Stuff with Python, 3rd Edition
Python for Data Analysis: Data Wrangling with pandas, NumPy, and Jupyter
Learning Python: Powerful Object-Oriented Programming
To implement a custom activation function in PyTorch, you need to follow these steps:
- Import the necessary libraries: Begin by importing the required libraries, including torch.
- Define the activation function class: Create a new class that inherits from torch.nn.Module. This class will represent your custom activation function. Give it a meaningful name, like CustomActivation.
- Initialize the activation function: Within the class, define an init method to initialize any variables or parameters needed by your activation function.
- Implement the forward method: Override the forward method of the parent class. This method will define the forward pass of your activation function, taking input and performing the necessary computations and returning the output.
- Register your activation function: In order to use your custom activation function in a neural network model, you need to register it using torch.nn.ModuleList. This allows PyTorch to handle your function correctly during backpropagation.
- Use the custom activation function: Finally, you can use your custom activation function as a regular activation function in any neural network model. Simply include an instance of your CustomActivation class within the model.
By following these steps, you can successfully implement and use your custom activation function in PyTorch for various neural network architectures.
How to set the parameters for a custom activation function in PyTorch?
To set the parameters for a custom activation function in PyTorch, you can define a subclass of the torch.autograd.Function class and override its forward() and backward() methods. Here's an example of setting custom parameters for an activation function named CustomActivation:
import torch import torch.nn as nn
class CustomActivationFunction(torch.autograd.Function):
@staticmethod
def forward(ctx, input, param1, param2):
    # Store any parameters for backward computations
    ctx.save\_for\_backward(input)

    # Perform computations using custom activation function and parameters
    output = ...

    return output

@staticmethod
def backward(ctx, grad\_output):
    # Retrieve stored tensors from forward computations
    input, = ctx.saved\_tensors

    # Perform backward computations using custom activation function and parameters
    grad\_input = ...

    # Return gradients with respect to input and parameters
    return grad\_input, None, None
class CustomActivation(nn.Module): def __init__(self, param1, param2): super(CustomActivation, self).__init__() self.param1 = nn.Parameter(torch.Tensor([param1])) self.param2 = nn.Parameter(torch.Tensor([param2]))
def forward(self, x):
    return CustomActivationFunction.apply(x, self.param1, self.param2)
In this example, forward() method performs the forward computations using the input tensor input and the custom parameters param1 and param2. The backward() method is responsible for the backward computations required for gradient calculation. You can adjust the calculations inside these methods as per your custom activation function's requirements.
To use this custom activation function in a neural network, you create an instance of the CustomActivation class and use it in the network's definition.
How to create a custom activation function using PyTorch?
To create a custom activation function using PyTorch, you can follow these steps:
- Import the necessary libraries:
import torch import torch.nn.functional as F from torch.autograd import Function
- Define a new class that inherits from the Function class:
class CustomActivationFunction(Function): @staticmethod def forward(ctx, input): # Compute the forward pass of the activation function output = input.clamp(min=0) # Example: ReLU activation ctx.save_for_backward(input) # Save input for backward pass return output
@staticmethod
def backward(ctx, grad\_output):
    # Compute the backward pass of the activation function
    input, = ctx.saved\_tensors
    grad\_input = grad\_output.clone()
    grad\_input\[input < 0\] = 0  # Example: Gradient for ReLU activation
    return grad\_input
- Create a functional version of the activation function using the class you just defined:
custom_activation = CustomActivationFunction.apply
- Use the custom activation function in your neural network model. Here's an example of how to define a simple model using the custom activation function:
class CustomModel(torch.nn.Module): def __init__(self): super(CustomModel, self).__init__() self.fc1 = torch.nn.Linear(10, 5) self.fc2 = torch.nn.Linear(5, 1)
def forward(self, x):
    x = custom\_activation(self.fc1(x))
    x = self.fc2(x)
    return x
Now you can use this custom activation function in your PyTorch model. Note that this example uses the ReLU activation function as an illustration, but you can replace it with your own custom function as needed.
What is the impact of a custom activation function on convergence speed?
The impact of a custom activation function on convergence speed is highly dependent on the specific characteristics and behavior of the function. In general, the choice of activation function can have a significant impact on the convergence speed of a neural network.
Traditional activation functions like sigmoid and tanh suffer from the vanishing gradient problem, where the gradient becomes extremely small for large or small input values, resulting in slow learning. This can lead to slower convergence and longer training times. In contrast, rectified linear units (ReLU) and its variants (e.g., Leaky ReLU) have been found to accelerate convergence due to the absence of the vanishing gradient problem.
When using a custom activation function, it is important to consider its derivative or gradient behavior. If the derivative becomes too small or inconsistent for certain input ranges, it may slow down convergence. On the other hand, if the derivative encourages large gradients in the early stages of training, it can help speed up convergence.
Additionally, the non-linear behavior of the activation function influences the network's ability to model complex relationships in the data. An appropriate choice of activation function can facilitate better representation and learning of the underlying patterns in the data, potentially leading to faster convergence.
It is worth noting that the impact of a custom activation function on convergence speed might not be universally beneficial. There may be cases where certain predefined activation functions such as ReLU or sigmoid are already well-suited to the problem at hand, and custom functions may not provide a significant advantage in convergence speed. Ultimately, the effectiveness of a custom activation function depends on carefully considering its properties and how well it aligns with the problem being addressed.