
Best Web Hosting Solutions to Buy in July 2026

Web Hosting For Dummies


Building Your Own Web Server: A Hands-On Approach to Hosting Your Website: Understand the inner workings of web hosting by setting up your own server from scratch.

The Ultimate WHM Guide (Web Hosting with cPanel)

Complete Blueprint on How to Start Your Own Web Hosting Company

Strategies for Web Hosting and Managed Services
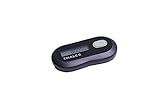
SafeNet IDProve 110 6-digit OTP Token for Use with Amazon Web Services Only
- SECURE REMOTE ACCESS WITH STRONG OTP AUTHENTICATION.
- CONVENIENT AND PORTABLE DESIGN FOR ON-THE-GO USE.
- LONG-LASTING BATTERY LIFE OF UP TO 7 YEARS.

How To Create A Website Using Wordpress: The Beginner's Blueprint for Building a Professional Website in Less Than 60 Minutes
Launching Microweber on web hosting involves several steps. Here is a step-by-step guide to help you:
- Choose a Suitable Web Hosting Provider: Start by selecting a web hosting provider that supports the requirements of Microweber. Look for providers that offer PHP and MySQL support, as well as a control panel for easy management.
- Download Microweber: Visit the Microweber website and download the latest version of the software. It is an open-source content management system (CMS) that you can use to create and manage your website.
- Extract the Files: Once the download is complete, extract the contents of the Microweber package to a folder on your computer. This folder will later be uploaded to your web hosting server.
- Create a Database: Access your web hosting control panel and navigate to the database management section. Create a new MySQL database and note down the database name, username, and password for later use.
- Upload Microweber Files: Connect to your web hosting server using an FTP client or the file manager provided by your hosting provider. Upload the extracted Microweber files to the document root or a subdirectory, depending on your preference.
- Set File Permissions: After uploading the files, you need to set the correct file permissions. Change the permissions of the "storage" and "bootstrap" folders to 775 or 777, depending on your server configuration. This allows Microweber to write and modify files when necessary.
- Run the Installation Wizard: Open a web browser and navigate to your website's URL. You will be redirected to the Microweber installation wizard. Follow the instructions to configure your website settings, including language, database connection details, and administrator credentials.
- Customize Your Website: Once the installation is complete, log in to the Microweber admin panel using the administrator account created during the installation. From there, you can start customizing your website, adding content, selecting templates, and configuring various settings.
Remember to regularly update Microweber to the latest version to ensure security and access new features. Additionally, consult the Microweber documentation or community forums if you encounter any issues during the installation process.
How to manage user permissions in Microweber?
To manage user permissions in Microweber, follow these steps:
- Log in to your Microweber admin panel.
- In the sidebar, click on the "Users" tab.
- Here, you will see a list of all the registered users on your website.
- Click on the username of the user whose permissions you want to manage.
- This will take you to the user's profile page. Scroll down to find the "Permissions" section.
- In the Permissions section, you will see a list of available permissions for that user, such as "Website editing," "Media management," "Product management," etc.
- To enable a permission, simply check the box next to it. To disable a permission, uncheck the box.
- Make the necessary changes to the user's permissions and click the "Save" button to save the changes.
Note: The available permissions may vary depending on the installed modules, plugins, and themes on your Microweber website. Additionally, some permissions may require specific roles or subscriptions to be enabled.
What is Microweber and how does it work?
Microweber is a website builder and content management system (CMS) that allows users to create websites and online stores without any coding knowledge. It combines website design, e-commerce, and content editing capabilities into a single platform.
Here's how Microweber works:
- Website Creation: Microweber provides a drag-and-drop interface, allowing users to easily create and customize the layout of their website. Users can choose from a range of pre-designed templates or create their own design using various elements and modules.
- Content Management: Microweber offers a powerful content management system, allowing users to easily edit and publish content on their website. It provides a WYSIWYG (What You See Is What You Get) editor, enabling users to create, format, and style content without writing code.
- E-commerce Functionality: Microweber includes built-in e-commerce features, making it suitable for building online stores. Users can add products, manage inventory, set up payment gateways, and track orders and shipments without the need for additional plugins or extensions.
- Responsive Design: Microweber ensures that the created websites are mobile-friendly and responsive, adapting to different screen sizes and devices. This helps to improve user experience and ensures that the website looks great on desktops, tablets, and smartphones.
- Hosting and Publishing: Once the website is built, Microweber allows users to publish their website directly through the platform. It provides hosting options, including cloud hosting, or users can choose to export their website and host it on a separate server.
Overall, Microweber simplifies the process of website creation, content management, and e-commerce by offering an intuitive interface and powerful features for users with no coding experience.
How to backup and restore a Microweber website?
To backup and restore a Microweber website, you can follow these steps:
- Backup the Files: a. Connect to your website using FTP or a file manager provided by your hosting provider. b. Locate the root folder of your Microweber installation, usually named "public_html" or "www". c. Download all the files and folders in the root folder to your local computer. This step will create a backup of your website's files.
- Backup the Database: a. Access your website's hosting control panel or use a tool like phpMyAdmin to access your website's database. b. Locate and select the database used by your Microweber website. c. Export the database to a file. This step will create a backup of your website's database.
- Restore the Files: a. Create a new folder on your local computer and copy all the files and folders from the backup into it. b. Connect to your website using FTP or a file manager provided by your hosting provider. c. Upload all the files and folders from the local folder to the root folder of your Microweber installation.
- Restore the Database: a. Create a new database on your website's hosting control panel or using a tool like phpMyAdmin. b. Import the backed up database file into the newly created database. c. Edit the configuration file of your Microweber installation (usually named "config.php" or "database.php") to update the database credentials with the new database details.
- Test the Restored Website: a. Access your website using its URL to check if it is now running with the restored backup. b. Navigate through different pages and functionalities to ensure everything is working as expected.
It is crucial to regularly backup your website and keep multiple copies in different locations. This ensures you have a recent backup to restore from in case of any unexpected issues or data loss.
How to configure Microweber for optimal performance?
To configure Microweber for optimal performance, you can follow these steps:
- Enable caching: Microweber has built-in caching features that can significantly improve its performance. To enable caching, go to the Microweber Dashboard and navigate to Settings > Advanced > Performance. Enable the "Page cache" and "CSS/JS minify" options.
- Optimize database tables: Regularly optimizing your database tables can improve performance. Use a tool like phpMyAdmin or a plugin like WP Optimize to optimize your Microweber database tables.
- Use a caching plugin: In addition to Microweber's built-in caching, you can also use a caching plugin to further enhance performance. Some popular caching plugins for Microweber include W3 Total Cache, WP Super Cache, and WP Rocket.
- Optimize images: Large image files can slow down your Microweber site. Use an image optimization plugin like Smush or Optimole to reduce the file size of your images without sacrificing quality.
- Minify CSS and JavaScript: Minifying your CSS and JavaScript files can reduce their size and improve loading speed. Use a plugin like Autoptimize to automatically minify these files in Microweber.
- Use a content delivery network (CDN): A CDN can help distribute your website's content across multiple servers worldwide, reducing the load on your Microweber server and improving performance. Consider using a CDN service like Cloudflare or MaxCDN.
- Keep Microweber and plugins/themes updated: Regularly updating Microweber core, plugins, and themes is essential for optimal performance and security. Ensure that you are using the latest versions of Microweber and its associated components.
- Remove unused plugins and themes: Uninstall any unused plugins and themes as they can affect the performance of your Microweber site. Only keep the necessary plugins and themes active.
- Optimize server settings: If you have access to server settings, consider adjusting PHP and MySQL configuration to optimize performance. This may include increasing PHP memory limit, adjusting MySQL cache settings, and enabling GZIP compression.
- Use a performance monitoring tool: Monitor your Microweber site's performance using a tool like Pingdom or GTmetrix. These tools can provide insights and recommendations for further optimization.
Remember to back up your Microweber site before making any major changes, and test the performance after each adjustment to ensure the desired improvements are achieved.
What is the multilingual support available in Microweber?
Microweber offers multilingual support, allowing users to create websites in multiple languages. This feature enables website owners to easily translate their content and display it in different languages on their website. Users can manage and translate all content, including pages, blog posts, menus, and more. Microweber also provides a built-in language switcher that allows visitors to switch between different language versions of the website.