Best Tools to Upload Images on Canvas to Buy in July 2026
wall26 Custom Poster Prints - Upload Your Image/Photo, Personalized Photo to Poster Printing, Durable and Waterproof, Home Decor Wall Art Prints - 12x18 inches
- CREATE A STUNNING, CUSTOM MOVIE POSTER WITH VIBRANT COLORS!
- WATERPROOF AND CURLING-FREE FOR LASTING, FLEXIBLE DISPLAYS.
- PREVIEW YOUR DESIGN TO ENSURE A PERFECT FINAL PRINT!


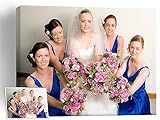
Your Image Turn Into Canvas Art Print - Photo to Canvas Custom Prints - Personalized Wall Art Pictures for Bedroom, Office and living room with frame (8"W x 10"H x 0.5"D)
- EFFORTLESS DISPLAY: PRE-ATTACHED HOOKS MAKE HANGING A BREEZE.
- GIFT-READY QUALITY: PERFECT FOR ANY SPECIAL OCCASION OR CELEBRATION.
- ECO-FRIENDLY MATERIALS: DURABLE AND EASY TO MAINTAIN WITH CARE.
Liferyx Custom Canvas Prints, Personalized Wall Art, Upload Your Image for Family, Travel, Pet & Art photos, Home Décor & Holiday Gifts 11x14inch
-
CREATE CUSTOM CANVAS ART FROM 8X10 TO 24X36 FOR ANY SPACE.
-
PERFECT FOR DECORATING HOMES, CAFES, HOTELS WITH CHERISHED PHOTOS.
-
GIFT ELEGANT, PERSONALIZED ART FOR SPECIAL OCCASIONS AND MEMORIES.
YK artwood Custom Canvas Upload Images- Custom Canvas Prints with Your Photos 6x8 inch 3 Pack-Personalized Canvas Pictures for Kid Lover Pet Family -Canvas Framed
- CUSTOMIZABLE CANVAS ART IDEAL FOR ANY ROOM OR CHERISHED GIFT.
- HIGH-QUALITY INKS & CANVAS ENSURE VIBRANT COLORS AND CLEAR DETAILS.
- ECO-FRIENDLY SPRUCE FRAME EMITS A NATURAL WOOD FRAGRANCE.
CXHOSTENT Photo Canvas Prints Custom Personalized Gifts Upload Your Image to Canvas set of 3 Customized Picture Wall Art for Wedding Family Pet Framed (Frame, 8"x16"x3)
-
CAPTURE MEMORIES: UNIQUE CUSTOM CANVAS PRINTS FOR EVERY OCCASION!
-
READY TO HANG: ENJOY HASSLE-FREE DISPLAY WITH FRAMED OPTIONS!
-
PERFECT GIFT: THOUGHTFUL PERSONALIZED ARTWORK FOR ANY CELEBRATION!
Smile Art Design 3 Images Collage Picture Custom Canvas Print with your Photos Personalized Photo Custom Photo Prints Personalized Gifts for men Wedding Gift Bacheloratte Decorations - 8x12 inches
- PERSONALIZED GIFTS FOR EVERY OCCASION, HANDCRAFTED JUST FOR YOU!
- UV & FADE RESISTANT PRINTS, ENSURING LASTING MEMORIES!
- READY TO HANG GALLERY QUALITY, MADE IN THE USA FOR YOUR HOME!

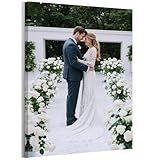
Create Your Own Customized Canvas Prints With Your Photos, Upload Personal Images or Art, 10'' x 8''
- TRANSFORM MEMORIES INTO CANVAS ART - EASY UPLOADS!
- CRAFTED IN THE USA: QUALITY YOU CAN TRUST FOR LASTING BEAUTY.
- EFFORTLESS INSTALLATION: COMES READY TO HANG WITH HARDWARE.
JINJUREN Custom Tapestry Upload Images Banners and Signs Customize For Bedroom 60 * 51inch Horizontal
- UNIQUE, PERSONALIZED TAPESTRIES THAT WOW LOVED ONES WITH DESIGN!
- MADE FROM PREMIUM MICROFIBER: SOFT, DURABLE, AND LIGHTWEIGHT!
- HASSLE-FREE HANGING WITH CLIPS AND HOOKS; NO WALL DAMAGE!

YK artwood Custom Canvas Upload Images- Custom Canvas Prints with Your Photos 12x12 inch 2 Pack -Personalized Canvas Pictures for Kid Lover Pet Family -Canvas Framed
-
CUSTOMIZE UNIQUE CANVAS ART FOR ANY ROOM OR SPECIAL GIFT!
-
HIGH-QUALITY PRINTS WITH VIBRANT COLORS AND CLEAR DETAILS!
-
ECO-FRIENDLY SPRUCE FRAME FOR A NATURAL TOUCH IN YOUR HOME!

wall26 Custom Poster Prints - Upload Your Image/Photo, Personalized Photo to Self-Adhesive Poster Printing, Durable and Waterproof, Home Decor Wall Art Prints - 12x18 inches
-
VIVID PRINTS: ENJOY SHARP, COLORFUL, GLOSSY, AND WATERPROOF POSTERS!
-
CUSTOM DECOR: TURN YOUR MEMORIES INTO UNIQUE WALL ART EFFORTLESSLY!
-
USER-FRIENDLY: EASY CUSTOMIZATION WITH INSTANT PREVIEWS ON AMAZON!
To create an input type file in a canvas element to upload an image, you can start by adding an input element of type "file" to your HTML code. This input element allows users to select an image file from their local system.
Next, you'll need to add JavaScript code to handle the file upload. When a user selects an image file, you can use the FileReader API to read the contents of the selected file. Once you have the file contents, you can create a new Image object in JavaScript and set its source to the uploaded image file.
Finally, you can use the canvas element's 2D rendering context to draw the uploaded image onto the canvas. This will display the image on the canvas for the user to see.
By following these steps, you can enable users to upload an image file and display it on a canvas element on your webpage.
How do you enable users to crop or resize the uploaded image in canvas using an input type file?
To enable users to crop or resize the uploaded image in a canvas using an input type file, you can follow these steps:
- Create an input element of type file in your HTML document to allow users to upload an image:
- Add a canvas element to display the uploaded image and allow users to crop or resize it:
- Use JavaScript to handle the file upload and display the image on the canvas:
const uploadImage = document.getElementById('uploadImage'); const imageCanvas = document.getElementById('imageCanvas'); const ctx = imageCanvas.getContext('2d');
uploadImage.addEventListener('change', function() { const file = uploadImage.files[0]; const reader = new FileReader();
// Load the image file as a data URL
reader.onload = function(e) {
    const img = new Image();
    img.onload = function() {
        imageCanvas.width = img.width;
        imageCanvas.height = img.height;
        ctx.drawImage(img, 0, 0);
    }
    img.src = e.target.result;
}
reader.readAsDataURL(file);
});
- Implement cropping and resizing functionality on the canvas using JavaScript. You can use libraries like Fabric.js or simply write your own custom functions to handle cropping and resizing.
By following these steps, you can enable users to crop or resize the uploaded image in a canvas using an input type file.
How do you enable users to upload images to canvas using an input type file?
To enable users to upload images to a canvas using an input type file, you can follow these steps:
- Create an HTML input element of type file within your form:
- Create a canvas element in your HTML where you want to display the uploaded image:
- Add JavaScript code to handle the image upload and display it on the canvas:
const canvas = document.getElementById('canvas'); const ctx = canvas.getContext('2d'); const fileInput = document.getElementById('fileInput');
fileInput.addEventListener('change', function() { const file = fileInput.files[0]; const reader = new FileReader();
reader.onload = function(e) {
  const img = new Image();
  img.onload = function() {
    canvas.width = img.width;
    canvas.height = img.height;
    ctx.drawImage(img, 0, 0);
  };
  img.src = e.target.result;
};

reader.readAsDataURL(file); });
- Style your canvas element using CSS to set its width and height:
#canvas { max-width: 100%; height: auto; }
By following these steps, you can allow users to upload images using an input type file and display them on a canvas element.
How do you allow users to upload images using canvas and an input type file?
To allow users to upload images using canvas and an input type file, you can follow these steps:
- Create an HTML file input element for selecting the image file:
- Create a canvas element where users can preview the selected image:
- Add JavaScript code to handle the file input change event and display the selected image on the canvas:
const fileInput = document.getElementById('fileInput'); const canvas = document.getElementById('canvas'); const ctx = canvas.getContext('2d');
fileInput.addEventListener('change', function() { const file = fileInput.files[0];
const reader = new FileReader(); reader.onload = function(e) { const img = new Image(); img.onload = function() { canvas.width = img.width; canvas.height = img.height; ctx.drawImage(img, 0, 0); }; img.src = e.target.result; }; reader.readAsDataURL(file); });
- Customize the canvas and the image display according to your requirements, such as resizing the image, applying filters, and more.
With these steps, users can select an image file using the file input element, and the selected image will be displayed on the canvas for further processing or manipulation.
How can I add an input type file to my canvas for uploading images?
To add an input type file to your canvas for uploading images, you can follow these steps:
- Create an input element with type 'file' in your HTML file:
- Add a change event listener to the input element to handle the file upload:
const uploadInput = document.getElementById('upload'); const canvas = document.getElementById('canvas'); const ctx = canvas.getContext('2d');
uploadInput.addEventListener('change', function() { const file = uploadInput.files[0];
if (file) { const reader = new FileReader();
reader.onload = function(e) {
const img = new Image();
img.onload = function() {
canvas.width = img.width;
canvas.height = img.height;
ctx.drawImage(img, 0, 0);
};
img.src = e.target.result;
};
reader.readAsDataURL(file);
} });
- In the above code, we first get the file selected by the user from the input element. We then create a new FileReader object to read the contents of the file as a data URL. Once the file is loaded, we create a new Image object and set the src attribute to the data URL. Finally, we draw the image on the canvas.
- Style the input element as needed to match the design of your canvas.
With these steps, you have successfully added an input type file to your canvas for uploading images. Just select an image file using the input element, and the image will be displayed on the canvas.
What is the importance of optimizing image file size before uploading it to canvas via an input type file?
There are several reasons why it is important to optimize image file size before uploading it to Canvas:
- Faster loading times: Optimizing image file size reduces the amount of time it takes for the image to load on the Canvas platform. This can result in improved user experience, as users are less likely to get frustrated with slow-loading images.
- Improved performance: When images are properly optimized, they consume less bandwidth and server resources. This can result in improved overall performance of the Canvas platform, as fewer resources are required to render images.
- Cost savings: Optimizing image file size can also result in cost savings, as less storage space is required to store images on the server. This can be particularly important for large organizations with a high volume of images.
- Better compatibility: Optimized images are more likely to be compatible with different devices and browsers. Ensuring that images are properly optimized can help prevent compatibility issues that may arise when uploading large files.
Overall, optimizing image file size before uploading it to Canvas can help improve loading times, performance, cost savings, and compatibility, leading to a better overall user experience.
How can I allow users to select and upload images to canvas through an input type file?
You can use the HTML input type file element to allow users to select and upload images to a canvas. Here's how you can create a basic implementation:
- Create an HTML file input element:
- Add a function to handle the file selection and rendering the image on the canvas:
const fileInput = document.getElementById('fileInput'); const canvas = document.getElementById('canvas'); const ctx = canvas.getContext('2d');
fileInput.addEventListener('change', function(e) { const file = e.target.files[0]; const reader = new FileReader();
reader.onload = function(e) { const img = new Image(); img.onload = function() { canvas.width = img.width; canvas.height = img.height; ctx.drawImage(img, 0, 0); } img.src = e.target.result; }
reader.readAsDataURL(file); });
- Style the canvas element as needed in your CSS:
#canvas { border: 1px solid #ccc; }
With this implementation, users can select an image file using the file input element, and the selected image will be rendered on the canvas once it is loaded. You can further enhance this functionality by adding features like image manipulation tools, saving the canvas as an image, or allowing users to draw on the canvas.