Best AI Modeling Tools to Buy in July 2026

AI 3D Animation: From Idea to Master-piece – Step-by-Step Guide for Begin-ners, Creators, and Filmmakers: Master AI Tools for 3D Modeling, Rigging, ... Capture, Rendering, and Post-Production


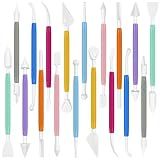
Clatoon 10Pcs Silicone Clay Sculpting Tool, Modeling Dotting Tool & Pottery Craft use for DIY Handicraft, Silicone Brush, Sculpture Pottery, Nail Art
- VERSATILE TOOL SET: 10 PIECES FOR ALL YOUR CLAY CRAFTING NEEDS!
- DUAL TIP SIZES: PERFECT FOR DETAILS OR LARGE AREAS WITH EASE.
- DURABLE & COMFORTABLE: STURDY MATERIALS FOR LONG-LASTING USE!
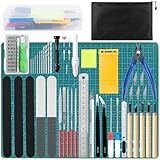
Gundam Tool Kit, 192 Pcs Professional Model Tool Kit for Gundam, Modeling Tools for Models with Decals Sticker Operated Box, Model Building Tools Hobby Tools Craft Set for Repairing Fixing Painting
-
COMPREHENSIVE 192-PIECE TOOLKIT FOR ALL MODEL-MAKING NEEDS!
-
DURABLE, ERGONOMIC DESIGN ENSURES COMFORT AND EFFICIENT WORKFLOW.
-
PERFECT GIFT FOR BEGINNERS AND ADVANCED HOBBYISTS ALIKE!
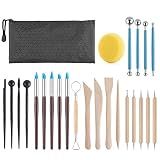
Langqun Air Dry Clay Sculpting Tools, Modeling Shaping Embossing for Kids and Adults,Polymer Clay Tools,Pottery Tools Kit 19Pcs
- 13 VERSATILE TOOLS FOR ENDLESS CREATIVE POSSIBILITIES AND FUN!
- IDEAL FOR CAKES, CLAY, AND CRAFTS-UNLEASH YOUR ARTISTIC SIDE!
- PERFECT GIFT FOR ANY OCCASION-DELIGHT FRIENDS AND FAMILY TODAY!
Analytical Skills for AI and Data Science: Building Skills for an AI-Driven Enterprise
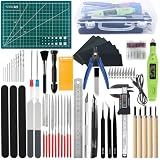
Gundam Tool Kit, 82 Pcs Professional Model Tool Kit for Gundam, Modeling Tools for Plastic Models, Model Car Kit for Adults, Model Building Tools Hobby Tools Craft Set for Repairing and Fixing
-
ESSENTIAL TOOLKIT FOR ALL MODELERS-BEGINNERS TO ADVANCED!
-
ALL-IN-ONE PACKAGE INCLUDES 82 HIGH-QUALITY MODEL ACCESSORIES!
-
PERFECT GIFT FOR ANIMATION AND MODEL ENTHUSIASTS-SURPRISE THEM!
Luney Clay Tools Kit, 25 PCS Ceramics Polymer Clay Sculpting Modeling Pottery Tools Kit, Air Dry Clay for Adults, Pottery Craft, Dotting, Baking, Carving, Drawing, Molding, Modeling, Shaping
- VERSATILE TOOLS FOR ALL CRAFTING: SHAPING, SCULPTING, AND CARVING.
- DURABLE, HIGH-QUALITY MATERIALS ENSURE LONG-LASTING PERFORMANCE.
- PERFECT GIFT FOR ARTISTS: INSPIRES CREATIVITY FOR ALL SKILL LEVELS.
Gundam Tool Kit, 85 Pcs Professional Model Tool Kit for Gundam, Modeling Tools for Plastic Models, Gunpla Tool Kits for Adults, Model Building Tools Hobby Tools Craft Set for Repairing and Fixing
-
ULTIMATE 85-PIECE KIT FOR ALL SKILL LEVELS & PROJECTS!
-
DURABLE & ERGONOMICALLY DESIGNED TOOLS ENHANCE YOUR WORKFLOW!
-
PERFECT GIFT FOR ANIMATION LOVERS AND MODEL-MAKING BEGINNERS!
Clay Tools 18PCS Air Dry Clay Double-Ended Tool Kit Plastic Clay Sculpting Tools Set for DIY Pottery, Modeling Molding Polymer Clay
-
18PCS DOUBLE-ENDED TOOLS FOR PRECISE SHAPING AND DETAILING.
-
DURABLE, ERGONOMIC DESIGN IDEAL FOR BEGINNERS AND PROFESSIONALS.
-
VERSATILE SET FOR ALL CLAY CRAFTING NEEDS, EASY & MESS-FREE!
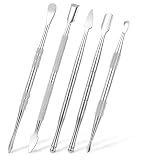
Piriuuo Wax Carving Tools Set, Stainless Steel Clay Sculpting Tools Double-Ended Pottery Carving Tools Wax Modeling Tools Dental Carvers Tools Wax Accessories Modeling Sculpting and Shaping(5 Style)
- VERSATILE DOUBLE-HEADED DESIGN FOR A VARIETY OF SCULPTING TASKS.
- DURABLE STAINLESS STEEL CONSTRUCTION: RUST-PROOF AND EASY TO CLEAN.
- COMFORTABLE KNURLED HANDLE ENSURES PRECISION DURING CREATIVE PROJECTS.
To print the structure of a Tensorflow network, you can use the summary() method provided by the Keras API. By calling model.summary(), you can see a summary of the network's layers, output shapes, and number of parameters. This information can help you understand the architecture of your model and troubleshoot any issues. Additionally, you can visualize the network graph using TensorBoard, a visualization tool provided by Tensorflow. This can give you a more detailed view of the connections between layers and how data flows through the network. Overall, printing the Tensorflow network structure is important for debugging, optimizing performance, and gaining insights into the inner workings of your model.
How to display the Tensorflow model structure in detail?
To display the Tensorflow model structure in detail, you can use the summary() method available in the Keras API. This method provides a concise summary of the model, including the layer names, output shapes, and number of parameters. Here is an example of how to display the model structure in detail:
import tensorflow as tf
Define your Tensorflow model
model = tf.keras.models.Sequential([ tf.keras.layers.Dense(128, activation='relu', input_shape=(784,)), tf.keras.layers.Dropout(0.2), tf.keras.layers.Dense(10, activation='softmax') ])
Display the model structure in detail
model.summary()
When you run this code, you will see a detailed summary of the model structure printed in the console, including information about each layer in the model. This can be helpful for understanding the architecture of the model and debugging any issues that may arise during training.
How can I display the Tensorflow network structure on the console?
You can use the .summary() method on your Tensorflow model to display the network structure on the console. Here's an example code snippet:
import tensorflow as tf
Create your Tensorflow model
model = tf.keras.models.Sequential([ tf.keras.layers.Dense(64, activation='relu', input_shape=(784,)), tf.keras.layers.Dense(10, activation='softmax') ])
Display the network structure on the console
print(model.summary())
When you run this code, you will see the summary of your Tensorflow model displayed on the console, including details like the layers in the network, the output shapes of each layer, and the number of trainable parameters in each layer.
What is the command to show the Tensorflow network architecture in Jupyter Notebook?
To show the Tensorflow network architecture in Jupyter Notebook, you can use the following command:
from tensorflow.keras.utils import plot_model plot_model(model, to_file='model.png', show_shapes=True, show_layer_names=True)
Here model is the Tensorflow model that you want to visualize, and this command will generate a visualization of the network architecture and save it as an image named model.png. The show_shapes=True and show_layer_names=True parameters control whether or not to display the shapes of the layers and the names of the layers in the visualization respectively.
How can I generate and print a graph of the Tensorflow network structure?
You can generate and print a graph of the Tensorflow network structure using the TensorBoard tool. TensorBoard allows you to visualize and analyze the structure and performance of your Tensorflow models.
Here are the steps to generate and print a graph of the Tensorflow network structure using Tensorboard:
- Add the following code to your Tensorflow model to log the graph:
import tensorflow as tf
Build your Tensorflow model here
Add this code to log the graph
tf.summary.FileWriter('./logs', tf.get_default_graph())
- Run your Tensorflow model and let it log the graph data.
- Open a terminal window and navigate to the directory where your model script is located.
- Start Tensorboard by running the following command:
tensorboard --logdir=./logs
- Open a web browser and go to http://localhost:6006 to access Tensorboard.
- In Tensorboard, navigate to the "Graph" tab to see a visual representation of your Tensorflow network structure.
You can click on nodes in the graph to see more details about each operation in your network. You can also save the graph as an image or PDF by clicking on the "Save" button in Tensorboard.
This is how you can generate and print a graph of the Tensorflow network structure using Tensorboard.
What is the process to visualize the Tensorflow model layers?
To visualize the layers of a TensorFlow model, you can use the TensorBoard tool provided by TensorFlow. Follow these steps to visualize the model layers:
- Install TensorFlow and TensorBoard: Make sure you have TensorFlow installed in your Python environment. You can install TensorBoard by running the following command in your terminal:
pip install tensorboard
- Import the necessary libraries: In your Python script, import TensorFlow and other necessary libraries.
import tensorflow as tf
- Define and train your model: Create and train your TensorFlow model as you normally would.
- Add callbacks for TensorBoard: Add a callback to your model that will log data for visualization in TensorBoard.
log_dir = "logs/fit/" + datetime.datetime.now().strftime("%Y%m%d-%H%M%S") tensorboard_callback = tf.keras.callbacks.TensorBoard(log_dir=log_dir, histogram_freq=1)
- Run TensorBoard: Once you have trained your model, open a new terminal window and run the following command to start TensorBoard:
tensorboard --logdir logs/fit
- Visualize the model layers: Open a web browser and go to http://localhost:6006 to access the TensorBoard interface. You should see a tab called "Graphs" that allows you to visualize the layers of your TensorFlow model.
By following these steps, you can easily visualize the layers of your TensorFlow model using TensorBoard.
How can I visualize the Tensorflow network diagram?
There are several ways to visualize a TensorFlow network diagram, some of which include:
- Using TensorBoard: TensorBoard is a visualization tool that comes with TensorFlow and allows you to visualize the computational graph of your TensorFlow model. You can use TensorBoard to view the network architecture, monitor training progress, and analyze model performance.
- Using Graphviz: You can use Graphviz, a graph visualization software, to generate a visual representation of the computational graph of your TensorFlow model. You can export the graph in various formats such as PNG, PDF, or SVG for better visualization.
- Using TensorFlow's built-in visualization tools: TensorFlow provides a way to visualize the model using its built-in visualization tools like tf.summary.FileWriter to visualize the computational graph during model training.
- Using third-party libraries: There are several third-party libraries that can also help in visualizing the TensorFlow network diagram like TensorSpace, Net2Vis, and NetScope.
Overall, choosing the visualization method that best suits your needs and preferences will depend on the complexity of your TensorFlow model and your familiarity with the tools mentioned above.