
Best Web Hosting Tools to Buy in July 2026

Self-Hosting Handbook: Deploy your own web applications and services on a VPS or home server – an intro for indie developers


Full Stack Web Development for 2025: The Complete Guide to Modern Web Apps

All My Podcast Shit: Funny Podcast Log Book Planner, Hosting Notebook & Podcasting Journal Logbook for Planning Perfect Podcasts - Gift for Podcasters, Hosts, Producers & Entrepreneurs Men & Women

Modern Web Development: A Beginner's Guide to HTML, CSS, Hosting, and SEO
Building Tools with GitHub: Customize Your Workflow
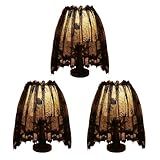
3-Pack Halloween Decorations Indoor, Black Lace Spider Web Lampshade Cover, 20" x 60" – Reusable Polyester Halloween Lamp Shade Topper & Party Decor
-
VALUE PACK: THREE STYLISH 20 × 60 COVERS FOR ULTIMATE SAVINGS!
-
ELEGANT SPIDER WEB DESIGN ENHANCES ANY DECOR, INDOORS OR OUT!
-
DURABLE, REUSABLE FABRIC-EASY TO CLEAN AND PERFECT FOR EVERY YEAR!
To publish Microweber on OVHcloud, you can follow these steps:
- Sign up for an account on OVHcloud and purchase a suitable hosting plan.
- Access your OVHcloud account and navigate to the control panel.
- Create a new database for Microweber by selecting the appropriate option in the database section.
- Install an FTP client, such as FileZilla, and connect it to your OVHcloud server using the provided credentials.
- Download the Microweber CMS package from the official website.
- Extract the downloaded package on your local computer.
- Connect to your OVHcloud server via FTP and upload all the extracted files to the desired location on your server.
- Once the files are uploaded, open a web browser and navigate to your domain name or server IP address.
- The Microweber installation wizard should now appear on your screen.
- Follow the on-screen instructions to complete the installation process, including providing the necessary database information.
- After the installation is finished, you can log in to the Microweber admin panel using the provided credentials.
- Customize your website by selecting or creating a suitable theme, adding content, and configuring various settings.
- Ensure that your domain name is properly linked to your OVHcloud server by updating the DNS settings if necessary.
- Regularly update your Microweber CMS to the latest version to ensure optimal security and performance.
Remember to consult the official Microweber and OVHcloud documentation for more detailed instructions tailored to your specific requirements.
How to configure SSL/TLS certificate for a Microweber website on OVHcloud?
To configure an SSL/TLS certificate for a Microweber website on OVHcloud, you can follow these steps:
- Purchase an SSL/TLS certificate: You can purchase an SSL/TLS certificate from a trusted certificate authority (CA) or from OVHcloud directly.
- Generate a Certificate Signing Request (CSR): Login to your OVHcloud account and navigate to the "SSL Gateway" section. Click on "Create an SSL certificate" and fill in the required details for your Microweber website. This will generate a CSR file.
- Provide the CSR to the CA: Copy the CSR file content and provide it to the CA where you purchased the SSL/TLS certificate. Follow their instructions for submitting the CSR.
- Receive and Download the SSL/TLS Certificate: Once the CA verifies your request, they will send you the SSL/TLS certificate through email or provide a download link. Download the certificate files.
- Upload the SSL/TLS Certificate to OVHcloud: In your OVHcloud account, go to "SSL Gateway" and select the certificate you created earlier. Click on "Import a certificate" and upload the certificate files you received from the CA.
- Enable SSL/TLS in Microweber: Log in to your Microweber website's admin panel and go to "Settings" > "SSL". Enable the option for SSL by selecting "Use HTTPS only".
- Update Website URLs: Also, update your website URLs to use HTTPS instead of HTTP. Go to "Settings" > "General" and change the "Website URL" and "Website Preview URL" to begin with "https://".
- Test the SSL/TLS Configuration: Access your website using the HTTPS URL (e.g., https://www.yourwebsite.com) to ensure that the SSL/TLS certificate is working correctly. Check for any mixed content warnings or errors and fix them if required.
By following these steps, you should be able to configure an SSL/TLS certificate for your Microweber website on OVHcloud.
How to manage product inventory in Microweber on OVHcloud?
To manage product inventory in Microweber on OVHcloud, you can follow these steps:
- Log in to your Microweber admin dashboard. The URL will be something like http://yourdomain.com/admin.
- Go to the "Catalog" section in the left-hand menu.
- Click on "Products" to view the list of your products.
- Find the product you want to manage inventory for and click on it.
- In the product editing page, scroll down to the "Attributes" section.
- Here, you can set the product's inventory quantity by entering a number in the "Quantity" field.
- If you want to enable inventory tracking for the product, make sure the "Track Inventory" option is checked.
- You can also set a low-stock threshold by entering a number in the "Low Stock Threshold" field. This will trigger a notification when the product quantity goes below this number.
- Once you have made the necessary changes, click on the "Save" button to update the product's inventory settings.
- Repeat these steps for other products you want to manage inventory for.
By following these steps, you can effectively manage product inventory in Microweber on OVHcloud.
What is the URL structure for accessing Microweber on OVHcloud?
The URL structure for accessing Microweber on OVHcloud depends on the specific configuration and setup of your server. However, in general, the URL to access Microweber on OVHcloud would be:
http://[your-domain-name]/[path-to-microweber]
For example, if your domain name is "example.com" and Microweber is installed in the root directory of your server, you would access it using:
http://example.com/
If Microweber is installed in a subdirectory called "microweber" within your domain's root directory, the URL would be:
http://example.com/microweber/