Best PowerShell Script Tools to Buy in February 2026
Learn Windows PowerShell in a Month of Lunches


PowerShell in Depth


Learn Windows PowerShell in a Month of Lunches


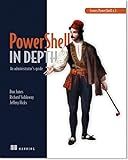
PowerShell in Depth: An Administrator's Guide


PowerShell with SharePoint from Scratch: Exercises and Explanations (Microsoft Tech from Scratch)


PowerShell Console (WinRM)
- COLORFUL UI WITH PROGRESS BARS ENHANCES USER EXPERIENCE.
- SMART AUTOCOMPLETION FOR EFFICIENT SCRIPTING AND NAVIGATION.
- RELIABLE PERFORMANCE EVEN ON UNSTABLE CELLULAR NETWORKS.


To select required columns in a CSV file using PowerShell, you can use the Select-Object cmdlet. First, you need to read the CSV file using the Import-CSV cmdlet and then use Select-Object to specify the columns you want to select. For example, if you have a CSV file named "data.csv" with columns "Name", "Age", and "City", and you want to select only the "Name" and "City" columns, you can use the following PowerShell command:
Import-Csv data.csv | Select-Object Name, City
This will output only the "Name" and "City" columns from the CSV file. You can also save the selected columns to a new CSV file by using the Export-Csv cmdlet:
Import-Csv data.csv | Select-Object Name, City | Export-Csv newdata.csv -NoTypeInformation
This will create a new CSV file named "newdata.csv" with only the selected columns.
How to update specific columns in a CSV file using PowerShell?
To update specific columns in a CSV file using PowerShell, you can use the following approach:
- Load the CSV file into a variable using the Import-Csv cmdlet
- Update the specific columns in the variable
- Save the updated variable back to the CSV file using the Export-Csv cmdlet
Here's an example to demonstrate how you can update specific columns in a CSV file using PowerShell:
# Load the CSV file into a variable $data = Import-Csv -Path "C:\path\to\your\file.csv"
Update specific columns in the variable
foreach ($row in $data) { $row.Column1 = "New Value 1" $row.Column2 = "New Value 2" # Add more columns to update as needed }
Save the updated variable back to the CSV file
$data | Export-Csv -Path "C:\path\to\your\file.csv" -NoTypeInformation
In the above example, replace "C:\path\to\your\file.csv" with the actual path to your CSV file and update the column values as needed. The -NoTypeInformation parameter in the Export-Csv cmdlet is used to exclude the type information from the CSV file.
What is the best way to parse a large CSV file in PowerShell?
The best way to parse a large CSV file in PowerShell is to use the Import-Csv cmdlet, which is specifically designed for reading and parsing CSV files. You can use the -Delimiter parameter to specify the delimiter used in the CSV file (usually a comma), and the -Header parameter to specify the column headers if they are not included in the file.
Here's an example of how to parse a large CSV file in PowerShell using the Import-Csv cmdlet:
Import-Csv -Path "C:\path\to\your\file.csv" -Delimiter "," | ForEach-Object { # Process each row of the CSV file here $value1 = $_.Column1 $value2 = $_.Column2 # Additional processing logic here }
By using Import-Csv, PowerShell will handle the parsing of the CSV file efficiently, making it easier to work with large files without consuming excessive memory or processing resources.
How to check if a file is a CSV file in PowerShell?
You can check if a file is a CSV file in PowerShell by reading the file and inspecting its content to determine if it follows the CSV file format. You can use the following script to check if a file is a CSV file in PowerShell:
$file = "path\to\your\file.csv"
Check if the file exists
if (Test-Path $file) { # Read the first line of the file $firstLine = Get-Content -Path $file -TotalCount 1
# Check if the first line contains comma-separated values
if ($firstLine -match '"?,?"') {
    Write-Output "The file is a CSV file."
} else {
    Write-Output "The file is not a CSV file."
}
} else { Write-Output "File not found." }
Replace "path\to\your\file.csv" with the path to the file you want to check. This script reads the first line of the file and checks if it contains comma-separated values, which is a common characteristic of CSV files. If it does, the script will output "The file is a CSV file," otherwise it will output "The file is not a CSV file."
