Best Art Supplies for Canvas and Webgl to Buy in July 2026
Caliart 176PCS Art Supplies Sketching Kit with 100 Sheets 3-Color Sketch Book, Graphite Colored Charcoal Watercolor & Metallic Pencils, Drawing Set Christmas Gifts for Adults Teens Girls Boys Kids
-
ALL-IN-ONE KIT: 176 ESSENTIAL PIECES FOR EVERY ARTIST'S NEEDS!
-
UNIQUE 3-COLOR SKETCHPAD: 100 SHEETS FOR VIBRANT, VERSATILE SKETCHES!
-
PORTABLE TRAVEL CASE: ORGANIZE AND SKETCH ANYWHERE WITH EASE!


Prina 76 Pack Drawing Set Sketching Kit, Pro Art Supplies with 3-Color Sketchbook, Include Tutorial, Colored, Graphite, Charcoal, Watercolor & Metallic Pencil, for Artists Adults Teens Beginner
- COMPLETE 76-PIECE SET FOR ALL DRAWING STYLES & TECHNIQUES
- PORTABLE CASE KEEPS SUPPLIES ORGANIZED FOR EASY TRAVEL
- INCLUDES 7-STEP TUTORIAL TO KICKSTART YOUR ARTISTIC JOURNEY
Crayola Construction Paper Bulk Pack (480 Sheets) – 10 Assorted Colors, 9x12, Classroom Arts & Crafts Supplies for Kids, Art Paper for School Projects
- 480-COUNT BULK PACK ENSURES ENDLESS CREATIVITY FOR CLASSROOMS.
- TRUSTED BY TEACHERS, LOVED BY STUDENTS-PERFECT FOR ALL AGES!
- HEAVY-DUTY, VIBRANT COLORS IDEAL FOR ARTS, CRAFTS, AND PROJECTS.
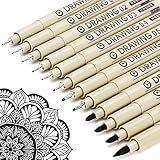
Muchcute Micro Fineliner Drawing Art Pens: 12 Black Fine Line Waterproof Ink Set Artist Supplies Archival Inking Markers Liner Sketch Outline Anime Gifts Manga Sketching Watercolor Zentangle Kit Stuff
-
VERSATILE TIP SIZES: 12 PEN TIPS FROM 0.2MM TO 3.0MM FOR ALL NEEDS.
-
NO BLEED, WATERPROOF INK: ENSURES CLEAN, LASTING ARTWORK EVERY TIME.
-
IDEAL GIFT PACKAGING: BEAUTIFUL STORAGE CASE, PERFECT FOR ANY OCCASION.
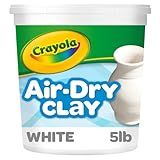
Crayola Air Dry Clay (5lbs), Teacher Supplies, Natural White Modeling Clay for Kids, Sculpting Material, Bulk Craft Supplies for Art Classrooms
-
RESEALABLE BUCKET ENSURES EASY STORAGE AND LONG-LASTING FRESHNESS!
-
VERSATILE FOR CLASSROOM PROJECTS: PERFECT FOR HANDS-ON LEARNING!
-
COMPATIBLE WITH CRAYOLA PAINTS FOR VIBRANT CREATIVE FINISHES!
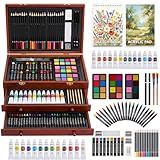
Color More Art Supplies, 175-Pack Deluxe Art Set Drawing Painting Kit with 2 Drawing Pads, Acrylic Paints, Colored Pencils, Crayons, Art Kit in Wooden Case, Gift for Artist, Adults, Teens and Kids
- 175 ESSENTIAL TOOLS: UNLOCK CREATIVITY FOR ALL SKILL LEVELS!
- ELEGANT DESIGN: STURDY WOODEN CASE KEEPS TOOLS ORGANIZED & SECURE.
- SAFE & ECO-FRIENDLY: NON-TOXIC MATERIALS MAKE IT GIFT-READY!
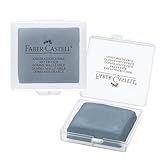
Faber-Castell Kneadable Eraser for Artists in Storage Case - Absorbent Kneaded Erasers, Art Eraser 1 Pack, Grey
-
VERSATILE FOR ARTISTS: IDEAL FOR CORRECTING CHARCOAL, GRAPHITE, AND PASTELS.
-
RESIDUE-FREE ERASING: LEAVES NO MARKS, ENSURING PERFECT ARTWORK TOUCH-UPS.
-
ADJUSTABLE SHAPES: SOFT, PLIABLE DESIGN ALLOWS PRECISE CONTROL FOR ERASING.
To share textures between a 2D canvas and a WebGL canvas, you can create a texture in WebGL, draw the content of the 2D canvas onto that texture, and then use the texture in the WebGL context.
First, you need to create a texture object in WebGL by using the createTexture method. Next, you can bind the texture object with the bindTexture method. Then, you can use the texImage2D method to upload the content of the 2D canvas onto the WebGL texture.
After that, you can use the WebGL texture in your WebGL shaders to render the content of the 2D canvas onto the WebGL canvas. This way, you can share textures between a 2D canvas and a WebGL canvas in your web application.
What is the relationship between textures and shaders in a webgl canvas?
In a WebGL canvas, textures and shaders work in tandem to create visually appealing and dynamic graphics. Textures are images that are applied to 3D objects in order to provide detail and realism to the scene. Shaders are programs written in GLSL (OpenGL Shading Language) that control how the pixels of a texture are rendered on objects.
Shaders are responsible for processing the texture data and determining how the final image is displayed. They can manipulate the texture in various ways, such as applying lighting effects, color adjustments, and other visual enhancements. By combining textures with shaders, developers can create complex and visually striking graphics in a WebGL canvas.
How to handle texture errors in both canvases?
Handling texture errors in both canvases involves identifying the source of the error, troubleshooting the issue, and implementing solutions. Here are some steps to handle texture errors in both canvases:
- Identify the error: The first step is to identify the specific texture error that is occurring in the canvases. Look for error messages or warnings that indicate a problem with loading or displaying textures.
- Check the texture files: Verify that the texture files being used in the canvases are correctly formatted and located in the appropriate directories. Make sure the file paths are correct and that the files themselves are not corrupted or missing.
- Update graphics drivers: Ensure that your graphics drivers are up to date, as outdated drivers can sometimes cause texture errors in canvases. Check for updates from the manufacturer's website and install any available updates.
- Adjust texture settings: If the error is related to texture settings, try adjusting the texture quality or resolution settings in the canvases. Lowering the texture quality may help resolve the error, especially if the graphics card is struggling to handle high-resolution textures.
- Clear cache and reload textures: Clear the cache in the canvases to remove any temporary files or data that may be causing the texture error. Reload the textures after clearing the cache to see if the error has been resolved.
- Restart the canvases: Sometimes simply restarting the canvases can help resolve texture errors by refreshing the program and loading the textures correctly. Close the canvases and reopen them to see if the error persists.
- Contact support: If you are unable to resolve the texture error on your own, consider reaching out to the technical support team for the canvases. Provide them with detailed information about the error and any troubleshooting steps you have already taken, so they can assist you further.
By following these steps, you should be able to effectively handle texture errors in both canvases and improve the overall performance and appearance of your projects.
What is the significance of texture units in a webgl canvas?
Texture units in a WebGL canvas are important for applying textures to objects in a 3D scene. Each texture unit represents a location where a texture can be bound and used during the rendering process.
Texture units are essential for achieving realistic rendering effects in a 3D graphics environment. By binding different textures to different texture units, developers can apply multiple textures to objects in a scene to create more visually complex and detailed images.
Furthermore, texture units allow for various texture operations to be performed, such as combining multiple textures using blending modes or applying different filters and transformations to textures. This provides developers with the flexibility to create a wide range of visual effects in their WebGL applications.
In summary, texture units play a crucial role in the rendering process of a WebGL canvas by enabling developers to apply textures to objects, create visually appealing 3D scenes, and achieve a higher level of realism and detail in their graphics.
What is the impact of texture resolution on performance in both canvases?
Texture resolution refers to the level of detail and quality of textures used in a canvas. Generally, higher resolution textures will require more memory and processing power to render compared to lower resolution textures. Therefore, the impact of texture resolution on performance in both canvases depends on factors such as the hardware capabilities of the device, the complexity of the scene, and how many textures are being used.
In a 2D canvas, the impact of texture resolution on performance may be less significant compared to a 3D canvas. However, using high resolution textures in a 2D canvas can still affect performance, especially on devices with limited memory and processing power. High resolution textures can increase file size, load times, and rendering times, which can lead to lag and decreased performance.
In a 3D canvas, the impact of texture resolution on performance can be more pronounced. Higher resolution textures are commonly used to create detailed and realistic scenes in 3D graphics, but they can also require a significant amount of memory and processing power to render. As a result, using high resolution textures in a 3D canvas can lead to lower frame rates, longer loading times, and overall decreased performance.
Overall, the impact of texture resolution on performance in both canvases can vary depending on the specific context and hardware constraints. It is important for developers to consider the trade-offs between texture resolution and performance when creating and optimizing canvas content.
How to blend textures in a 2d canvas?
Blending textures in a 2D canvas can be achieved using various techniques. Here are some common methods:
- Use blending modes: Most 2D rendering software and libraries have built-in blending modes that allow you to blend textures together in different ways. Experiment with blending modes like overlay, multiply, screen, and others to see how they affect the final result.
- Use shaders: If you are working with a more advanced rendering system like WebGL or a game engine, you can create custom shaders to blend textures together. Shaders give you more control over how the textures are combined and can create complex effects.
- Mix textures manually: If you are working with a basic 2D canvas, you can manually combine textures by overlaying them on top of each other and adjusting their opacity. This method gives you more control over the blending process but can be more time-consuming.
- Use masks: Another way to blend textures is to use masks. Create a mask texture that dictates where and how the textures should blend together, then apply the mask to the textures using a blending mode or shader.
Overall, the best method for blending textures in a 2D canvas will depend on your specific needs and the tools you have at your disposal. Experiment with different techniques to find the one that works best for your project.
What is the process of generating textures for use in both canvases?
The process of generating textures for use in canvases involves several steps.
- Gathering inspiration: The first step is to gather inspiration for the textures you want to create. This could involve looking at existing textures in nature, architecture, or art, as well as exploring different materials and techniques for creating textures.
- Choosing a medium: Next, you will need to choose a medium for creating your textures. This could include traditional mediums such as paint, pastels, or markers, as well as digital mediums such as digital painting software or photo editing tools.
- Experimenting with techniques: Once you have chosen a medium, you can start experimenting with different techniques for creating textures. This could involve using different brush strokes, layering techniques, or mixing different materials to achieve the desired effect.
- Creating the textures: After experimenting with different techniques, you can start creating your textures. This could involve creating textures on a separate surface or digitally creating textures on a computer.
- Digitizing the textures: If you have created textures using traditional mediums, you may need to digitize them so that they can be used in digital canvases. This could involve scanning or photographing the textures and editing them in a digital editing software.
- Applying the textures to canvases: Finally, you can apply the textures to your canvases. This could involve digitally layering the textures onto your digital canvas or physically applying the textures to a traditional canvas using a variety of techniques.
Overall, the process of generating textures for use in canvases involves a mix of experimentation, creativity, and technical skills to achieve the desired effects.