Best Screenshot Tools to Buy in July 2026
SCREENSHOT SCREENSHOTBRAND-S51801 Color Block Lightweight Graffiti Print Windbreaker Jacket-Black-Medium
- URBAN-INSPIRED WINDBREAKER FOR ULTIMATE STREET STYLE.
- LIGHTWEIGHT, HIGH-QUALITY MATERIALS FOR COMFORT AND FLAIR.
- FASHION-FORWARD DESIGN THAT AMPLIFIES INDIVIDUALITY AND TRENDS.


Y2 2.8'' Color Graphing Screen OBD2 Scanner Diagnostic Tool,Enhanced PRO Check and Reset Engine Fault Code,DTC Lookup,O2 Sensor Test,Live Data,Freeze Frame,OBDII Code Reader Tool for All Cars
- USER-FRIENDLY DESIGN: SIMPLIFIES DIAGNOSTICS FOR ALL SKILL LEVELS.
- ENHANCED FEATURES: ADVANCED FUNCTIONS FOR PRECISE AND EFFECTIVE REPAIRS.
- WIDE COMPATIBILITY: WORKS WITH 99% OF GLOBAL VEHICLES AND IS PORTABLE.

SCREENSHOT SCREENSHOT-H11510 Mens Urban Hip Hop Premium Streetwear Overzise Fit Fleece Hoodie Logo Flower High Density Puff Print Fashion Pullover Sweatshirt-Black/White-Small
- UNIQUE DESIGNS BLENDING URBAN CULTURE FOR STANDOUT INDIVIDUALITY.
- HIGH-QUALITY, SOFT FABRIC ENSURES COMFORT IN ANY OCCASION.
- STAY TRENDY WITH NYC-INSPIRED STYLES THAT TURN HEADS!
SCREENSHOT Men's Premium Workout Lifestyle Color Block Fashion Track Pants P41902-Charcoal-Medium
-
URBAN-INSPIRED DESIGNS ELEVATE YOUR STYLE FROM BLAND TO BOLD!
-
ADVANCED TECH ENHANCES COMFORT AND INDIVIDUALITY IN EVERY OUTFIT.
-
VERSATILE COLORS AND STYLES SEAMLESSLY MATCH YOUR CURRENT WARDROBE.
Screenshot SPORTS-A5050 Mens Premium Athletic Full Zip-up Fleece Jacket - Running Fitness Jogger Workout Gym Sweatshirt-Black-Medium
- UNIQUE URBAN DESIGNS BLEND SPORTS WITH MODERN FASHION SEAMLESSLY.
- PREMIUM MATERIALS OFFER COMFORT AND FLEXIBILITY FOR ALL ACTIVITIES.
- STAND OUT IN THE LATEST NYC ATHLETIC TRENDS AND EXPRESS INDIVIDUALITY.

SCREENSHOT Mens Premium Crew Neck Fleece Streetwear Graphic Sweatshirt SIGNATURE F11076-OLIVE-XLarge
- UNIQUE, URBAN-INSPIRED DESIGNS REFLECT VIBRANT 21ST-CENTURY CULTURE.
- PREMIUM 60% COTTON BLEND ENSURES COMFORT, FLEXIBILITY, AND WARMTH.
- STAND OUT WITH THE LATEST NYC FASHION TRENDS FOR BOLD SELF-EXPRESSION.
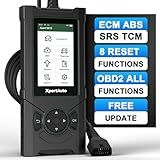
XpertAuto OBD2 Scanner S515 ABS SRS ECM TCM,Car Code Reader, Diagnostic Scan Tool with Reset for ABS/SRS/Oil/EPB/SAS/ETS/Battery/DPF/, Universal for All OBD II/EOBD Protocol Cars After 1996
- DIAGNOSE ABS, SRS, ECM & TCM EFFECTIVELY WITH REAL-TIME DATA.
- ENJOY 8 HOT RESET SERVICES FOR COMPREHENSIVE VEHICLE MAINTENANCE.
- EASY PLUG-AND-PLAY SETUP WITH UNIVERSAL COMPATIBILITY FOR ALL VEHICLES.

SCREENSHOT-F1113 Mens Urban Premium Fleece - Signature Sleeves Black Bear Cartoon Color Block Crew Neck Streetwear Sweatshirt-Bk/Bk-Medium
- TRENDY URBAN STYLES INSPIRE INDIVIDUALITY FOR THE MODERN WARDROBE.
- LUXURIOUS BLEND OF COTTON & POLY ENSURES COMFORT AND LASTING QUALITY.
- EFFORTLESSLY BOLD DESIGNS ELEVATE YOUR LOOK FOR ANY OCCASION.

SCREENSHOT-H11222 Mens Urban Hip Hop Premium Streetwear Fleece Top - Big Head Shadow Teddy Bear Patch Embroidery Gel Print Hoodie Pullover Sweatshirt-Khaki-Small
- STYLISH FASHION STATEMENT IN COMFORTABLE COTTON BLEND.
- FLATTERING REGULAR FIT FOR ALL BODY TYPES AND OCCASIONS.
- VERSATILE DESIGN PERFECT FOR CASUAL AND DRESSY OUTFITS.

SCREENSHOT-W21455 Mens Cotton Button Down Long Sleeve Collared Shirt - Airforce Graffiti Patch Urban Streetwear Fashion Top-Black-Medium
- VERSATILE STYLE: LAYER IT UP FOR CASUAL AND SEMI-FORMAL OCCASIONS.
- BOLD AESTHETIC: MAKE A STATEMENT WITH EYE-CATCHING STREETWEAR DESIGNS.
- COMFORT MEETS TREND: PERFECTLY PAIRS WITH JEANS FOR EFFORTLESS STREET STYLE.
To take a screenshot of the whole screen using wxPython, you can utilize the ScreenDC and MemoryDC classes provided by the library. Firstly, you would create an instance of ScreenDC, which represents the entire screen. Then, you create a bitmap with the size of the screen dimensions and select it into a MemoryDC. By using the Blit method, you can copy the screen content from the ScreenDC to the MemoryDC. Finally, you save the bitmap to a file in your desired format using the SaveFile method. This process captures the entire screen and writes it to an image file. Make sure to have wxPython installed and the necessary permissions to capture the screen content on the operating system you are using.
How to create a status bar in wxPython?
Creating a status bar in wxPython is a straightforward task. A status bar is typically used in a window to display status information about the application. In wxPython, the wx.StatusBar class provides a simple way to implement this feature. You would typically add a status bar to a wx.Frame or a similar top-level window.
Here's a basic example of how to create a status bar in a wx.Frame application:
import wx
class MyFrame(wx.Frame): def __init__(self, *args, **kw): super(MyFrame, self).__init__(*args, **kw)
    # Create the status bar
    self.CreateStatusBar()

    # Set a status message
    self.SetStatusText("Welcome to wxPython!")
class MyApp(wx.App): def OnInit(self): # Create an instance of the MyFrame class frame = MyFrame(None, title="wxPython Status Bar Example") frame.Show() return True
Run the application
if __name__ == "__main__": app = MyApp() app.MainLoop()
Explanation:
- MyFrame Class: Inherit from wx.Frame to create a main window frame. Call self.CreateStatusBar() to add a default status bar to the frame. This method handles creating the status bar and attaching it to the frame. Use self.SetStatusText("Your message here") to display a message in the status bar. This sets the text for the default field in the status bar.
- MyApp Class: Inherit from wx.App to create the application object. Override the OnInit method to initialize the main frame and show it.
- Running the Application: Instantiate MyApp and start the main event loop by calling MainLoop().
This code creates a GUI application with a basic status bar displaying the message "Welcome to wxPython!" If you want to add more fields to the status bar, you can use the CreateStatusBar(number) method, where number specifies how many fields you wish to have. You can then set text in each field using SetStatusText(text, number), where number indicates the field index.
To customize the status bar further, such as adding more fields or handling events, you would work with methods like SetStatusWidths, SetStatusStyles, or binding to relevant events such as EVT_STATUSBAR_LEFT_CLICK.
How to draw on a wxPython window?
Drawing on a wxPython window involves creating a wx.PaintDC in an overridden EVT_PAINT event handler. Here's a step-by-step guide:
- Set up the wxPython application: Start by creating a basic wxPython application with a frame. This frame will serve as the canvas for your drawing.
- Bind the Paint Event: You need to bind the EVT_PAINT event to a method in your frame. This method will handle all the drawing operations.
- Override the Paint Event Handler: In your paint event handler method, you’ll use wx.PaintDC to perform drawing operations on the window.
Here's an example code demonstrating these steps:
import wx
class MyFrame(wx.Frame): def __init__(self, *args, **kw): super(MyFrame, self).__init__(*args, **kw)
    # Bind the paint event
    self.Bind(wx.EVT\_PAINT, self.OnPaint)

def OnPaint(self, event):
    # Create a device context to draw on
    dc = wx.PaintDC(self)
    # Optionally, you could set a background color
    dc.SetBackground(wx.Brush(wx.Colour(255, 255, 255)))
    dc.Clear()

    # Set pen for outlines
    dc.SetPen(wx.Pen(wx.Colour(0, 0, 0), 1))

    # Set brush for fill
    dc.SetBrush(wx.Brush(wx.Colour(255, 0, 0)))

    # Draw a rectangle
    dc.DrawRectangle(10, 10, 100, 50)

    # Draw a circle
    dc.SetBrush(wx.Brush(wx.Colour(0, 255, 0)))
    dc.DrawCircle(150, 35, 25)

    # Draw a line
    dc.SetPen(wx.Pen(wx.Colour(0, 0, 255), 2))
    dc.DrawLine(10, 70, 200, 70)

    # Draw some text
    dc.DrawText("Hello, wxPython Drawing!", 10, 90)
class MyApp(wx.App): def OnInit(self): # Create the main window (frame) frame = MyFrame(None, title="Drawing in wxPython", size=(300, 200)) frame.Show(True) return True
Run the application
app = MyApp() app.MainLoop()
Explanation:
- wx.PaintDC: This is a device context used for painting on the window. It's important to use wx.PaintDC within an EVT_PAINT event to ensure proper repainting.
- Bind(wx.EVT_PAINT, self.OnPaint): This connects the EVT_PAINT event to the OnPaint method, meaning OnPaint is called whenever the window needs to be repainted.
- Drawing Methods: DrawRectangle, DrawCircle, DrawLine, etc., are methods provided by wx.PaintDC for drawing various shapes.
- Pen and Brush: These are used to define how outlines and fills are drawn.
Important Notes:
- You should perform all drawing operations in the paint event handler (EVT_PAINT). This ensures that the window redraws correctly when it's invalidated (such as being obscured and then uncovered).
- Avoid using wx.ClientDC for regular drawing as it doesn't handle events like covering/uncovering properly. It's mainly for quick drawing outside the normal paint cycle.
By following these steps and using the above example, you can effectively draw on a wxPython window.
How to handle events in wxPython?
Handling events in wxPython is a core aspect of creating interactive GUI applications. wxPython uses an event-driven model where events are objects representing actions, and they are bound to event handlers that define responses to these actions. Here's a step-by-step guide on how to handle events in wxPython:
1. Import wxPython
First, ensure you’ve imported wxPython in your script:
import wx
2. Create a Main Frame
You need a main frame (a window) to attach widgets and handle their events:
class MyFrame(wx.Frame): def __init__(self, *args, **kw): super(MyFrame, self).__init__(*args, **kw)
    # Create a panel in the frame
    panel = wx.Panel(self)

    # Add a button to the panel
    self.button = wx.Button(panel, label="Click Me", pos=(50, 50))

    # Bind an event to the button
    self.button.Bind(wx.EVT\_BUTTON, self.on\_button\_click)

def on\_button\_click(self, event):
    """Event handler for button click"""
    wx.MessageBox("Button was clicked!", "Info", wx.OK | wx.ICON\_INFORMATION)
3. Bind Events
Binding events in wxPython means connecting an event to a handler function. This is typically done using the Bind method of the widget:
self.button.Bind(wx.EVT_BUTTON, self.on_button_click)
In the above line:
- wx.EVT_BUTTON is the event type. Each widget has its own set of events.
- self.on_button_click is the handler function/method that gets called when the event occurs.
4. Define Event Handlers
An event handler is a method that gets executed in response to an event. It must accept at least one argument, usually called event, that contains details about the event.
def on_button_click(self, event): wx.MessageBox("Button was clicked!", "Info", wx.OK | wx.ICON_INFORMATION)
5. Initialize and Run the App
To display the GUI and handle events, you need to initialize and start the application's main loop:
if __name__ == "__main__": app = wx.App(False) frame = MyFrame(None, title="Event Handling Example") frame.Show() app.MainLoop()
Common wxPython Events
Some common events you might handle in wxPython include:
- wx.EVT_BUTTON: Button click
- wx.EVT_TEXT: Text change in a text control
- wx.EVT_CHECKBOX: Checkbox state change
- wx.EVT_CLOSE: Window close
- wx.EVT_MENU: Menu item selection
Tips:
- Always ensure that the event loop (app.MainLoop()) is running.
- Use event.Skip() within an event handler if you want the event to be processed by other handlers in addition to the one you’ve defined.
- For complex applications, it might be beneficial to use event handling via custom events or the pub/sub system (pubsub) for decoupling event producers and consumers.
By following these steps, you can successfully handle events in a wxPython application, providing interactivity and responsiveness to user actions.
What is a wx.StaticText in wxPython?
In wxPython, wx.StaticText is a control used to display a text label in a GUI application. It is a part of the wxWidgets library, which wxPython is a wrapper for, allowing for the creation of cross-platform graphical user interfaces.
wx.StaticText is typically used to show static, non-editable text to the user, such as labels or descriptions for other controls in the interface. Here are some key aspects of wx.StaticText:
- Non-Interactive: As a static control, it does not support user interaction. Users cannot edit the text displayed by a wx.StaticText control.
- Usage: It's often used to label other controls, provide instructions, or give feedback to users.
- Styles: It can be customized using various styles. For example, text alignment can be controlled, or the text can be made ellipsized if it doesn't fit.
- Cross-Platform: Being part of wxPython, it is designed to work consistently across different operating systems like Windows, macOS, and Linux.
Here is a simple example of how to use wx.StaticText in a wxPython application:
import wx
class MyFrame(wx.Frame): def __init__(self, parent, title): super(MyFrame, self).__init__(parent, title=title, size=(300, 200))
    panel = wx.Panel(self)
    text = wx.StaticText(panel, label="Hello, wxPython!", pos=(20, 20))

    self.Show()
if __name__ == '__main__': app = wx.App() frame = MyFrame(None, title="Static Text Example") app.MainLoop()
In this example, a wx.StaticText control is created on a panel to display the string "Hello, wxPython!" at the specified position. This illustrates the basic usage of wx.StaticText in a typical wxPython application.
How to compile a wxPython application?
Compiling a wxPython application generally involves bundling your Python scripts and any related resources into a standalone executable or distributable package. This allows users to run your application without needing to install Python or any dependencies. There are several tools available for this task, and one of the most commonly used ones is PyInstaller. Here's how you can compile a wxPython application using PyInstaller:
Step-by-Step Guide:
- Install PyInstaller: First, you need to install PyInstaller. You can do this using pip: pip install pyinstaller
- Prepare Your wxPython Application: Ensure that your wxPython application is working correctly as a Python script. Let's assume your main script is named main.py.
- Use PyInstaller to Create an Executable: Run PyInstaller from your command line or terminal to create an executable from your script. pyinstaller --onefile main.py --onefile: This option creates a single executable file. If you omit this, PyInstaller will create a directory with multiple files. main.py: This is the entry point of your application.
- Additional Options: You might want or need to use additional options based on your requirements: --windowed or -w: Suppress the console window (useful for GUI applications). pyinstaller --onefile --windowed main.py --icon=youricon.ico: Use a custom icon for your application. pyinstaller --onefile --windowed --icon=youricon.ico main.py
- Find the Executable: After running PyInstaller, it will generate some directories. The important one is dist, where you’ll find your standalone executable.
- Distribute Your Application: You can now distribute the executable to users. They don't need Python or wxPython installed to run your application.
- Handling Additional Files: If your application requires additional files like data files, images, or other resources, you might need to include these in the bundle. You can specify these in a PyInstaller spec file or using the --add-data option: pyinstaller --onefile --windowed --add-data "path_to_file_or_folder;destination_folder" main.py
Considerations:
- Cross-Compilation: If you need executables for different operating systems (Windows, macOS, Linux), you typically need to compile on each platform or use a cross-compilation setup.
- Testing: After creating the executable, make sure to test it on a clean installation of the target operating system to ensure all dependencies are included and it runs as expected.
By following these steps, you can successfully bundle and distribute your wxPython application as a standalone executable.
How to import wxPython in a Python script?
To import wxPython in a Python script, you first need to ensure that wxPython is installed in your Python environment. If it's not already installed, you can do so using pip:
pip install wxPython
Once wxPython is installed, you can import it in your Python script with the following line:
import wx
Here's a basic example of a simple wxPython application:
import wx
class MyApp(wx.App): def OnInit(self): frame = wx.Frame(None, title="Hello, wxPython!") panel = wx.Panel(frame) text = wx.StaticText(panel, label="Welcome to wxPython!", pos=(10, 10)) frame.Show() return True
if __name__ == "__main__": app = MyApp() app.MainLoop()
This script creates a basic window with a text label saying "Welcome to wxPython!". Save it as a .py file and run the script to see the wxPython window in action.