Best Books on Android Room Persistence to Buy in January 2026
How to Build Android Applications with Kotlin: A hands-on guide to developing, testing, and publishing production-grade Android 16 apps


Android App Development For Dummies


Head First Android Development: A Learner's Guide to Building Android Apps with Kotlin


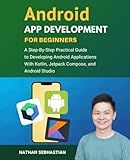
Android App Development For Beginners: A Step-By-Step Practical Guide to Programming Android Applications With Kotlin, Jetpack Compose, and Android Studio (Code With Nathan)


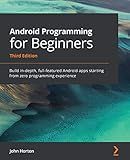
Android Programming for Beginners: Build in-depth, full-featured Android apps starting from zero programming experience, 3rd Edition


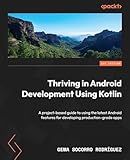
Thriving in Android Development Using Kotlin: A project-based guide to using the latest Android features for developing production-grade apps


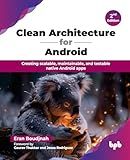
Clean Architecture for Android: Creating scalable, maintainable, and testable native Android apps - 2nd Edition


The Android Room Persistence Library is a SQLite object mapping library designed specifically for use with Android applications. It provides an abstraction layer over SQLite, making it easier to work with databases and manage data persistence.
When using the Android Room Persistence Library with Kotlin, there are a few steps involved in setting it up:
- Add the necessary dependencies: In your project's build.gradle file, add the following dependencies: implementation "androidx.room:room-runtime:2.4.0" kapt "androidx.room:room-compiler:2.4.0"
- Create the data model: Define your data model classes that represent the entities in your database. Annotate these classes with @Entity and add necessary fields and annotations such as @PrimaryKey, @ColumnInfo, etc.
- Create the data access object (DAO): Define an interface that acts as the DAO for your app. Annotate it with @Dao. Define various methods to perform database operations like inserting, updating, deleting, or querying data. Use annotations such as @Insert, @Update, @Delete, @Query, etc. to map these methods to specific SQL queries.
- Create the Room database: Create an abstract class that extends RoomDatabase and annotate it with @Database. Define an abstract method that returns an instance of your DAO interface. Include the database version and list of entity classes in the @Database annotation.
- Create an instance of the database: In your application class onCreate() method, create an instance of your Room database using the Room.databaseBuilder() method. Provide the context, database class, and a desired database name.
- Access data using the DAO: Use the instance of the database obtained in the previous step to access your DAO using the database.dao() method. Use the DAO's methods to perform various database operations like inserting, updating, deleting, or querying data.
By following these steps, you can effectively use the Android Room Persistence Library in conjunction with Kotlin to implement data persistence in your Android application.
How to implement background tasks in Room using Kotlin?
To implement background tasks in Room using Kotlin, you can follow these steps:
Step 1: Create an interface to define the background task methods
@Dao interface MyDao { @Insert suspend fun insertData(data: Data)
@Delete suspend fun deleteData(data: Data)
@Update suspend fun updateData(data: Data)
@Query("SELECT * FROM data_table") fun getData(): LiveData<List> }
Step 2: Create a RoomDatabase subclass
@Database(entities = [Data::class], version = 1) abstract class MyDatabase : RoomDatabase() { abstract fun myDao(): MyDao
companion object { @Volatile private var instance: MyDatabase? = null
 fun getDatabase(context: Context): MyDatabase {
    return instance ?: synchronized(this) {
       Room.databaseBuilder(
           context.applicationContext,
           MyDatabase::class.java,
           "my\_database"
       ).build().also {
          instance = it
       }
    }
 }
} }
Step 3: Create a Repository class to handle the background tasks
class MyRepository(private val myDao: MyDao) { val allData: LiveData<List> = myDao.getData()
suspend fun insertData(data: Data) { myDao.insertData(data) }
suspend fun deleteData(data: Data) { myDao.deleteData(data) }
suspend fun updateData(data: Data) { myDao.updateData(data) } }
Step 4: Create a ViewModel class to interact with the Repository
class MyViewModel(private val repository: MyRepository) : ViewModel() { val allData: LiveData<List> = repository.allData
fun insertData(data: Data) { viewModelScope.launch { repository.insertData(data) } }
fun deleteData(data: Data) { viewModelScope.launch { repository.deleteData(data) } }
fun updateData(data: Data) { viewModelScope.launch { repository.updateData(data) } } }
Step 5: Use the ViewModel in your Activity or Fragment
class MainActivity : AppCompatActivity() { private lateinit var myViewModel: MyViewModel
override fun onCreate(savedInstanceState: Bundle?) { super.onCreate(savedInstanceState) setContentView(R.layout.activity_main)
   val myDao = MyDatabase.getDatabase(this).myDao()
   val repository = MyRepository(myDao)
   myViewModel = ViewModelProvider(this, MyViewModelFactory(repository)).get(MyViewModel::class.java)

   // Access and observe data from ViewModel
   myViewModel.allData.observe(this, Observer { data ->
       // Update UI with the data
   })
}
// Example method to insert data private fun insertData() { val newData = Data(...) myViewModel.insertData(newData) } }
That's it! Now you have implemented background tasks in Room using Kotlin. The ViewModel is responsible for launching the tasks in a background scope, and the Repository handles the actual database operations. The LiveData is used to observe the changes in the data and update the UI accordingly.
What is the difference between @Insert and @Update annotations in Room?
In the Room database library, the @Insert and @Update annotations are used to define methods that insert or update data into the database, respectively.
The @Insert annotation is used on a method that is responsible for inserting an entity or a list of entities into the database table. It can be used with parameters representing the entities to be inserted or with varargs or arrays of entities. The @Insert annotation also allows you to specify optional conflict resolution strategies, such as replacing the existing data or ignoring the new data.
On the other hand, the @Update annotation is used on a method that is responsible for updating one or more entities in the database table. It can be used with parameters representing the entities to be updated. The @Update annotation also allows you to specify optional conflict resolution strategies.
In summary, the main difference between @Insert and @Update is that @Insert is used for inserting data into the database, while @Update is used for updating existing data in the database.
How to create a Room database in Android using Kotlin?
To create a Room database in Android using Kotlin, you need to follow these steps:
- Add the necessary dependencies to your app-level build.gradle file:
implementation 'androidx.room:room-runtime:2.2.5' kapt 'androidx.room:room-compiler:2.2.5'
- Create a data class representing your database entity. An entity is a class that represents a table in the database. For example, let's create a User entity:
@Entity data class User( @PrimaryKey val id: Int, val name: String, val age: Int )
- Create a class representing your database. This class should extend the RoomDatabase class and define the entities in the database, as well as the version number:
@Database(entities = [User::class], version = 1) abstract class AppDatabase : RoomDatabase() { abstract fun userDao(): UserDao
companion object {
    @Volatile
    private var INSTANCE: AppDatabase? = null

    fun getDatabase(context: Context): AppDatabase {
        val tempInstance = INSTANCE
        if (tempInstance != null) {
            return tempInstance
        }
        synchronized(this) {
            val instance = Room.databaseBuilder(
                context.applicationContext,
                AppDatabase::class.java,
                "my\_database"
            ).build()
            INSTANCE = instance
            return instance
        }
    }
}
}
- Create a data access object (DAO) interface. A DAO is responsible for defining the database operations (e.g., insert, update, delete). For example, let's create a UserDao interface:
@Dao interface UserDao { @Query("SELECT * FROM user") fun getAllUsers(): List
@Insert
fun insertUser(user: User)

@Update
fun updateUser(user: User)

@Delete
fun deleteUser(user: User)
}
- Use the database in your activity or fragment by obtaining an instance of the AppDatabase class and calling the DAO methods. For example, in your activity's onCreate() method:
val db = AppDatabase.getDatabase(this) val userDao = db.userDao()
val user = User(1, "John Doe", 25) userDao.insertUser(user)
val users = userDao.getAllUsers()
That's it! You have now created and used a Room database in Android using Kotlin.
What is the purpose of the @Database annotation in Room?
The purpose of the @Database annotation in Room is to define a database class. This annotation is used to indicate that a Java class is a database class and should be treated as such by the Room persistence library.
The @Database annotation requires a few parameters such as version number, entities, and optional parameters like exportSchema and views. The version number is used to handle database migrations, entities specify the tables that are part of the database, and views can be used to create virtual tables from queries.
By using the @Database annotation, Room can generate the necessary code to create and manage the underlying SQLite database based on the specified parameters. This includes generating the necessary DAO (Data Access Object) classes, handling migrations, and providing an easy-to-use API for accessing and manipulating the data in the database.
How to perform basic CRUD (Create, Read, Update, Delete) operations in Room with Kotlin?
To perform basic CRUD operations in Room with Kotlin, follow these steps:
- Create your Room database class: Define a class that extends RoomDatabase class and annotate it with @Database. Inside the class, declare an abstract function that returns an instance of your DAO (Data Access Object) interface.
@Database(entities = [YourEntity::class], version = 1) abstract class YourDatabase : RoomDatabase() { abstract fun yourDao(): YourDao }
- Create your entity class: Define a class that represents your database table and annotate it with @Entity. Include the primary key, column names, and any other required annotations.
@Entity(tableName = "your_table") data class YourEntity( @PrimaryKey val id: Int, val name: String )
- Create your DAO interface: Define an interface that includes all the methods for performing CRUD operations. Annotate it with @Dao.
@Dao interface YourDao { @Insert suspend fun insert(entity: YourEntity)
@Update
suspend fun update(entity: YourEntity)

@Delete
suspend fun delete(entity: YourEntity)

@Query("SELECT \* FROM your\_table")
fun getAllEntities(): LiveData<List<YourEntity>>
}
- Initialize and use the database: Create an instance of your Room database class by using Room.databaseBuilder(). You can access the DAO by calling the abstract function you declared in your database class.
val db = Room.databaseBuilder(applicationContext, YourDatabase::class.java, "your_database") .build()
val yourDao = db.yourDao()
- Perform CRUD operations:
- To create a new entity, call the insert() method on your DAO instance:
val entity = YourEntity(1, "Example") yourDao.insert(entity)
- To read entities, observe the LiveData returned by the getAllEntities() method:
yourDao.getAllEntities().observe(this, { entities -> // Handle the retrieved entities here })
- To update an existing entity, call the update() method on your DAO instance:
entity.name = "Updated Example" yourDao.update(entity)
- To delete an entity, call the delete() method on your DAO instance:
yourDao.delete(entity)
These steps cover the basic CRUD operations in Room with Kotlin. Depending on your requirements, you can extend these operations and customize your DAO interface accordingly.
What is the use of Room database migration?
The use of Room database migration is to manage changes in the database schema over time. When you make changes to the structure of your database, such as adding, removing, or modifying tables or columns, you need to update the database schema to reflect these changes.
Room database migration allows you to safely and smoothly upgrade your database without losing or corrupting data. It provides a way to define the necessary transformations to migrate your old schema to the new one.
By using database migration, you can:
- Preserve user data: Migrations help ensure that user data is not lost during updates to the application. Instead of deleting the entire database and starting from scratch, migrations allow you to modify the schema while preserving existing data.
- Maintain backward compatibility: Migrations also enable backward compatibility by allowing the application to work with older versions of the database schema. This is useful when you have users who are still running older versions of your app and need to migrate their data to the latest schema.
- Manage schema changes: With database migration, you have control over how the schema is changed. You can define SQL scripts or use Room's migration functions to specify the necessary changes in a structured and manageable way.
- Ensure data integrity: Migrations ensure that data integrity is maintained during schema updates. You can define rules and transformations to handle data conversions, reordering, and any other necessary modifications to ensure that the data remains consistent and valid.
In summary, Room database migration provides a way to manage and upgrade the database schema, preserving user data, maintaining backward compatibility, managing schema changes, and ensuring data integrity.
