
Best Mapping Tools to Buy in July 2026
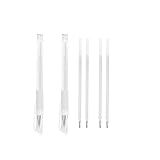
TEONEI Eyebrow microblading Marker Pen,Skin Marker Pen,Eyebrow Permanent Makeup Position Mapping Mark Tools (White)
-
DURABLE, PREMIUM MATERIALS ENSURE LONG-TERM RELIABILITY AND EASE OF USE.
-
ERGONOMIC DESIGN ENHANCES COMFORT FOR A JOYFUL EYEBROW TATTOOING EXPERIENCE.
-
MANUAL OPERATION FOR CONVENIENCE; NO POWER NEEDED FOR PROFESSIONAL RESULTS.


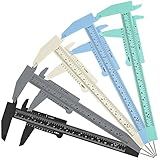
Frienda 5 Pieces Eyebrow Measuring Ruler Brow Mapping Tool Mini Vernier Caliper Double Scale Plastic Sliding Gauge Ruler for Micro Blading Eyebrow Tattoo Brow Artists(Fresh Colors)
-
PRECISE MEASUREMENT: DUAL SCALE DESIGN ENSURES ACCURACY IN INCHES & CM.
-
VERSATILE SET: FIVE RULERS MEET DIVERSE NEEDS FOR HOME, OFFICE, & MORE.
-
DURABLE & SAFE: LIGHTWEIGHT, UNBREAKABLE PLASTIC WITH A SMOOTH FINISH.

50 Pcs Eyebrow Ruler Stencils - Abeillo Disposable Brow Ruler Sticker, Microblading Eyebrow Template, Brow Measuring Shaper Tool, Eyebrow Mapping Makeup Tool
-
ACHIEVE FLAWLESS BROWS WITH 50 DISPOSABLE, TRANSPARENT STENCILS!
-
PERFECT YOUR BROW SYMMETRY EASILY WITH OUR MEASURING TOOL!
-
FITS ALL FACE SHAPES FOR CUSTOMIZED EYEBROW DESIGNS EVERY TIME!
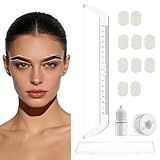
Eyebrow Ruler Eyebrow Measuring Tool Beginner Brow Mapping Kit(Includes Pigment Coloring Cotton), Achieve Symmetrical Perfectly Shaped Brows Brow Makeup Tools TA638
-
DUAL FUNCTIONALITY: MEASURE AND MARK EYEBROWS WITH ONE TOOL.
-
EASY SYMMETRY: TRANSPARENT RULER ENSURES PERFECT SYMMETRY EVERY TIME.
-
PROFESSIONAL ESSENTIAL: BOOST EFFICIENCY FOR BEAUTICIANS AND MAKEUP ARTISTS.
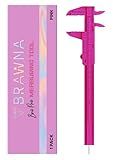
BRAWNA 1 Pc Brow Pro Measuring Tool - Double Scale Eyebrow Ruler for Microblading - Eyebrow Mapping - Caliper Vernier - PMU Supplies - Eyebrow Calipers Ruler Plastic- Pink
- ACHIEVE PERFECT BROWS WITH PRECISE 0-150 MM MEASUREMENTS!
- DURABLE, LIGHTWEIGHT DESIGN ENSURES COMFORT AND LONGEVITY.
- VERSATILE TOOL FOR PRECISE MEASUREMENTS BEYOND JUST BROWS!
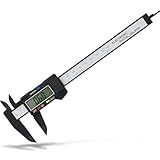
Digital Caliper, Adoric 0-6" Calipers Measuring Tool - Electronic Micrometer Caliper with Large LCD Screen, Auto-Off Feature, Inch and Millimeter Conversion
-
PRECISE 0.01” RESOLUTION: ENSURE ACCURACY IN EVERY MEASUREMENT!
-
4 VERSATILE MODES: MEASURE DEPTH, INSIDE, AND OUTSIDE WITH EASE.
-
INCH/MM TOGGLE: QUICK UNIT SWITCH SAVES TIME FOR ACCURATE RESULTS.
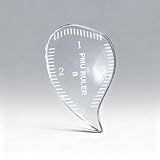
3Pcs Hair Stroke Brow Mapping Ruler Arch Eyebrow Eyeliner Ruler Emplate 1 Minute Fast Drawing Guide Tool Reuse Acrylic Tattoo Pmu Permanent Makeup Hairstroke Stencil (Teardrop-Shaped/3pcs)
-
VERSATILE 2-IN-1 DESIGN: PERFECT FOR NATURAL BROWS AND PRECISE EYELINER.
-
IDEAL FOR ALL USERS: ESSENTIAL FOR PROS AND BEGINNERS IN MAKEUP ARTISTRY.
-
DURABLE & EASY TO CLEAN: REUSABLE RULERS WITH SMOOTH EDGES FOR COMFORT.
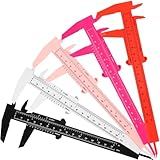
Frienda 5 Pieces Eyebrow Measuring Ruler Brow Mapping Tool Mini Vernier Caliper Double Scale Plastic Sliding Gauge Ruler for Micro Blading Eyebrow Tattoo Brow Artists(Bright Colors)
- DUAL SCALES (MM & INCHES) ENSURE EFFORTLESS AND ACCURATE MEASUREMENTS.
- 5 RULERS PER PACK PROVIDE GREAT VALUE FOR DIVERSE MEASUREMENT NEEDS.
- LIGHTWEIGHT, DURABLE PLASTIC OFFERS SAFE AND COMFORTABLE DAILY USE.
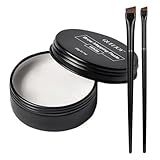
QUEEJOY 20g White Brow Mapping Paste Brow Contour Paste Brow Lip Shape Position Tool,2pcs Eyebrow Brush Set, Mapping Tool for Sketching Contouring the Eyebrow and Lip
-
QUICK AND CLEAR BROW MAPPING OUTLINES BEFORE TINTING AND MICROBLADING.
-
PRECISION BRUSHES ENSURE FLAWLESS APPLICATION-NO PENCIL REQUIRED!
-
EASY CLEANUP AND GENTLE ON SKIN FOR STRESS-FREE BROW MAPPING.
To create a choropleth map using D3.js, you can follow these steps:
- Start by including the D3.js library in your HTML file. You can download it from the D3.js website or include it from a content delivery network (CDN).
- Create an SVG container element in your HTML file where the map will be rendered. You can use the tag and specify the width and height attributes.
- Use D3.js to load the geographic data for your choropleth map. This data is typically in GeoJSON format, which represents geographic features as JSON objects. You can use the d3.json() function to fetch this data and handle it asynchronously.
- After loading the data, you need to bind it to the SVG elements. Use D3.js to select the desired SVG element and bind the data to it using the data() method.
- Next, define the color scale you want to use for the choropleth map. The color scale will map the data values to colors. D3.js provides various color scales, such as linear and quantile scales. You can choose the one that suits your data.
- Determine how you want to represent the data values visually on the map. You can assign a color to each feature based on its data value, or you can use different shades of a single color to represent the data range. Use the color scale to calculate the appropriate color for each feature based on its data value.
- Apply the calculated colors to the features of the map. Use D3.js to select the relevant SVG elements representing the map features and set their fill color based on the calculated colors. You can use the attr() or style() method to modify the color attribute or the CSS style property of the SVG elements.
- Add a legend to explain the color representation to the users. You can create a separate SVG element for the legend and add appropriate text and color swatches to it. You may also use the color scale to calculate the legend positions and labels based on your data range.
- Finally, you can add interactivity to the choropleth map. For example, you can bind mouseover and mouseout events to the map features to display additional information or highlight the selected feature.
By following these steps and using D3.js's powerful data manipulation and visualization capabilities, you can create a choropleth map that effectively communicates your data insights.
What are the advantages of using D3.js for creating choropleth maps compared to other libraries?
There are several advantages of using D3.js for creating choropleth maps compared to other libraries:
- Flexibility: D3.js is a powerful and flexible library that allows for highly customized visualizations. It provides fine-grained control over every aspect of the map, including colors, scales, and interactions.
- Data-driven approach: D3.js is built around the concept of binding data to elements in the document object model (DOM). This data-driven approach allows for seamless updating and transitioning of maps as the underlying data changes.
- High performance: D3.js leverages modern web technologies, such as SVG and HTML5, to create high-performance visualizations. It optimizes rendering performance by leveraging the capabilities of the browser's graphics processing unit (GPU).
- Extensive documentation and community support: D3.js has a large and active community of users and developers who contribute to its development and provide support. Its extensive documentation, tutorials, and examples make it relatively easy to learn and use for creating choropleth maps.
- Integration with other libraries and frameworks: D3.js can be easily integrated with other libraries and frameworks, such as React or Angular, allowing for seamless integration into larger web applications.
- Wide range of features: D3.js offers a wide range of features for creating interactive choropleth maps. It provides tools for handling geographic projections, zooming and panning, tooltips, legends, and interactivity like hover and click events.
Overall, D3.js provides a robust and flexible solution for creating choropleth maps, allowing for highly customized and performant visualizations.
What are the recommended practices for color selection in choropleth maps to ensure accessibility and readability?
- Use a continuous color scale: It is recommended to use a continuous color scale instead of discrete color categories. This allows for a more accurate representation of the data and makes it easier for viewers to interpret the map.
- Consider color blindness: Around 8% of men and 0.5% of women worldwide have some form of color blindness. To ensure accessibility, avoid using color combinations that may be difficult for color-blind viewers to distinguish, such as red and green. Use color palettes that have been tested to be accessible to individuals with color vision deficiencies.
- Use high contrast: Ensure there is enough contrast between different colors on the map, particularly between the color of the choropleth regions and the background. This is important for users with low visual acuity or contrast sensitivity.
- Limit the number of colors: Too many colors on a map can make it visually overwhelming and confusing. Try to limit the number of colors in your choropleth map and use colors that have clear differences between them.
- Consider cultural associations: Different colors can have different cultural associations and meanings. Be aware of any potential cultural biases in color selection and avoid using colors that may carry unintended connotations or be misinterpreted in different contexts.
- Provide a color scale and labels: Include a color scale or a legend on the map to provide a clear indication of what each color represents. Additionally, label the regions of the map with the corresponding data values or provide tooltips with the relevant information to improve clarity.
- Test readability: Before finalizing your color selection, test the readability of your map with different user groups, including individuals with visual impairments or color blindness. Make adjustments based on their feedback to ensure that the map is accessible to a wide range of users.
Remember, the goal of color selection in choropleth maps is to enhance accessibility and readability to ensure that the information is effectively communicated to all users.
How to add tooltips to map elements for interactive visualization?
To add tooltips to map elements for interactive visualization, you can follow these steps:
- Determine the software or library you will use for your interactive map visualization. Popular options include JavaScript libraries like Leaflet, Mapbox, or Google Maps API.
- Create your map and add elements such as markers, polygons, or lines to represent your data.
- Identify the elements that you want to attach tooltips to. For example, if you have markers representing different locations, you might want to display additional information about each location when hovering over a marker.
- Depending on the library you are using, you'll need to find the corresponding method or event to handle tooltips. Most libraries provide built-in functionality or plugins for tooltips.
- Define the content or data you want to display in the tooltip. This could be additional information related to the map element, such as the name, description, or any other relevant details.
- Use the appropriate method or event to bind the tooltip to the map element. This typically involves associating the tooltip content with a specific event, such as 'mouseover' or 'click' on the map element.
- Customize the tooltip appearance and behavior according to your design preferences. This could include adjusting the appearance of the tooltip, such as its position, style, or animation.
- Test the interactivity by hovering or clicking on the map elements to trigger the display of tooltips. Verify that the tooltips show the correct information and behave as expected.
Remember to consult the documentation or examples provided by the map library or framework you are using for more specific instructions on adding tooltips to your interactive visualization.
What is the significance of a legend in a choropleth map and how to create one?
A legend in a choropleth map is a key that helps interpret the colors or patterns used in the map to represent data values or categories. It is a crucial element in understanding the map and allows the reader to comprehend the meaning behind the colors or patterns.
The significance of a legend in a choropleth map is as follows:
- Representation of Data: The legend explains the relationship between the colors or patterns used in the map and the corresponding data values or categories. It enables the reader to understand which color or pattern represents a specific range or category.
- Interpretation: The legend helps the reader interpret the map accurately. It provides a guide to understanding the distribution and intensity of data across different areas represented in the choropleth map.
- Comparison: The legend facilitates comparison of data values between areas. By referring to the legend, the reader can compare the magnitude or intensity of data in different regions, identifying areas with higher or lower values of the variable being depicted.
Creating a legend for a choropleth map involves the following steps:
- Determine the data ranges or categories: Identify the range or categories of data values that need to be represented in the map. Decide how to divide the data into meaningful intervals or categories for visualization purposes.
- Select colors or patterns: Choose colors or patterns that effectively represent the different data ranges or categories. Consider using a color palette that is visually appealing and easily distinguishable.
- Design the legend: Create a clear and concise representation of the data values or categories. You can use a sidebar or a box to place the legend on the map, typically in a corner or a spot where it is easily visible and doesn't obstruct the map content.
- Label the legend: Label each color or pattern with the corresponding data range or category it represents. Use clear and descriptive labels to avoid confusion while interpreting the map.
- Place the legend on the map: Finally, insert the legend onto the choropleth map in a suitable location. Ensure that the legend is easily visible and doesn't interfere with the map's main content or other important elements.
By following these steps and creating a well-designed legend, you provide the reader with a comprehensive understanding of the data visualized in the choropleth map.