Best Plugins to Display Images in WordPress to Buy in July 2026

Projectables Six Image LED Plug-In Night Light, Light Sensing, Auto On/Off, Projects Solar System, Earth, Moon, Safari, Aquarium, and Coral Reef on Ceiling, Wall, or Floor 13347
- SOFT GREEN GLOW WITH VIBRANT SOLAR SYSTEM & NATURE PROJECTIONS!
- AUTO ON/OFF FEATURE FOR EFFORTLESS ENERGY-SAVING CONVENIENCE.
- LONG-LASTING LED WITH ROTATING GLOBE FOR IMMERSIVE EXPERIENCES!


Peakeep Projection Alarm Clock for Bedroom Ceiling, Loud for Heavy Sleepers, RGB Nightlight Multi-Color Large Display 5 Brightness Dimmer, Plug in Bedside Electric LED Digital Clock with USB Port
- 180° ROTATABLE PROJECTION FOR EASY NIGHTTIME VIEWING.
- COLORFUL DISPLAY WITH 8 OPTIONS FOR A VIBRANT WAKE-UP.
- LOUD ALARM WITH ADJUSTABLE VOLUME FOR HEAVY SLEEPERS.
2Pcs 0.96 Inch TFT Display Screen Module Color IPS LCD Screen 80x160 ST7735 Driver SPI Interface Plug-in Display Screen Board RGB
- VIBRANT RGB DISPLAY: ENJOY FULL-COLOR VISUALS AND WIDE VIEWING ANGLES.
- EASY INSTALLATION: PLUG-IN DESIGN ENSURES SECURE, HASSLE-FREE SETUP.
- ENERGY EFFICIENT: LOW POWER OPERATION AT 3.3V, PERFECT FOR ALL PROJECTS.

Peakeep Projection Alarm Clock for Bedroom Ceiling, Loud for Heavy Sleepers, RGB Nightlight, Multi-Color Large Display 5 Brightness Dimmer, Plug in Bedside Electric LED Digital Clock with USB Port
- 180° ROTATION AND ADJUSTABLE BRIGHTNESS FOR ULTIMATE CONVENIENCE.
- LARGE, COLORFUL DISPLAY MAKES TIME EASILY VISIBLE FROM ANY ANGLE.
- DUAL ALARM VOLUMES ENSURE YOU WAKE UP WITHOUT DISRUPTING OTHERS.
HONWELL Track Lighting LED Spotlights with 3 Rotatable Lights Heads, Under Cabinet Counter Lighting Plug in Accent Lights Remote Controlled Ceiling Track Light for Wall Picture Artwork Display
-
SUPER BRIGHT & WARM: 500 LUMENS FOR PERFECT CLOSET & ART LIGHTING.
-
ONE-TOUCH CONTROL: EASY ON/OFF WITH A SINGLE PRESS FOR CONVENIENCE.
-
CUSTOMIZABLE LIGHTING: TIMER & DIMMER PRESETS FOR ULTIMATE FLEXIBILITY.
Pasoar LED Picture Lights for Paintings Plug in, 16 Inch 4W Adjustable Art Light Gallery Wall Light for Display Art Work, Antique Brass Finish, CRI90+, 3000K Warm White
-
VERSATILE ADJUSTABILITY: 360° ROTATION AND 90° TILT FOR PERFECT LIGHTING.
-
REMOTE CONTROL CONVENIENCE: ADJUST BRIGHTNESS AND COLOR TEMP EASILY!
-
SLEEK DESIGN: MINIMALIST LOOK WITH HIDDEN WIRING FOR A CLEAN SETUP.
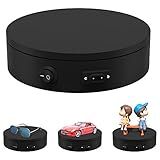
Motorized Photography Turntable, Automatic Revolving Platform Perfect for 360 Degree Images,Professional for Shop Display Stand,Product Display or Cake Display,55lb Load Dia 7.8inch- Black
-
ENHANCE PRODUCT DISPLAYS: SHOWCASE ITEMS WITH A 360° VIEW FOR BETTER SALES.
-
USER-FRIENDLY OPERATION: EASY PLUG-AND-PLAY SETUP WITH A SINGLE SWITCH.
-
STABLE AND QUIET: ANTI-SLIP DESIGN ENSURES STEADY ROTATION WITH LOW NOISE.
To display images in WordPress, follow these steps:
First, log in to your WordPress dashboard. Click on "Media" in the left menu. Choose "Add New" to upload a new image from your computer, or select an existing image from the media library. If you're uploading a new image, click on the "Upload" button to select the file from your computer. After selecting the image, click "Open" to upload it to the media library. Once the image is uploaded, you can provide a title, alt text, and caption for SEO purposes. These fields help search engines understand the content of your image. Click on the "Edit" button to further customize the image settings. Here, you can crop, rotate, scale, or flip the image as needed. After making any necessary adjustments, click on the "Save" or "Update" button to save the changes. To display the image on a page or post, navigate to the desired location within your WordPress editor. Click on the "Add Media" button above the editor. The media library will now appear, showcasing all the uploaded images. Locate the image you want to display and click on its thumbnail. On the right side of the window, you'll see various options related to the image. Set the size, alignment, and other settings as per your requirements. Finally, click on the "Insert into post" or "Insert into page" button to add the image to your content. You can preview your page or post to see how the image appears.
How to display images in WordPress email newsletters?
To display images in WordPress email newsletters, you can follow these steps:
- Install and activate a WordPress plugin that allows you to send newsletters. Some popular options include Mailchimp, Newsletter, and SendinBlue.
- Create a new newsletter campaign in your chosen plugin.
- In the content editor of the newsletter, position your cursor where you want to insert an image.
- Click on the "Add Media" button to upload or select an image from your WordPress media library. Alternatively, you can insert a URL if the image is hosted elsewhere.
- Once you have selected an image, adjust the size, alignment, and other settings as needed.
- Ensure that the image is included in the HTML version of the newsletter. Most newsletter plugins automatically generate both HTML and plain text versions.
- Preview the newsletter to ensure the image is displaying correctly.
- Finish composing the rest of the newsletter content and add any additional images if required.
- Once you are satisfied with the newsletter, send a test email to yourself to verify that the images are displayed properly.
- If everything looks good, schedule or send the newsletter to your desired subscribers.
Note: It is important to optimize your images for the web to maintain a good user experience and prevent slow-loading newsletters.
How to display images in WordPress carousels?
There are multiple ways to display images in WordPress carousels. Here are a few common methods:
- Using a WordPress plugin: Install and activate a carousel plugin from the WordPress Plugin Directory, such as "Soliloquy," "MetaSlider," or "WP Slick Slider and Image Carousel." Configure the plugin settings, including selecting the carousel style and animation effects. Upload and insert the images you want to display in the carousel. Embed the carousel shortcode provided by the plugin into the desired page or post where you want the carousel to appear. The shortcode will vary depending on the plugin you choose.
- Utilizing a theme with built-in carousel functionality: Choose a WordPress theme that includes a carousel feature. Look for themes specifically designed for image galleries or portfolios. Activate the theme and go to the Appearance > Customize section of your WordPress dashboard. Locate the carousel settings within the theme customization options and upload/select the images you wish to display in the carousel. Save the changes and the carousel should now be visible on your website.
- Manually coding a carousel: This option requires some technical knowledge of HTML, CSS, and JavaScript. Create a new page or post in WordPress and switch to the text or HTML editor mode. Write the necessary HTML and CSS code to define and style the carousel container and individual slide elements. Upload the images you want to display and link to them in the carousel HTML code. Include any required JavaScript libraries or custom JavaScript code to enable the carousel functionality. Save and publish the page, and the carousel should be visible on the website.
Remember to always backup your WordPress website before making any changes or installing plugins.
How to display images in WordPress lightboxes?
To display images in WordPress lightboxes, you can follow these steps:
- Login to your WordPress dashboard.
- Install and activate a lightbox plugin. Some popular lightbox plugins are 'Simple Lightbox', 'Responsive Lightbox & Gallery', and 'FooBox Image Lightbox'.
- Once activated, go to the plugin's settings page to configure its options according to your preference. You can set animation effects, image size, and other display settings.
- Create a new or edit an existing WordPress post or page where you want to display the image in a lightbox.
- Insert an image into your post or page by clicking on the 'Add Media' button above the text editor.
- Select or upload the image you want to display in the lightbox and click on the 'Insert into post' button.
- After the image is inserted, select the image and click on the 'Edit' icon in the top left corner.
- In the image editing window, click on the 'Link To' option and choose 'Media File'. This will ensure that clicking on the image will open it in the lightbox.
- Save and update your post or page.
- Preview the post or page, and when you click on the image, it should open in the lightbox with the configured display settings.
Note that the exact steps and options may vary depending on the lightbox plugin you choose to use, so make sure to refer to the plugin's documentation for any specific instructions or customization options.
How to display images in WordPress grids?
To display images in WordPress grids, you can follow these steps:
- Install and activate a grid plugin: Choose and install a grid plugin from the WordPress plugin repository. Some popular options include "Gridable - Grid Gallery Plugin" and "Essential Grid Gallery."
- Configure the grid plugin: After installation, go to the settings for the grid plugin and configure it according to your desired layout and image display options.
- Create a new grid: Once the plugin is configured, create a new grid by going to the plugin's settings page and selecting "Add New Grid" or similar.
- Add images to the grid: In the grid settings, select the option to add images or media. You can either upload new images or choose from your existing media library.
- Customize the grid layout: Configure the number of columns, spacing between images, and other layout options according to your preferences.
- Save and publish the grid: Once you have added images and customized the grid settings, save the changes and publish the grid.
- Display the grid on a page or post: Create a new page or edit an existing one where you want to display the grid. Use the shortcode provided by the grid plugin to embed the grid on the page. Usually, the shortcode will be something like [grid id="123"].
- Preview and update: Preview the page or post to ensure that the grid is displayed correctly. If needed, make additional adjustments to the grid settings and update the page to reflect the changes.
That's it! The images should now be displayed in a grid layout on your WordPress website.
How to display images in WordPress pricing tables?
To display images in WordPress pricing tables, you can follow these steps:
- Install and activate a pricing table plugin: There are several plugins available in the WordPress plugin repository. Choose a suitable pricing table plugin according to your requirements and install it.
- Create a new pricing table: After installing the plugin, navigate to the plugin settings or go to "Pricing Tables" in your WordPress dashboard. Create a new pricing table by clicking on the "Add New" button.
- Add pricing columns: Depending on the plugin you are using, you will see options to add pricing columns with various features such as title, price, features, etc. Look for an option to add images and upload your desired images for each pricing column.
- Customize the pricing columns: Adjust the layout, style, and design of the pricing columns, including image size, spacing, colors, fonts, and more. Many pricing table plugins offer customization options to match your website's theme.
- Preview and save the pricing table: Once you have added the images and customized the pricing table, preview it to ensure that the images are displaying properly. Save the pricing table settings.
- Insert the pricing table in your page or post: The pricing table plugin will generate a shortcode or a block for your pricing table. Copy the generated shortcode or block and go to the page or post where you want to display the pricing table. Paste the shortcode or block into the content area.
- Update the page or post: Finally, update the page or post to display the pricing table with images.
Remember to regularly update and maintain your pricing tables to ensure that the images and information remain up to date and relevant.
How to display images in WordPress contact forms?
To display images in WordPress contact forms, you can follow these steps:
- Install a plugin: There are several plugins available that allow you to add contact forms to your WordPress site. Two popular options are Contact Form 7 and WPForms. Install and activate the plugin you prefer.
- Create a contact form: After installing the plugin, you'll need to create a contact form. In the WordPress dashboard, navigate to the plugin's settings or contact form builder. Follow the provided instructions to create a form, adding the desired fields.
- Add an image upload field: To allow users to upload images in your contact form, you'll need to include an image upload field. In Contact Form 7, you can use the "File" tag to create an upload field. In WPForms, you can add a "File Upload" field. Make sure to properly configure the field settings.
- Configure email notifications: Set up email notifications to receive the submitted form data, including the uploaded images. In the form settings, specify the email address where you want the notifications to be sent.
- Customize the form's appearance: If needed, you can customize the form's appearance to match your website's design. Most form builder plugins offer options to style the form using custom CSS or pre-built templates.
- Insert the form on your website: After creating and customizing the form, insert it into the desired page or post on your WordPress site. Copy the shortcode provided by the form builder plugin and paste it into the text editor of the page or post where you want the form to appear. Update or publish the page to see the form live on your website.
When users submit the contact form with an uploaded image, the form plugin should send both the form fields and the uploaded image as an attachment to the email address you specified.
How to display images in WordPress category pages?
To display images in WordPress category pages, you can follow these steps:
- Login to your WordPress dashboard.
- Navigate to "Appearance" -> "Widgets".
- Locate the "Categories" widget and drag it to your desired widget area (e.g., sidebar).
- Expand the widget to customize its settings.
- Check the "Show hierarchy" option if you want category hierarchy to be displayed.
- Check the "Show post counts" option to display the number of posts in each category.
- Save the widget settings.
Now, when you visit any category page on your WordPress website, the Categories widget will appear in the sidebar or widget area you specified. It will display the category hierarchy and post count.
To add images to the category pages, you can use a WordPress plugin like "Category Featured Images". Here's how to do it:
- Install and activate the "Category Featured Images" plugin from the WordPress repository.
- Go to "Posts" -> "Categories" in your WordPress dashboard.
- Edit the category for which you want to add an image.
- Look for the "Category Featured Image" meta box below the category editor.
- Click on the "Set featured image" button to choose or upload an image from your media library.
- Select the desired image and click "Set featured image".
- Update or publish the category.
Once you have set the featured images for the desired categories, they will be displayed on the category pages automatically. The appearance may vary depending on your theme, but generally, the featured image will be displayed alongside the category title or as a header image at the top of the category page.