
Best Magento Launch Tools to Buy in July 2026

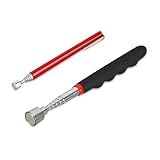
3 Pack Telescoping Magnet Pick-up Tool Set - Retrieving Telescoping Magnet Pickup Tools,Extendable Magnetic Pick Up Tools,Bendable Spring Magnet Stick
-
VERSATILE 3-PIECE SET: INCLUDES TOOLS FOR VARIOUS METAL RETRIEVAL NEEDS.
-
STRONG MAGNETIC LIFT: EFFICIENTLY PICKS UP METAL OBJECTS UP TO 15 LBS.
-
BENDABLE DESIGN: ACCESS HARD-TO-REACH SPACES WITH A FLEXIBLE MAGNET TOOL.


Klein Tools MAG2 Demagnetizer / Magnetizer for Screwdriver Bits and Tips, Makes Tools Magnetic, Home Improvement, Rare-Earth Magnet
- INSTANT MAGNETIZATION FOR SCREWDRIVERS-NO BATTERIES NEEDED!
- FITS MOST SCREWDRIVERS, FROM PRECISION TO PHILLIPS SIZES.
- CONVENIENTLY ATTACHES TO BAGS WITH A STAINLESS STEEL KEY RING.
2-Piece Set Magnetic Pick Up Tool, 15LB Pull Force And 2LB Pull Force Telescopic Magnet Stick
- VERSATILE 2-PIECE SET FOR HOME, OFFICE, AND INDUSTRIAL USE.
- PORTABLE DESIGN FITS EASILY IN POCKETS OR TOOLBOXES.
- IDEAL GIFT FOR DIY ENTHUSIASTS OR ANYONE WHO LOSES SMALL ITEMS.
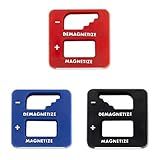
Katzco Precision Demagnetizer-Magnetizer - Pack of 3 Colors - Black, Red, Blue - for Screwdrivers, Small Tools, Small, Big Screws, Drills, Drill Bits, Sockets, Nuts, Bolts, Nails, Construction Tools
- EFFORTLESS TOOL MAGNETIZATION-NO BATTERIES REQUIRED!
- COMPACT DESIGN-TAKE ANYWHERE, STORE WITH EASE!
- VERSATILE USE-MAGNETIZES & DEMAGNETIZES ALL METAL TOOLS!

HORUSDY 4PCS Telescoping Magnetic Pick Up Tool Kit, Magnetic Sweepers Set with 360° Inspection Mirror, 2 Telescoping Magnetic Pickup Tools (5–25.6/6.9–29.5 in) & 24 in Flexible Claw Grabber
- COMPLETE 4-IN-1 KIT: INSPECTION MIRROR, GRABBER, AND POWERFUL MAGNETS!
- VERSATILE & REACHABLE: PERFECT FOR TIGHT SPACES-EASY, EFFECTIVE SOLUTIONS.
- DURABLE & COMFORTABLE: NON-SLIP HANDLES ENSURE CONTROL AND CONVENIENCE.

LOZAGU 4 Pack Telescoping Magnet Pick-up Tool Set with Magnetic Parts Tray, Extendable Magnetic Pick Up Tools & Flexible Magnet Pickup Tool
- VERSATILE 4-PIECE SET: INCLUDES ESSENTIAL TOOLS FOR EVERY JOB.
- STRONG MAGNETIC GRIP: EASILY LIFTS UP TO 10 LBS FOR VARIOUS TASKS.
- CONVENIENT ORGANIZATION: MAGNETIC TRAY KEEPS SMALL PARTS TIDY AND ACCESSIBLE.

VASTOOLS Flexible Magnetic Pickup Tool Set,3 Pack, 4mm Magnet,7mm Magnet Magnet Stick, 26" Bendable Extension Magnetic Pickup 0.5lb, 2lb, 5lb
- COMPACT DESIGN: FITS TIGHT SPOTS; PERFECT FOR HARD-TO-REACH ITEMS.
- FLEXIBLE REACH: EXTENDS UP TO 26 INCHES FOR MAXIMUM ACCESSIBILITY.
- SPACE-SAVING: FOLDS IN HALF FOR EASY STORAGE IN YOUR TOOLBOX.

Rotatable Telescoping Magnetic Pick Up Tool -Telescopic Magnet Stick,Useful for Hard-to-Reach,Narrow Space,Mechanic,Automotive,Home- Cool Gadget Christmas Gifts Stocking Stuffers for Men Women Husband
- STRONG 20LB MAGNET: EFFORTLESSLY RETRIEVE METAL ITEMS FROM TIGHT SPOTS.
- COMPACT & PORTABLE: EXTENDS TO 31.5, RETRACTS TO JUST 8 FOR EASY STORAGE.
- COMFORT GRIP DESIGN: NON-SLIP HANDLE AND ROTATABLE HEAD FOR CONVENIENCE.

Enbar Gifts for Men,20lbs Magnetic Telescoping Pick Up Tool for Small Metal Tools Extendable Extends from 7 to 31 in,Useful for Hard-to-Reach Picking Tool,for Men, DIY Handyman, Father/Dad, Husband.
- POWERFUL 20 LB SUCTION WITH PRECISE, EXTENDABLE REACH (7-31).
- LIGHTWEIGHT 90G DESIGN WITH DURABLE STAINLESS STEEL FOR LASTING USE.
- IDEAL FOR MECHANICS AND CARPENTERS-RETRIEVE LOST METAL PARTS EASILY!
To launch Magento on web hosting, you need to follow a series of steps. Here's a text-based guide on how to do it:
- Choose and sign up for a web hosting service that meets the system requirements for Magento. Ensure that the hosting service supports PHP and MySQL databases, as Magento is built on these technologies.
- Download the latest stable version of Magento from the official website. Unzip the downloaded file on your computer.
- Access your web hosting control panel or FTP client and connect to your hosting account.
- Create a new MySQL database through your hosting control panel. Make note of the database name, username, and password, as you will need these during the installation process.
- Upload the unzipped Magento files to the desired location on your web server using your FTP client or the file manager provided by your hosting service.
- Set the appropriate permissions for Magento files and directories to ensure proper functioning.
- Open a web browser and enter your domain name or the path to the Magento installation. You will be redirected to the Magento installation wizard.
- Choose your preferred language and click "Next."
- The wizard will perform a readiness check to verify if your hosting environment meets all the requirements for Magento. Ensure that all the requirements are met, resolve any issues, and click "Next" to proceed.
- Read and accept the Magento Software License Agreement, then click "Next."
- Provide the database details you created earlier, including the database server hostname, username, and password. Click "Next" when done.
- Enter your store's base URL, admin URL, and other necessary information. You will also be prompted to create an admin account for managing your Magento store. Click "Next" to proceed.
- Choose the preferred time zone, currency, and language settings for your store. Click "Next" to continue.
- Optionally, you can enable additional Magento extensions and features, depending on your requirements. Click "Next" when done.
- The installation process will begin, and you will be redirected to the Magento success page once it's complete.
- To access the Magento admin panel, append "/admin" to your store's URL and input the admin account credentials you created during installation.
That's it! Magento is now successfully launched on your web hosting. You can start customizing and managing your online store through the admin panel.
What is the cost of hosting Magento on a web hosting server?
The cost of hosting Magento on a web hosting server can vary depending on various factors such as the hosting provider, the type of hosting plan, and any additional features or services required.
Generally, shared hosting plans for Magento start as low as $5 to $10 per month. However, these plans have limited resources and may not be suitable for high-traffic or resource-intensive Magento websites.
For more advanced Magento hosting solutions like VPS (Virtual Private Server) or dedicated servers, prices typically range from $20 to $200 or more per month, depending on the server specifications and hosting provider.
Additionally, there may be additional costs for SSL certificates, domain registration, backups, security measures, managed services, and any specialized Magento support or optimization services.
It's important to carefully evaluate your website's requirements and compare different hosting providers to choose a plan that fits your needs and budget.
How to set up a staging environment for Magento on web hosting?
To set up a staging environment for Magento on web hosting, follow these steps:
- Choose a web hosting provider that supports staging environments. Look for providers that offer features like staging sites, one-click staging setup, or Git integration.
- Create a new subdomain or directory on your web hosting account to set up the staging environment. For example, you can use "staging.yourdomain.com" or "yourdomain.com/staging".
- Install a fresh copy of Magento on your staging subdomain or directory. This can be done using the Magento installer or via a one-click installation tool provided by your web hosting provider.
- Make a copy of your Magento production database and import it into your staging environment. You can use tools like PhpMyAdmin or command-line tools to export and import the database.
- Update Magento's configuration files (app/etc/env.php) in the staging environment with a new database connection, ensuring that it does not affect the configuration of the production environment.
- If your web hosting provider offers Git integration, initialize a Git repository in your staging environment and connect it to your existing Magento project repository. This allows you to easily synchronize code changes and updates between staging and production environments.
- Set up separate credentials (admin username and password) for the staging environment to prevent accidental modifications or orders.
- Disable any automatic synchronization or cron jobs that might affect the staging environment, such as product imports or order processing.
- Ensure that your staging environment is password protected or restricted to specific IP addresses to prevent unauthorized access.
- Test your staging environment thoroughly before making any changes in the production environment. Use the staging environment to test code updates, extensions, theme changes, and any other modifications.
By setting up a staging environment for Magento on web hosting, you can safely test and validate changes without impacting the live production site, allowing you to minimize risks and ensure a smooth experience for your customers.
What is the role of server-level caching in optimizing Magento performance on web hosting?
Server-level caching plays a crucial role in optimizing Magento performance on web hosting by improving the speed and efficiency of the website. Here are some key aspects of server-level caching in Magento:
- Memory-based caching: Server-level caching involves storing frequently accessed data and objects in memory, reducing the need to fetch data from the database repeatedly. This significantly speeds up the responsiveness of the website.
- Page caching: Server-level page caching creates static HTML versions of dynamically generated pages. When a user requests a particular page, the cached HTML version is served instead of executing complex PHP scripts, database queries, and rendering the page from scratch. This reduces server load and improves response times.
- Accelerating dynamic content: Server-side caching can also be used for caching specific dynamically generated content, such as product data, shopping carts, or personalized content, on a per-user basis. This allows for faster delivery of personalized content without the need for complete page regeneration.
- Full page caching: By implementing full page caching at the server level, the web server can cache entire pages or blocks of content, drastically reducing the processing time required for subsequent requests for the same content. This is especially effective for websites with high traffic or frequent content updates.
- Distributed caching: In high-demand scenarios, where multiple servers or load balancers are involved, server-level caching can be distributed across multiple server nodes. Distributed caching ensures consistent and synchronized caching among multiple server instances, enhancing scalability and load balancing.
Overall, server-level caching improves Magento performance by reducing server load, optimizing database utilization, and minimizing the processing time required for content delivery. It helps enhance the user experience, increases conversion rates, and ensures smooth operation even during peak traffic periods.